Introduction
Service providers can offer their customers the option to pay with Bitcoins for services consumed. The principal strength of Bitcoin crypto currency is that it offers anonymity to customers. When a Bitcoin transaction takes place, no personal identifying information such as name and address are required. This makes paying with Bitcoins convenient for those customers who care about their privacy and want it preserved.
PortaBilling stores all Bitcoins in a centralized Bitcoin wallet owned by the service provider. For each customer, the centralized wallet generates a unique address where payments are sent. The customer sends the top-up amount to this address from their individual Bitcoin wallet. When payment is received, the customer’s balance is topped up.
Enable Bitcoin on the Configuration server
- On the Configuration server, create a new configuration.
- Open the created configuration and choose the Bitcoin group.
- Define the Bitcoin group’s configuration parameters:
- Enabled – choose Yes to enable Bitcoin functionality.
- Prune – this option allows you to save disk space by deleting the previous transactions and old blockchain history. To enable pruning mode, select “1”. If you leave this option disabled (“0” by default), the Bitcoin service will require a significant amount of data downloaded to its transaction database.
- RPCPassword – type an RPC password here. This password is used to secure the connection to the remote Bitcoin wallet via JSON RPC API.
- RPCUser – type an RPC user name here. Along with the RPC password, it is used to secure the connection to the remote Bitcoin wallet via JSON RPC API.
- Testnet – choose Yes to use the Bitcoin’s test network (testnet). Testnet coins are distinct from actual Bitcoins and have no real value. Choose No to use the real Bitcoin network.
- Click Save and then click
 Verify.
 - Verify the new configuration and click
 Check/Apply.
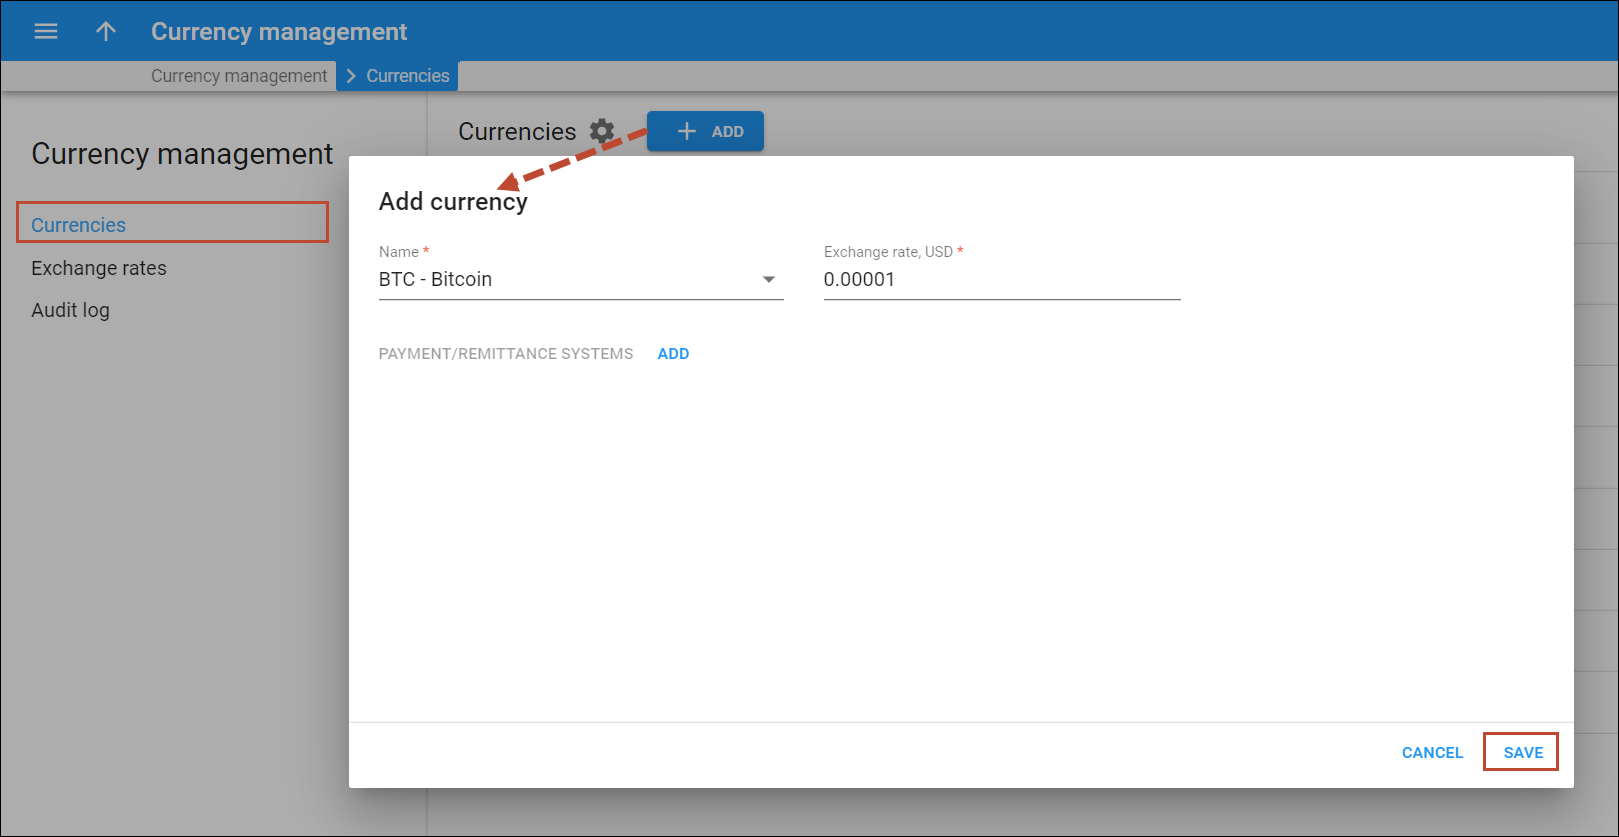
Add Bitcoin (BTC) currency
- On the navigation menu on the left select Financial and then Currency management.
- On the Currencies panel, click Add.
- Select BTC from the currency list.
- Specify the exchange rate.
- Click Save.
Configure the centralized Bitcoin wallet
- On the navigation menu on the left select Financial, click E-Payments, and open the Bitcoin panel.
Bitcoin panel is only available if the Bitcoin option is enabled on the Configuration server and BTC currency is added on the Currencies page.
- Turn on the toggle to enable Accept Bitcoin payments option.
- In the The centralized wallet to store all Bitcoins field, type the address of the centralized Bitcoin wallet owned by the service provider.
- In the Minimum payment, BTC field, type a minimum payment amount.
- Click Save.
Now your customers can make payments with Bitcoins via the self-care interface.
Make payments with Bitcoins
- On the customer self-care interface, choose the Billing Information tab.
- In the left-hand menu, click Make a Payment.
- In the Amount field, type a top-up amount.
- Choose New Payment Method and click Next.
- Choose Pay with Bitcoins and click Next. You will see the top-up amount in Bitcoins according to the current exchange rate and the Bitcoin payment address to where the payment must be sent.
- With a Bitcoin client or Bitcoin wallet online service, send the top-up amount from your Bitcoin wallet to this address. For your convenience, the Bitcoin address can be scanned with a QR code.
- When the transaction has been submitted, click Done.
- Once the Bitcoin amount is received at your Bitcoin payment address, your balance is topped up.


