The main steps for enabling invoicing in PortaBilling are as follows:
- Create a new invoice template (proceed to step 2 if you wish to use a template that already exists in your PortaBilling system). Choose the way to design invoice layout:
- Built-in visual editor – with this method, you don't need any specific knowledge or skills to design an invoice PDF. You can edit a predefined template right in the web browser using the built-in WYSIWYG Layout Designer. However, it offers limited customization possibilities.
- Custom HTML template file – you can prepare an HTML template file using the Template Toolkit syntax and upload this file to PortaBilling.
- Define the template for generating invoices on the customer class level
- Optionally, override the invoicing settings for a specific customer
Invoice layout design
Built-in visual editor
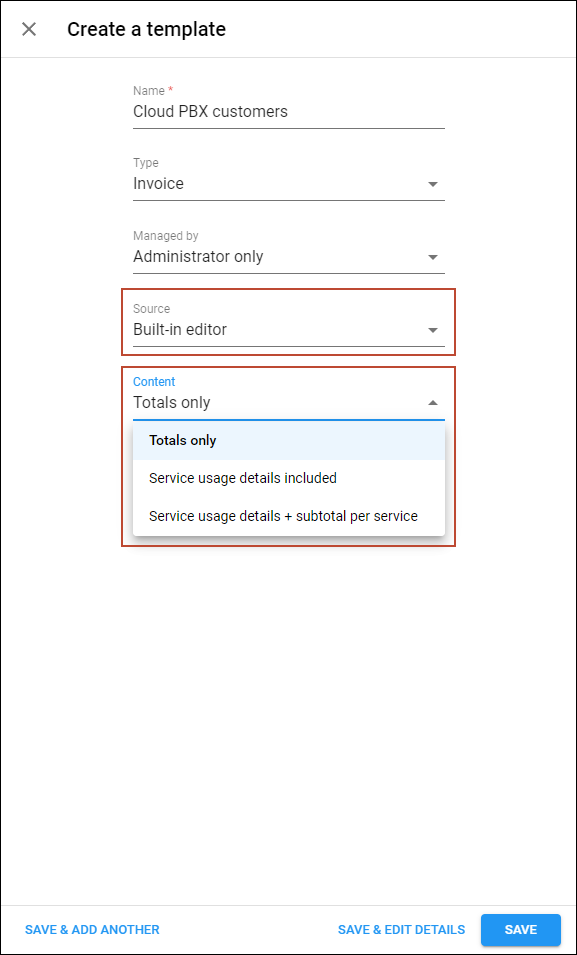
This method can be used for creating simple invoice templates. You have the option to choose from three predefined invoice layouts with different levels of detail: "Totals only", "Service usage details included," or "Service usage details + subtotal per service." You can customize a predefined template layout using the built-in editor (WYSIWYG invoice layout designer) in the web browser. This customization allows you to adjust the location of data blocks, fonts, add logos, or include additional information such as payment terms.
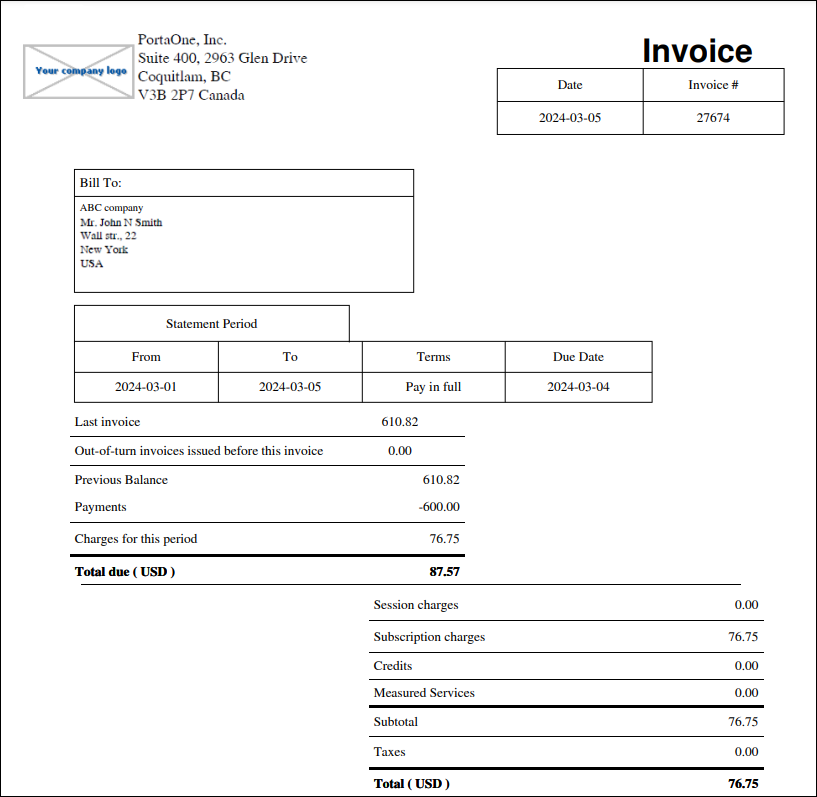
Here is an example of how the “Totals only” layout looks by default:
To create an invoice template using the built-in editor, navigate to My company > Templates, click Add and fill in the details:
- Type – select “Invoice”
- Source – select “Built-in”
- Content – choose the level of invoice detail:
Custom HTML template file
You can create an HTML template file using the Template Toolkit syntax and upload it to PortaBilling. The template HTML code should include special placeholders (variables) for data that should appear in an invoice, such as company name, invoice number, invoice due date, invoice amount due, and so on. When generating invoice PDF files, PortaBilling replaces the variables in the template with the corresponding values from the database.
This method provides extensive customization options, allowing you to sort and group invoice data as needed and insert dynamic content like banners. However, advanced template customizations require knowledge of template markup language (Template Toolkit) and programming algorithms. Contact PortaOne sales if you need a personalized template.
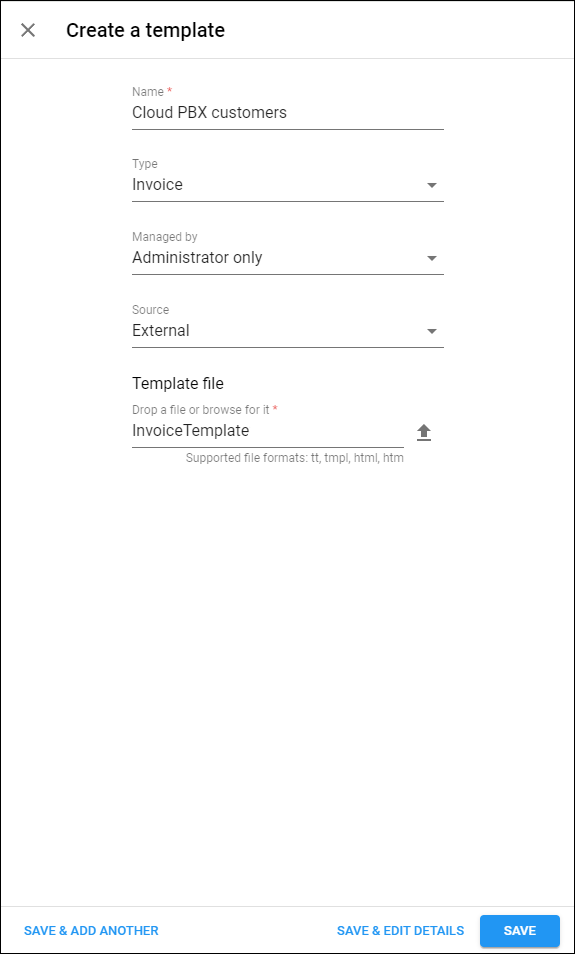
To upload an external invoice template, navigate to My company > Templates, click Add and fill in the details:
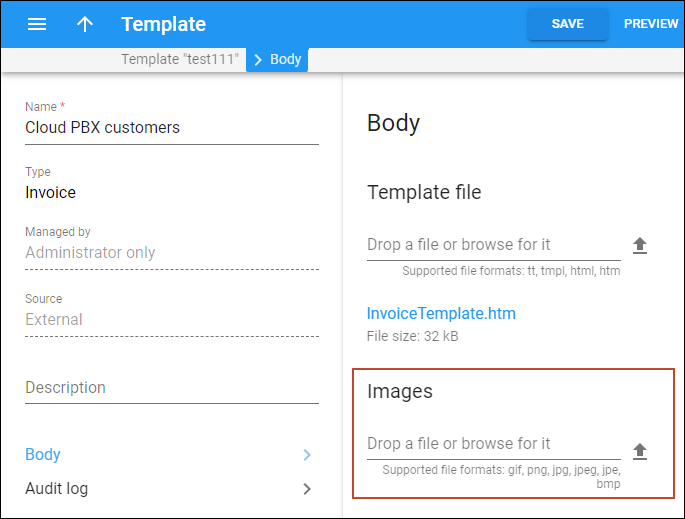
To upload images, open the created invoice template record, navigate to Body, and drop files or browse for them.
Invoicing configuration on the customer class level
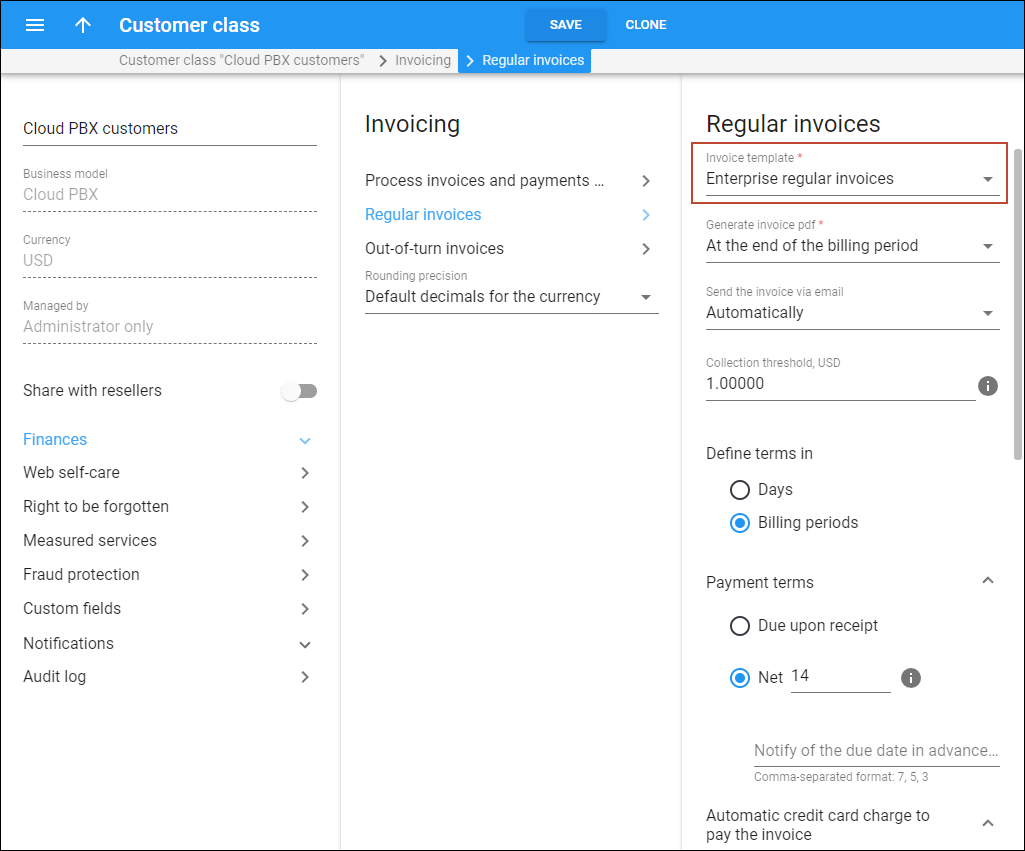
To enable invoicing for the customers of a specific customer class, navigate to Customer class > Finances > Invoicing > Regular invoices and select the previously created invoice template in the corresponding field.
Note that Regular and out-of-turn invoices are configured separately, i.e., you can define separate templates for these invoices and different payment terms.
To enable out-of-turn invoices, navigate to Customer class > Finances > Invoicing > Out-of-turn invoices, and define the template there.
Once the template is defined, you can configure options such as:
- Invoice PDF file generation (for regular invoices only)
- Automatically sending invoices to customers' emails
Then, you can set up payment terms and the notifications/actions that should apply if payment is past due. These options are described within the payment collection process section.
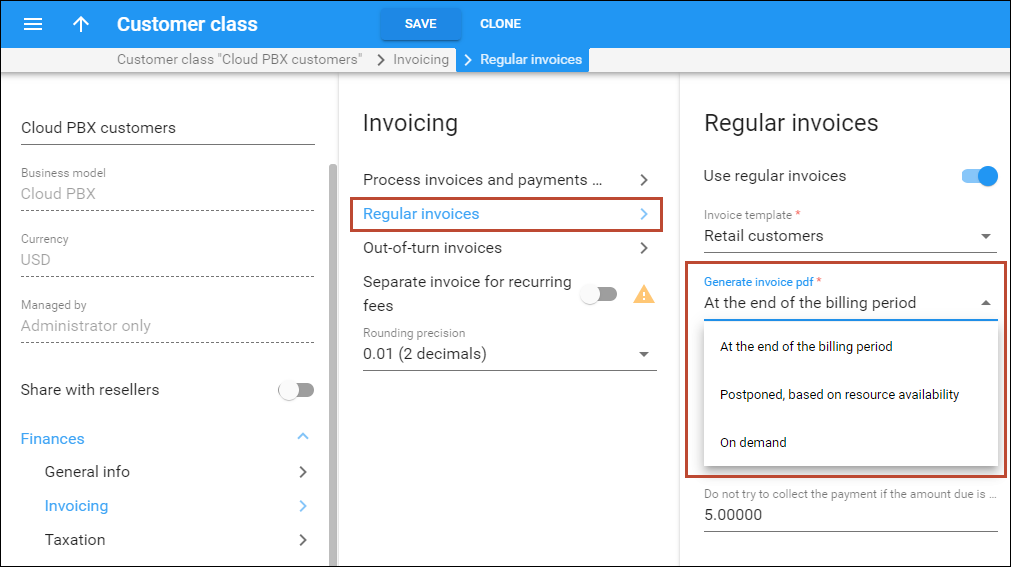
When to generate invoice PDF files
You can choose when and how PDF files for regular invoices should be generated depending on your business needs and available system resources.
The following options are available:
PDF file generation at the end of a billing period (default)
Your business customers settle their invoices only after their accounting departments receive the invoice PDF files. You want your customers to start receiving invoices as soon as possible.
Once a billing period ends, PortaBilling processes xDRs for a specific customer, applies charges (e.g., subscriptions, fees, etc.), creates an invoice, and automatically generates the corresponding PDF file. The system proceeds to process xDRs for the next customer only after generating the PDF file for the previous customer. With this approach, the system starts generating invoice PDF files without waiting for all customers' invoices to be created beforehand.
Postponed PDF file generation based on resource availability
You've set up automatic credit card charging upon invoice generation. With a large customer base, generating invoice PDFs may take up to several days. Your goal is to quickly collect payments while allowing for the delivery of invoice PDF files to customers later.
Once a billing period ends, PortaBilling processes xDRs for a specific customer, applies charges (e.g., subscriptions, fees, etc.), creates an invoice, and charges a customer’s credit card immediately. PortaBilling starts generating the invoice PDFs only after completing all the calculations related to this billing period for all customers. This postponed generation accelerates the payment procedure, enabling you to promptly receive revenue.
PDF file generation on demand
You have your own customer self-care portal integrated with PortaBilling via the API. As your customer base grows, you wish to save hard disk space and decrease the workload on the system when generating invoice PDF files. You offer your customers access to their invoices on the portal. The invoice PDF files can be generated and emailed to the customer or shown on the self-care portal upon request.
PortaBilling makes all calculations for customers, creates their invoices and saves them to a database. These invoices are then accessible via the API, but the PDF files are not generated automatically. An admin can initiate PDF file invoice generation on the customer’s page at any time.
By generating PDF file invoices “on demand,” you can save hard disk space and decrease the workload on the system by up to 50%, depending on the data amount.
Send the invoice via email
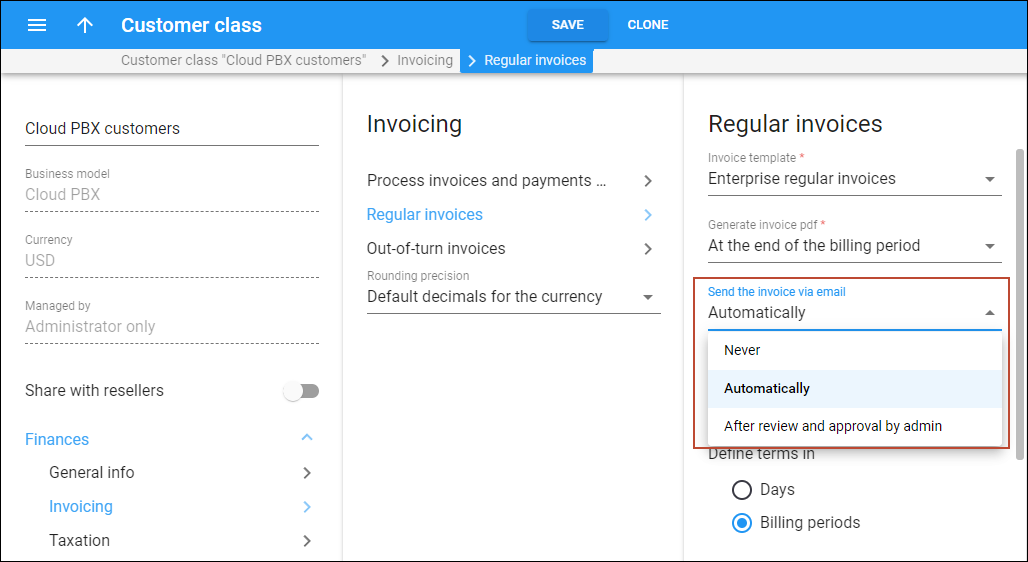
You can choose when to send invoices to customers’ emails:
- Never – some customers may prefer to access their invoice PDF files through online portals rather than receiving them automatically via email. In such cases, you can generate PDF invoices for internal record-keeping purposes and compliance with regulatory requirements, while disabling the automatic sending of invoices to customers' emails. Upon request, you can download an invoice at any time and manually send it to the customer.
- Automatically – it is the most common option allowing you to automatically send the invoice PDF files to the customers’ emails. To make sure that the email is specified for a specific customer, navigate to Customer > General info panel and check the Email field.
- After review and approval by admin – use this option to review and manually approve regular invoices before sending them to your customers. PortaBilling will send the invoice PDF to customers only after the invoice has been approved by admin or after the defined period set in the ”Hold for review, days” field. Refer to the Review of invoices chapter for more details.
Configurations that can be overridden for an individual customer
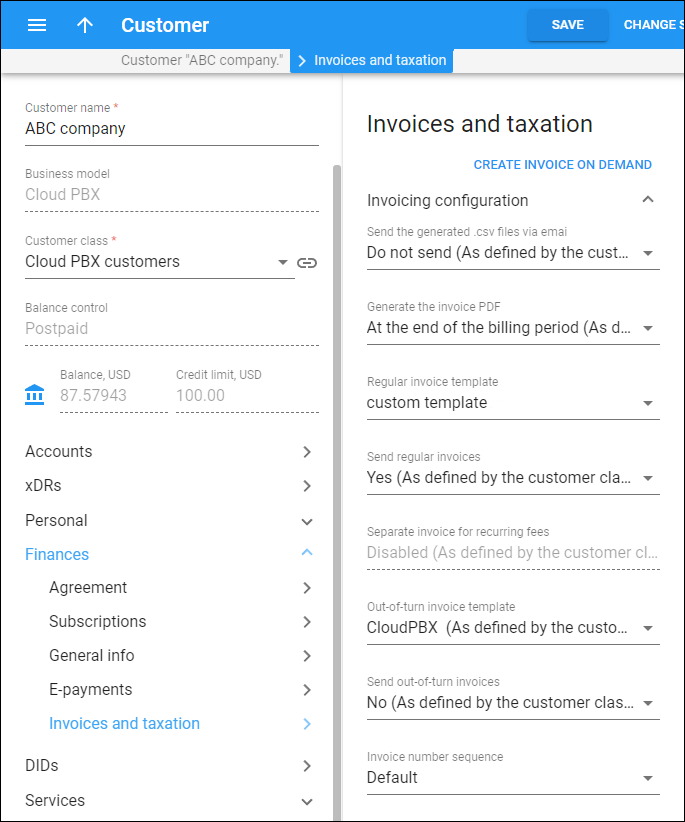
If invoicing is enabled at the customer class level, you can override the invoicing configuration for a specific customer associated with this customer class. The following settings can be adjusted:
- Invoice template
- Invoice PDF file generation
- Sending invoices to email (the option “After review and approval by admin” is unavailable for individual customers)
Additionally, on the customer page, you can enable an individual invoice number sequence for the customer. Refer to the Invoice number sequence chapter for more details.
Say you define a standard one-page invoice template that includes totals only at the customer class level. Your customer ABC company uses a range of services including internet, phone lines, and cloud services. The ABC’s accounting department requires the invoices to include a detailed breakdown of charges for each service provided. To meet this requirement, you create a separate template for ABC, incorporating service usage details and subtotal per service. You then override the customer class invoicing settings by defining the new template specifically for ABC.
Enabling invoicing for existing customers
Sometimes there is a situation where invoicing has been disabled for a customer, e.g., due to human error, and after a few billing periods, invoicing is enabled. By that time, the customer may already have accrued an outstanding balance from the billing periods that were not invoiced. In this case, the invoice amount due will include the total debt accrued prior to the period when invoicing was enabled. For the customer, that debt will be displayed as “previous balance” in the invoice.
Starting from MR109, the debt from the billing periods that were not invoiced is also reflected on the PortaBilling web interface in the invoice’s “Outstanding balance” column. This enables the admin to easily access this info when managing reconciliation with the customer. And if the customer makes a payment that covers the charges from previous billing periods where no invoices were issued, the payment amount will be included in the displayed “Paid amount” value. This allows the admin to accurately track how much the customer has actually paid.
In September, an admin creates a customer with a monthly billing period and assigns them a $15 subscription. However, due to human error, the invoicing is enabled for this customer in PortaBilling only in November.
When the November invoice is generated, it displays the "Period total" of $15 (the subscription fee for November) and cumulative charges from the previous billing periods that were not invoiced – $30 ($15x2, for September and October). So, the "Amount due" on the November invoice is $30+$15=$45.
| Previous balance | 30 |
| Payments | 0 |
| Period total | 15 |
| Amount due | 45 |
Say, in December, the customer pays $40, which covers the previous balance of $30 and partially settles the November invoice total, covering $10 out of $15. The December invoice reflects this payment and shows the amount due of $20 that includes the period total of $15 for December and the outstanding $5 from November.
| Previous balance | 45 |
| Payments | -40 |
| Period total | 15 |
| Amount due | 20 |


