Let’s consider Yealink W80B as an example in this instruction. It’s an office phone system with base stations and wireless handsets. Say the phone number 12065558966 should be configured as a shared line on 10 handsets.
Preparation for IP phone models available via the Add-on Mart
If the IP phone model is available via the Add-on Mart (like Yealink W80B), you need to:
- Start a free trial/paid subscription for the corresponding Add-on Mart module
- Check whether your system should be granted access to Add-on Mart services
- Enable external CPE provisioning on the Configuration server web interface. For this, set the ExternalCpeProvisioningService.Enabled option to Yes.
Step 1. Configure IP phones for auto-provisioning
To prepare Yealink W80B base stations for auto-provisioning:
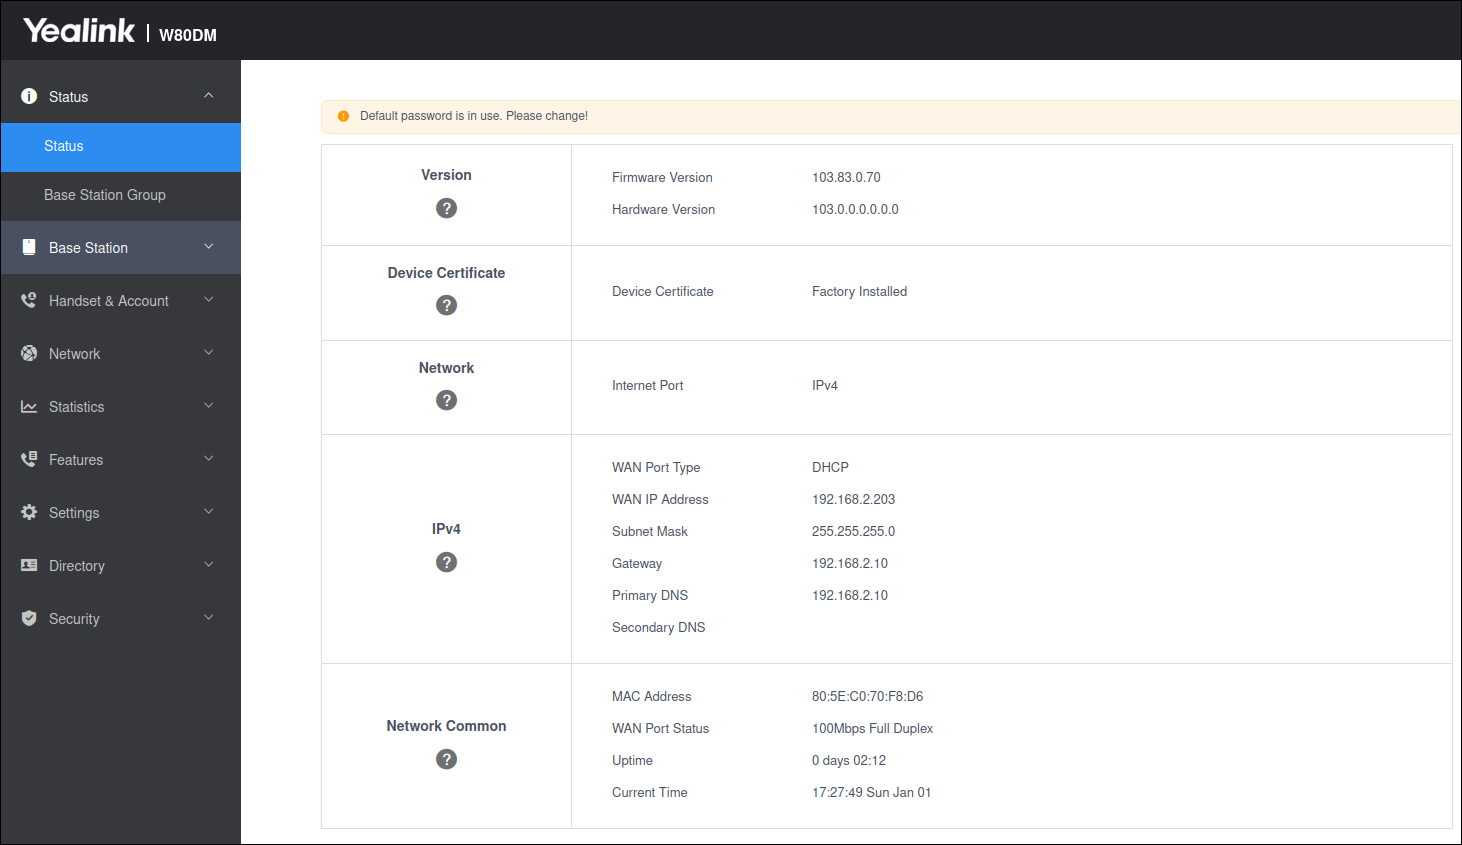
- One base station should be manually set as DECT (Digital Enhanced Cordless Telecommunications) Manager and use a static IP address (e.g., DECT Manager IP is 192.168.2.203).
- Other stations (in the “Base” mode) should use the DECT Manager IP address.
Step 2. Create a CPE profile and configure generic parameters
Customer Premises Equipment (CPE) profile allows you to apply general configuration settings to all IP phones that have this assigned profile . When an IP phone connects to the internet, it retrieves its specific configuration file with the configuration settings from the provisioning server.
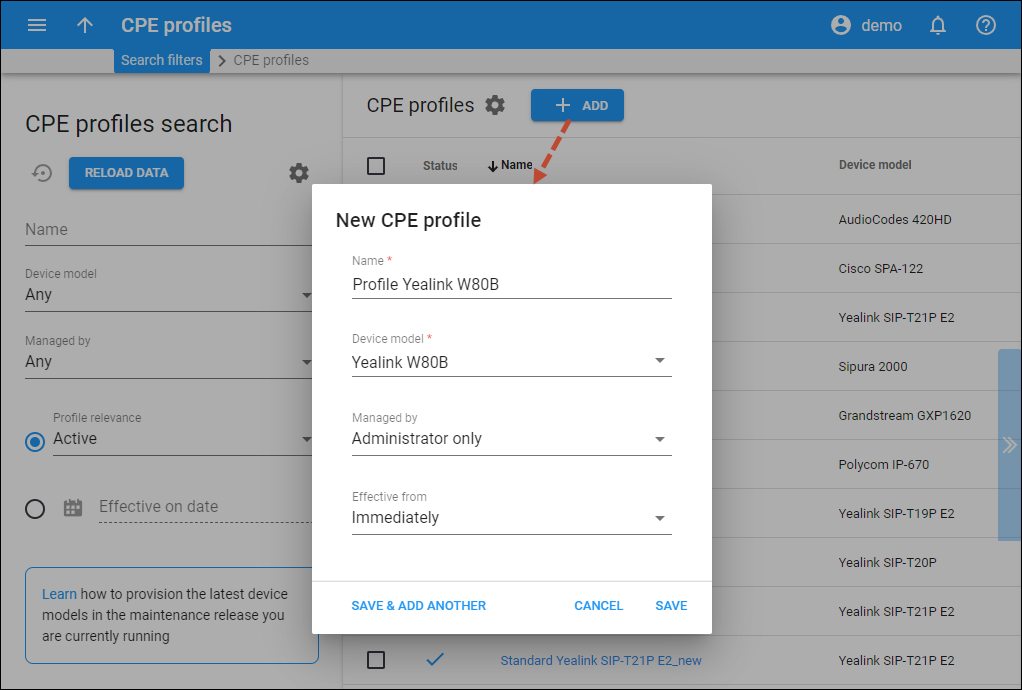
2.1 Create a new CPE profile:
- Go to Infrastructure > Phones/CPEs > CPE profiles
- Click Add
- Fill in the details:
- Name – specify a short descriptive name for this profile
- Device model – select the model of the IP phones, e.g., Yealink W80B
- Managed by – if you plan to use this profile for a specific reseller’s customers, choose the reseller from the dropdown list; otherwise leave this as Administrator only.
If you choose Administrator only, later on you can make this CPE profile available not only to the administrator but also to all resellers. For this, open the created CPE profile and turn on the Shared with resellers toggle.
- Effective from – select Immediately.
2.2 Configure generic profile parameters.
To configure CPE profile for Yealink W80B:
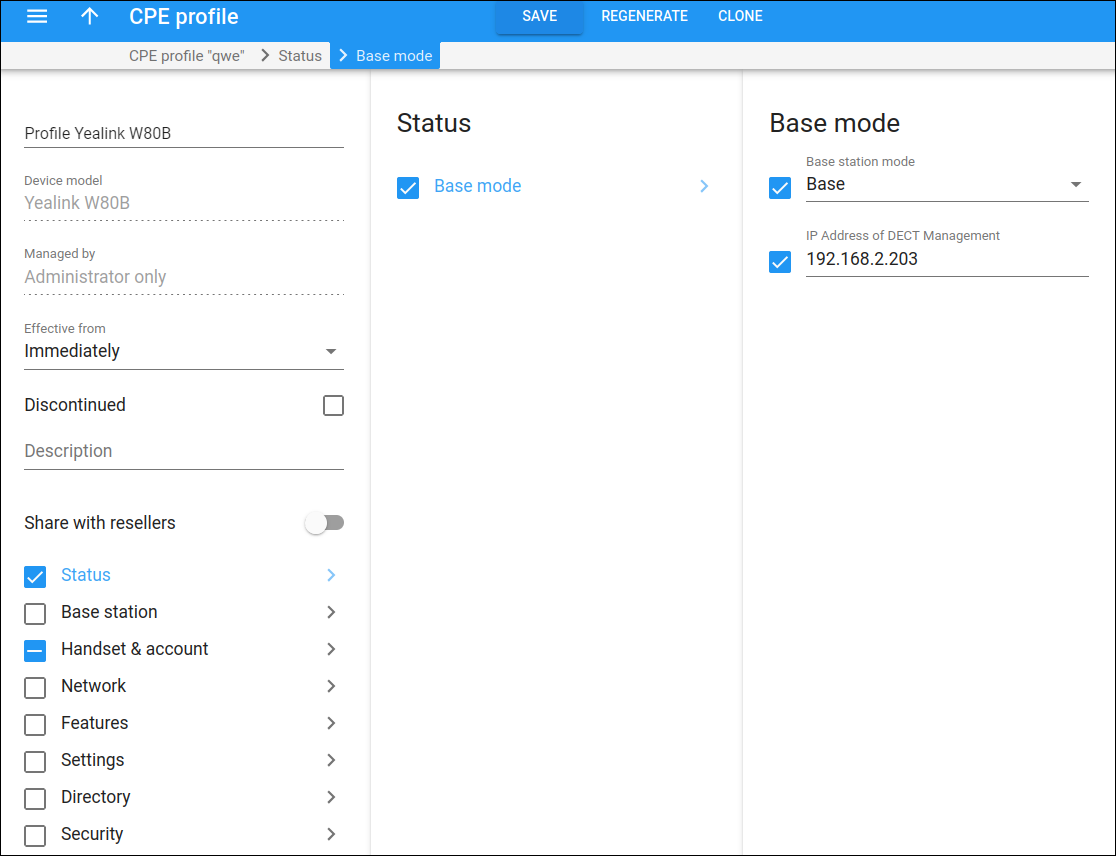
- Open CPE profile
- Go to Status > Base mode and fill in the details:
- Base station mode – select Base
- IP address of DECT management – specify the IP address of DECT Manager
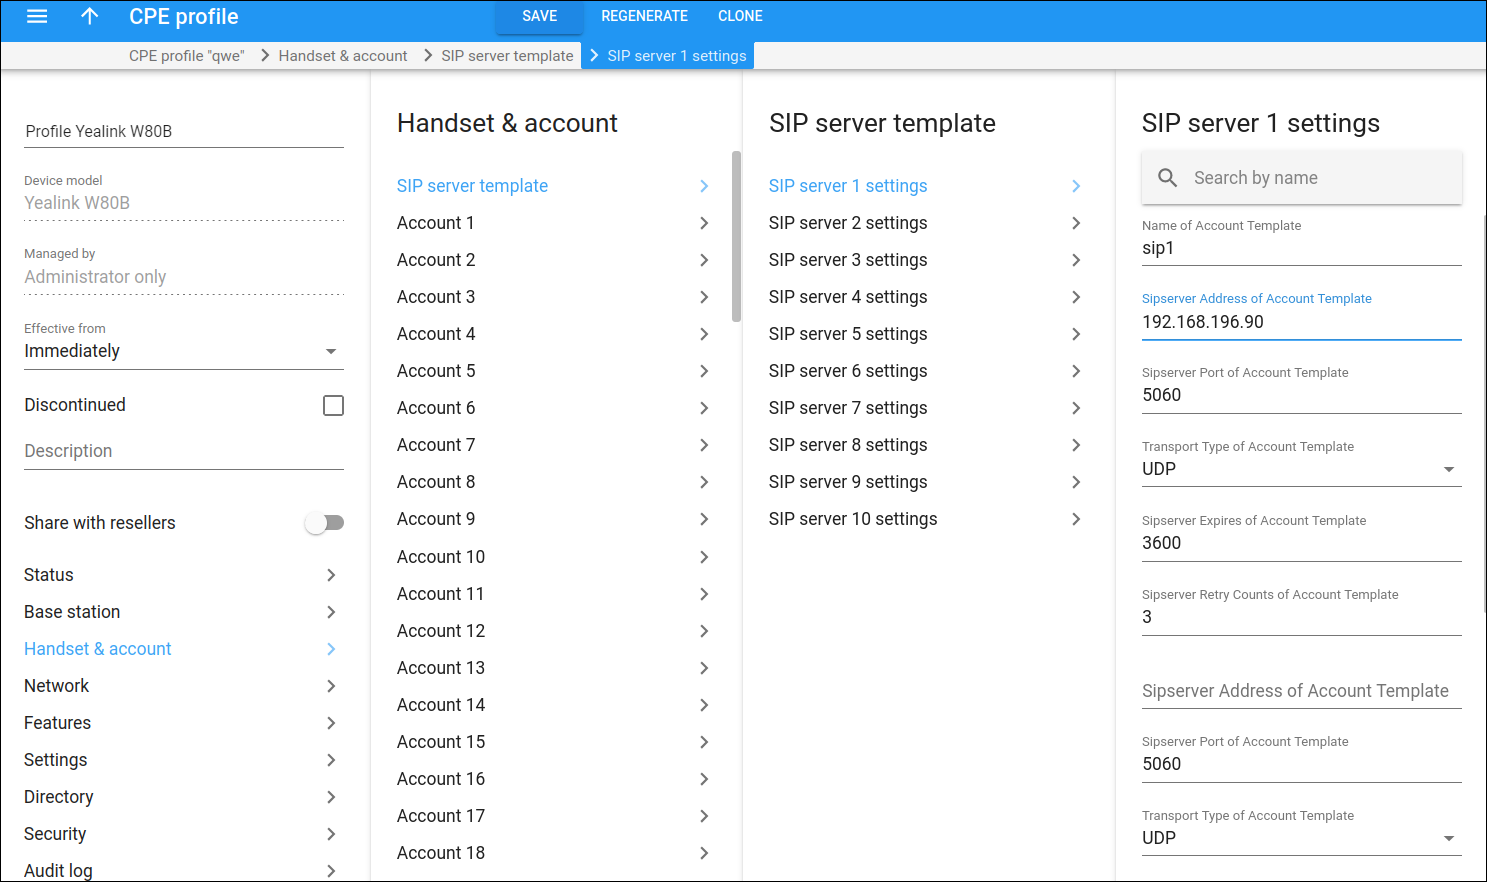
- Go to Handset & account > SIP server template > SIP server 1 settings and specify the SIP server IP address and port.
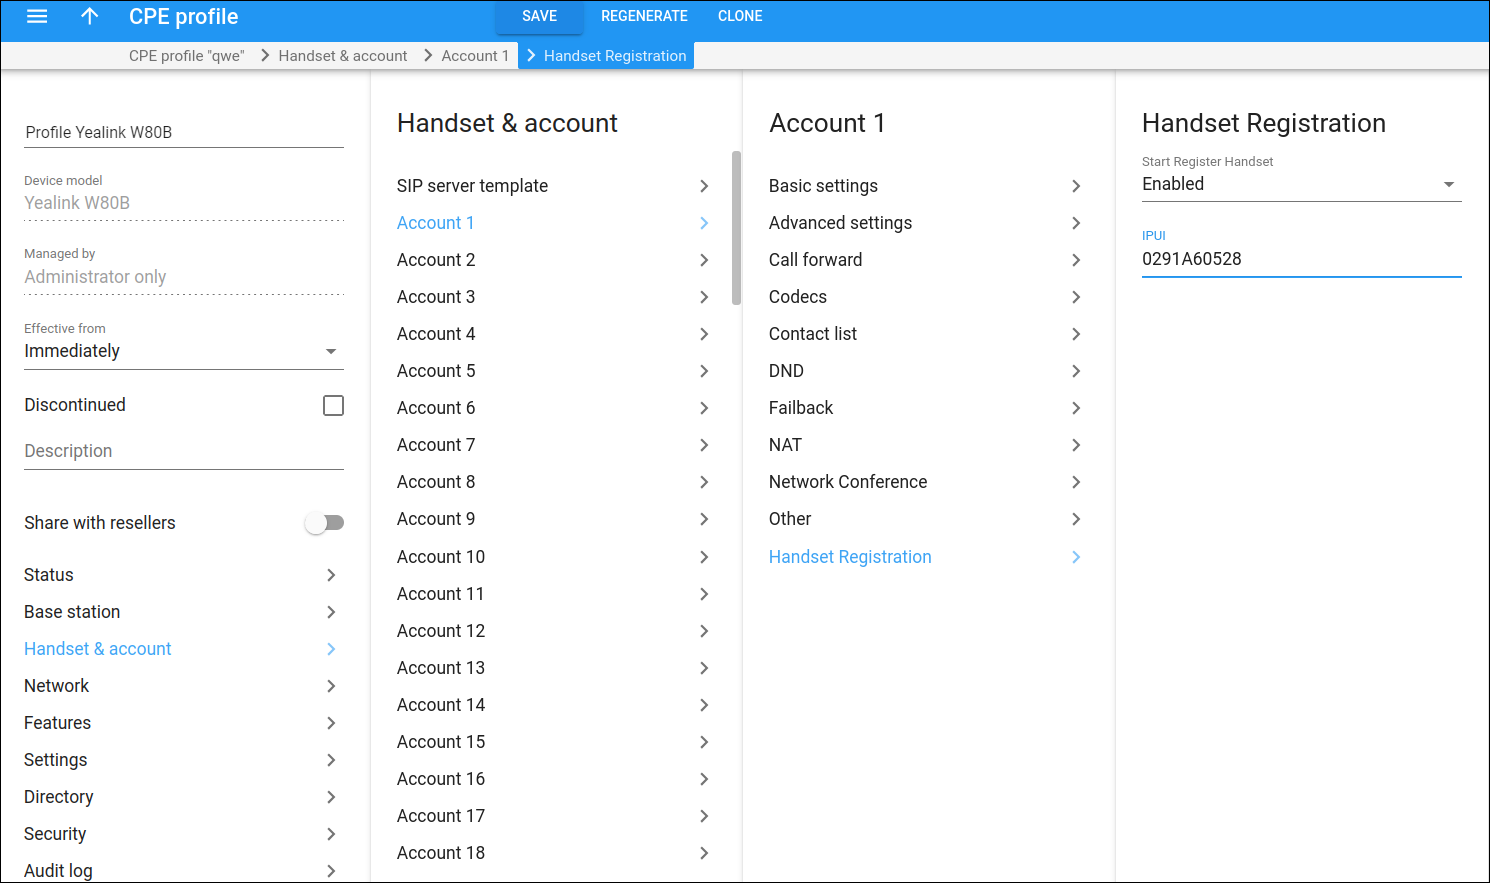
- For each handset, go to Handset & account > Account > Handset Registration and fill in the details:
Step 3. Configure shared line appearance in the CPE profile
To configure shared line appearance for a Yealink W80B handset:
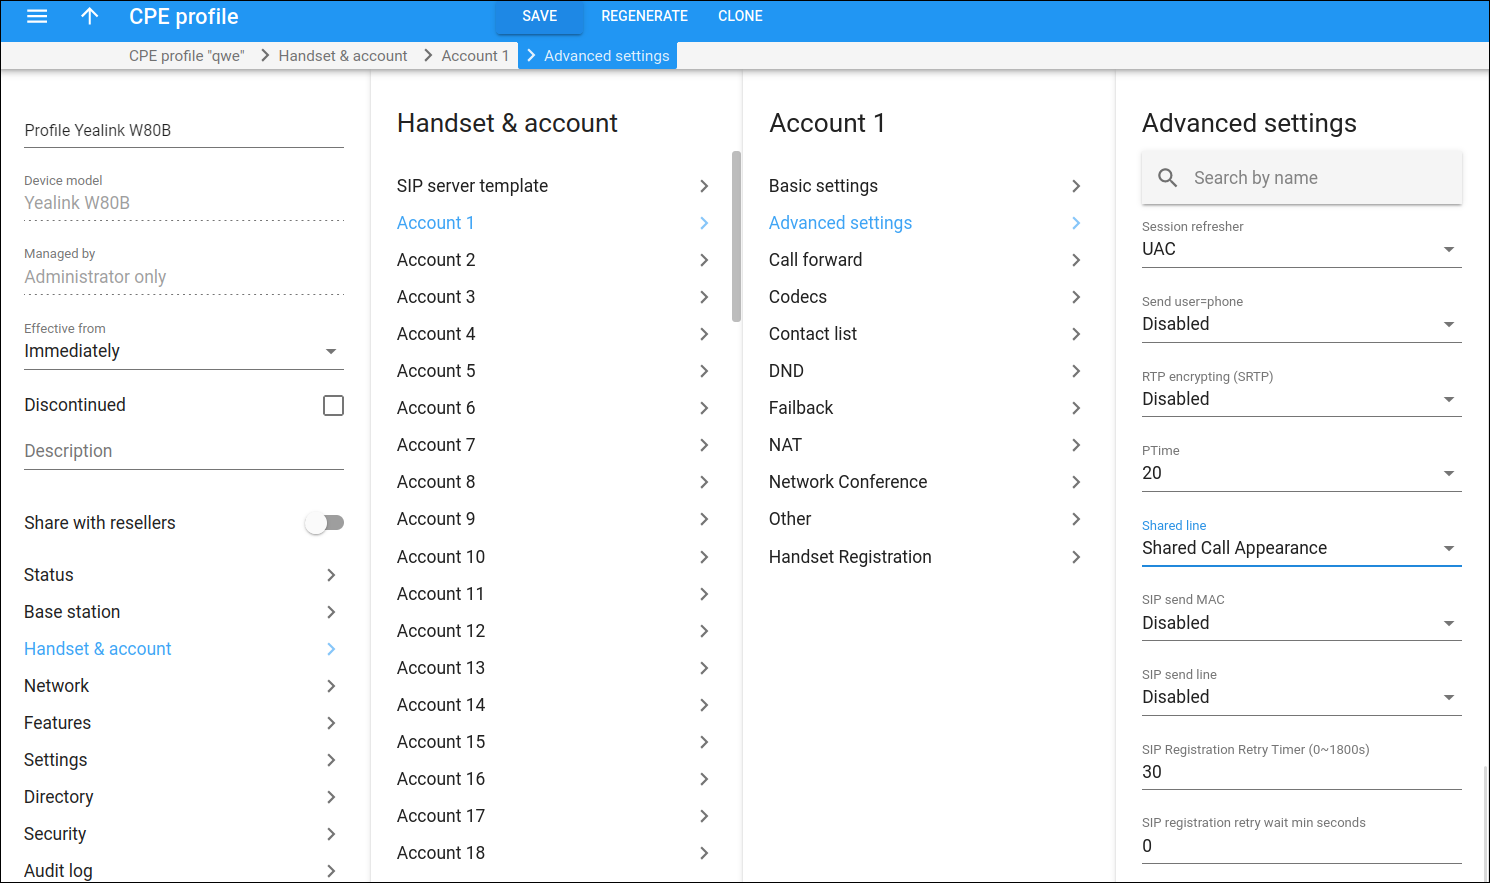
- Go to Handset & account > Account > Advanced settings and select Shared Call Appearance in the Shared line field.
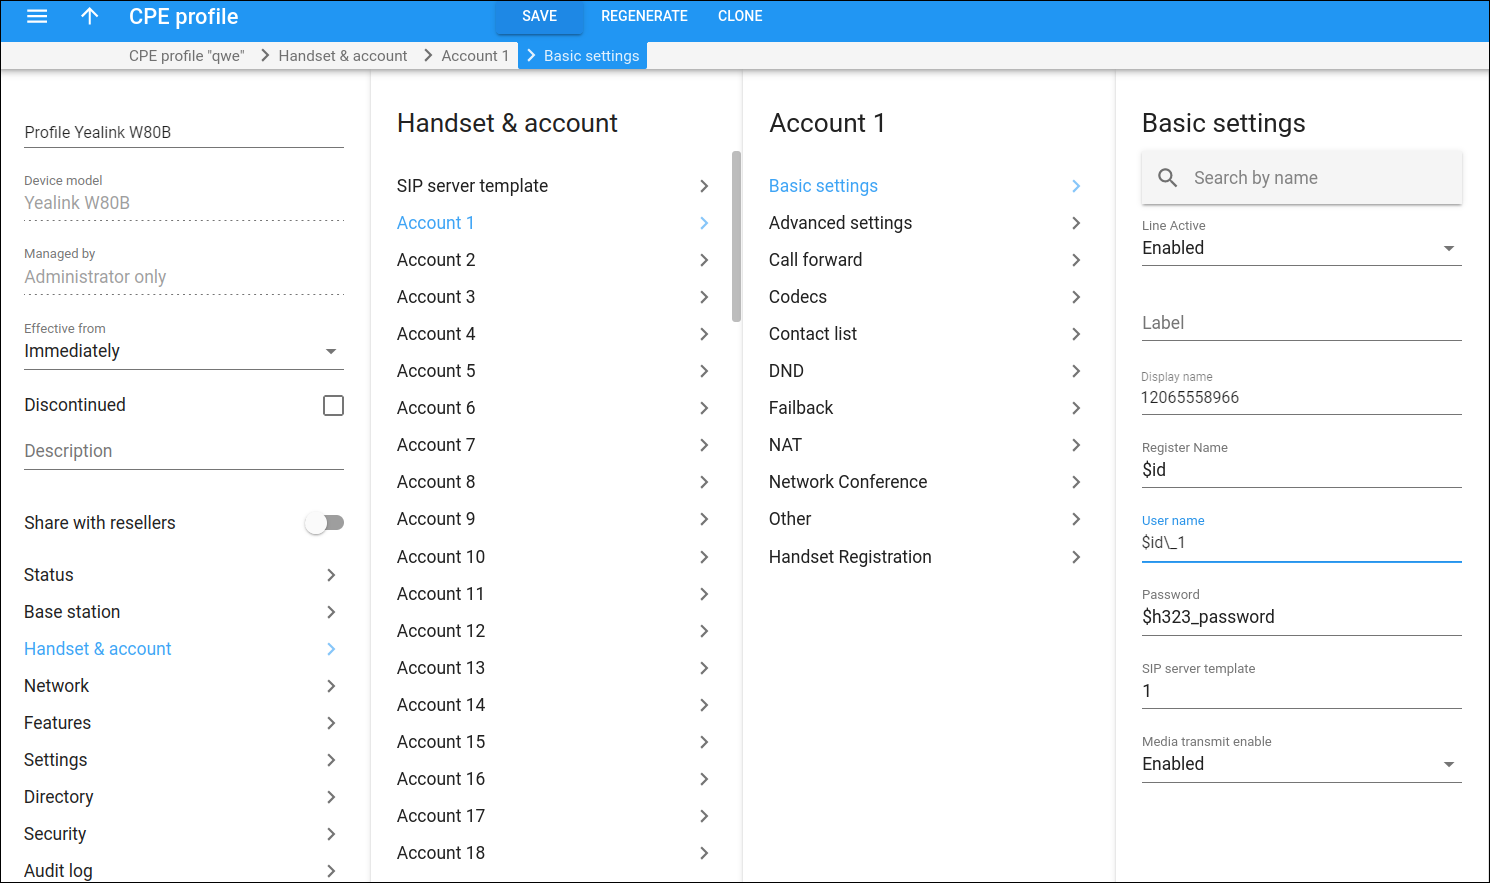
- Go to Handset & account > Account > Basic settings and fill in the details:
- Line active – select Enabled
- Display name – specify a display name, e.g., phone number, which will be displayed on the other phones receiving calls from this user.
- Register name – specify $id (this is a dynamic variable that will be automatically replaced by the account ID – phone number)
- User name – specify $id\_1 for account 1, $id\_2 for account 2, and so on for each account (handset). For example, if the account id (phone number) is 16045558921, $id\_1 will be replaced by 16045558921_1.
- Password – specify the password used to authenticate all calls made using this account
- SIP server template – specify “1” (as we configured “SIP server 1 settings” at step 2.2.c)
- Media transmit enabled – select Enabled
Step 4. Create IP phone entry in the CPE inventory
You can upload IP phones to the CPE inventory from a file.
To add an IP phone entry manually:
- Go to Infrastructure > Inventory > Phones/CPEs.
- On the CPEs Inventory panel, select Phones/CPEs list. On the Create CPE panel that opens, specify the basic CPE device information:
- Device ID – type a unique ID for the IP phone.
- Device model – select Yealink W80B from the dropdown list.
- MAC address – type the hardware ID of the IP phone (typically printed on the back of the device), 6 hexadecimal numbers, separated by colons. Make sure you enter the full value of the MAC address, including the colons.
- Managed by – select Administrator only from the drop-down list.
- CPE profile – select the IP device profile you created at step 2.
- Click Save.
Step 5. Assign the IP phone to the account for auto-provisioning
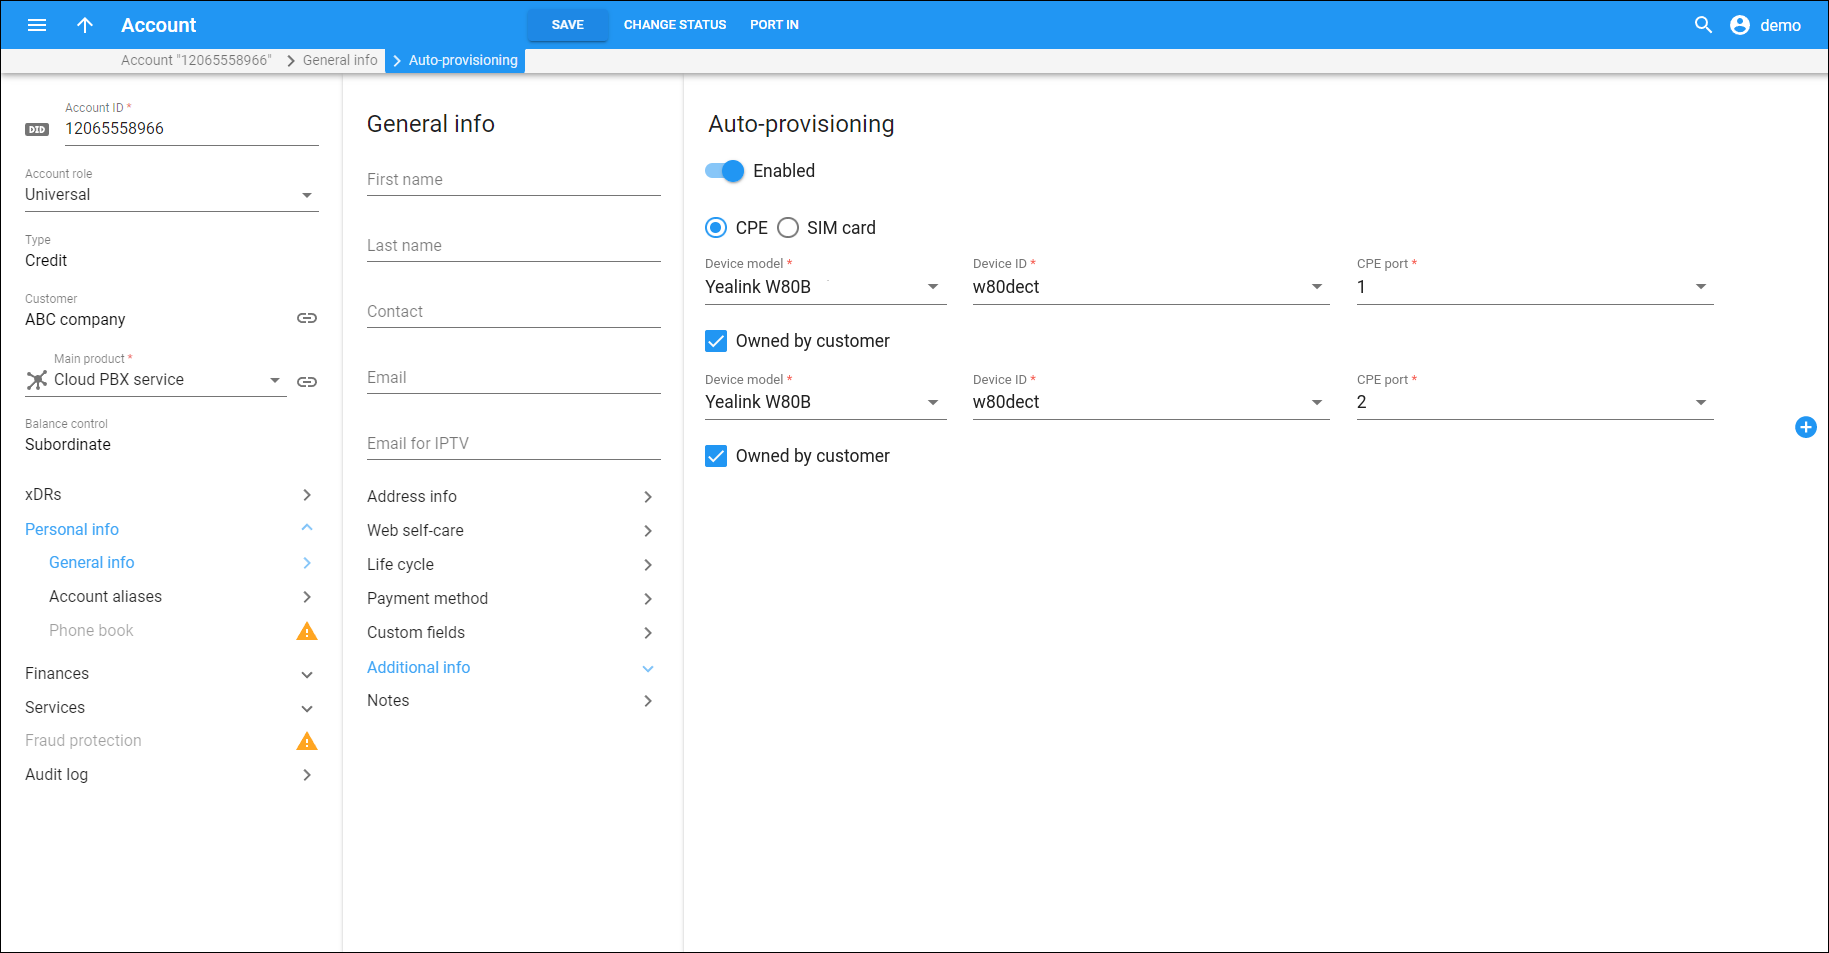
Assign the IP phone created at step 4 to the PortaBilling account.
Step 6. Initiate auto-provisioning on the IP phone user web interface
To initiate auto-provisioning:
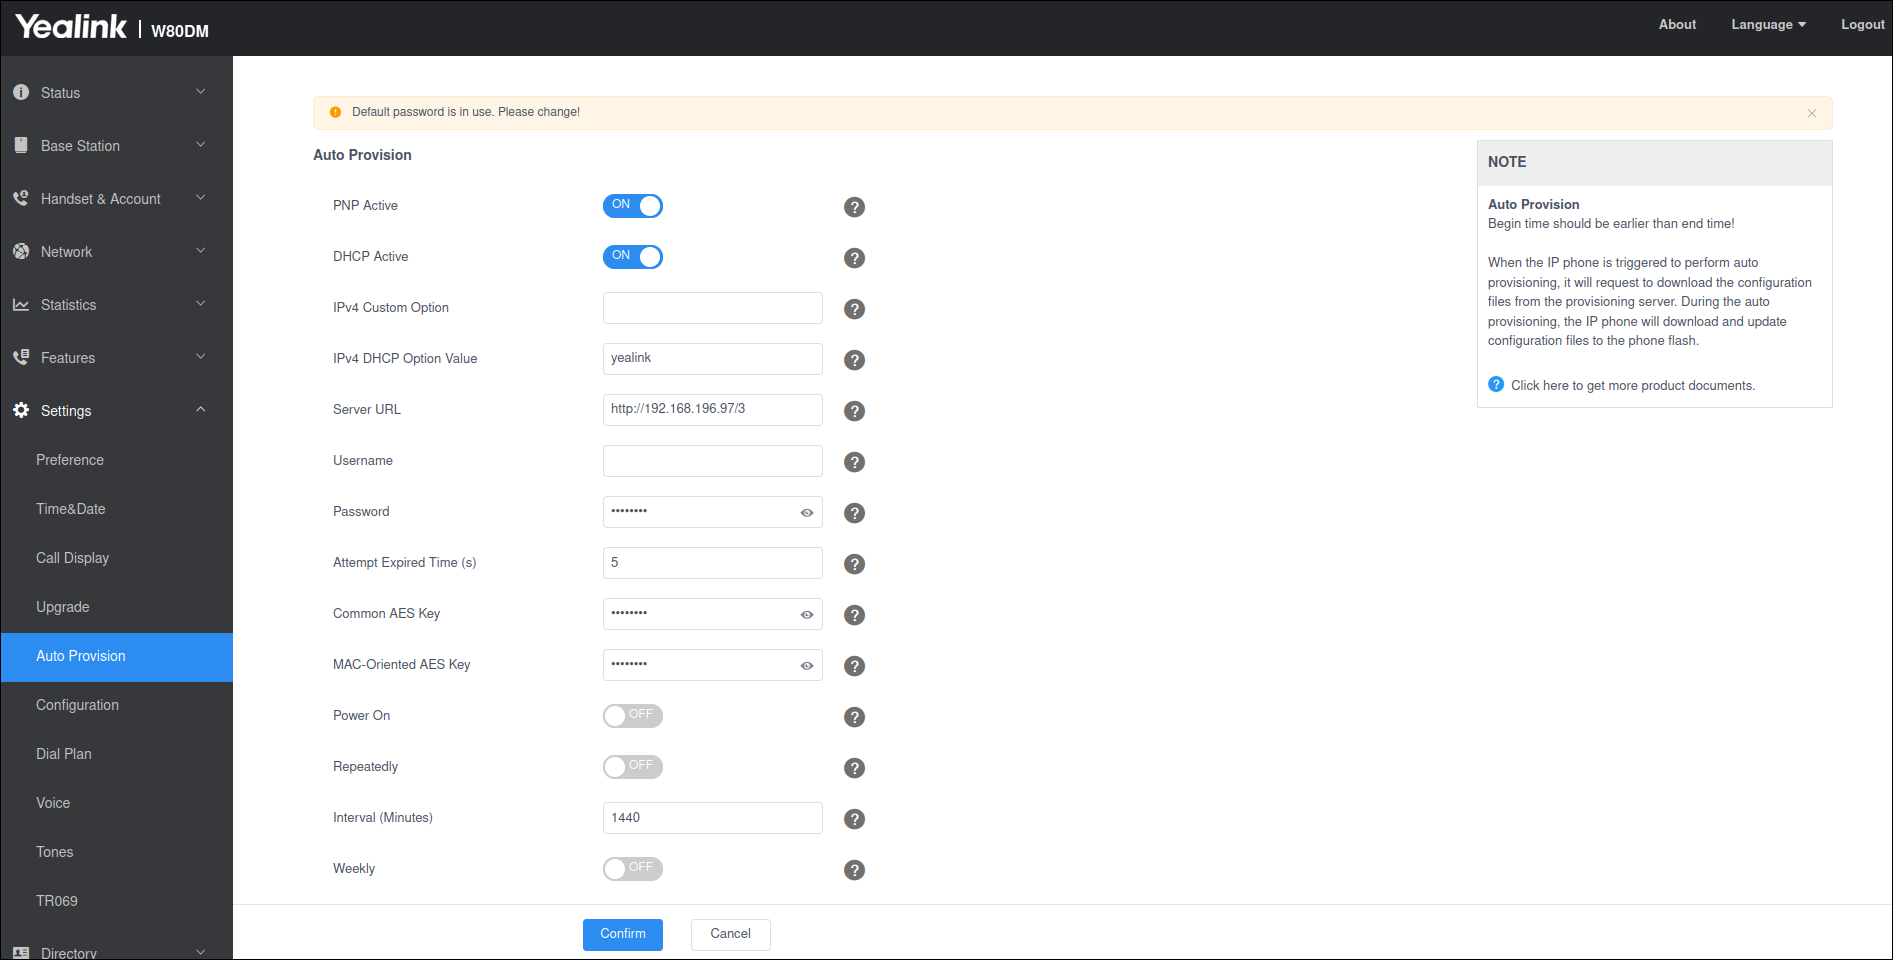
- Go to the Yealink W80B admin web interface > Auto Provision
- Specify the provisioning server URL as follows: [hostname or IP address of your PortaBilling web server]/[environment_id]. For example, http://192.168.196.97/3
- Click Confirm


