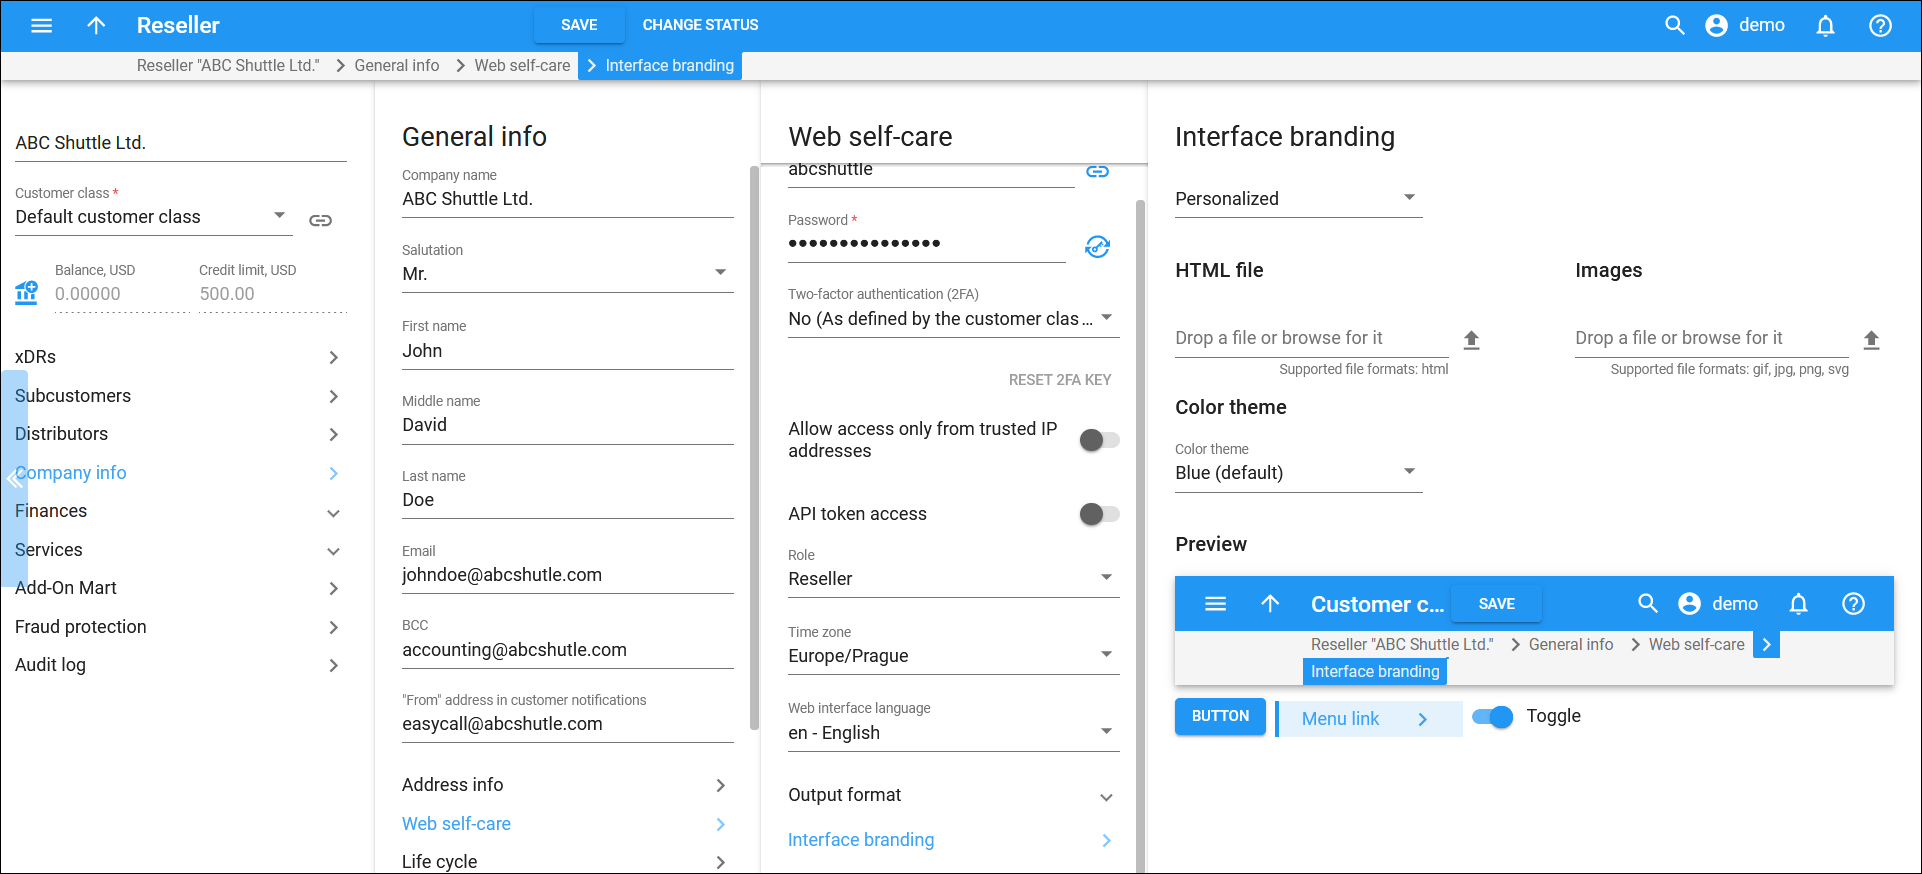
This panel allows you to override the default branding of the reseller portal for a specific reseller.
Choose a branding option for the reseller:
- Personalized – choose this option to set a personalized branding for this specific reseller.
- No branding – this option removes any custom branding set at the customer class or environment level and restores the interface of the reseller portal to its default appearance.
- As defined in customer class (default) – this means that the branding option defined at the customer class is used (by default, that option is set to “As defined in company info”).
When the branding option is selected, the following options appear:
HTML file
To brand the interface with your company name and logo, you need to prepare an HTML file containing the company name and the logo image filename.
To upload this HTML file, either drag and drop it into the designated area or click Browse  to select it from your files. If you need to remove the uploaded file, simply click Delete
  .
.
Images
Upload the logo image in one of the supported formats: GIF, JPG, PNG, or SVG. Ensure that the image filename matches what you specified in the HTML file.
To upload your logo image, drag and drop it into the upload area or use Browse  .
.
To download the image, click on its name. To delete an image, click Delete  .
.
Color theme
Select a color theme from the dropdown menu. This will change the appearance of elements like the page header, buttons, and toggles to match your chosen theme.
Preview
Before saving your changes, preview how the updated brand name, logo, and color scheme will look on the interface.


