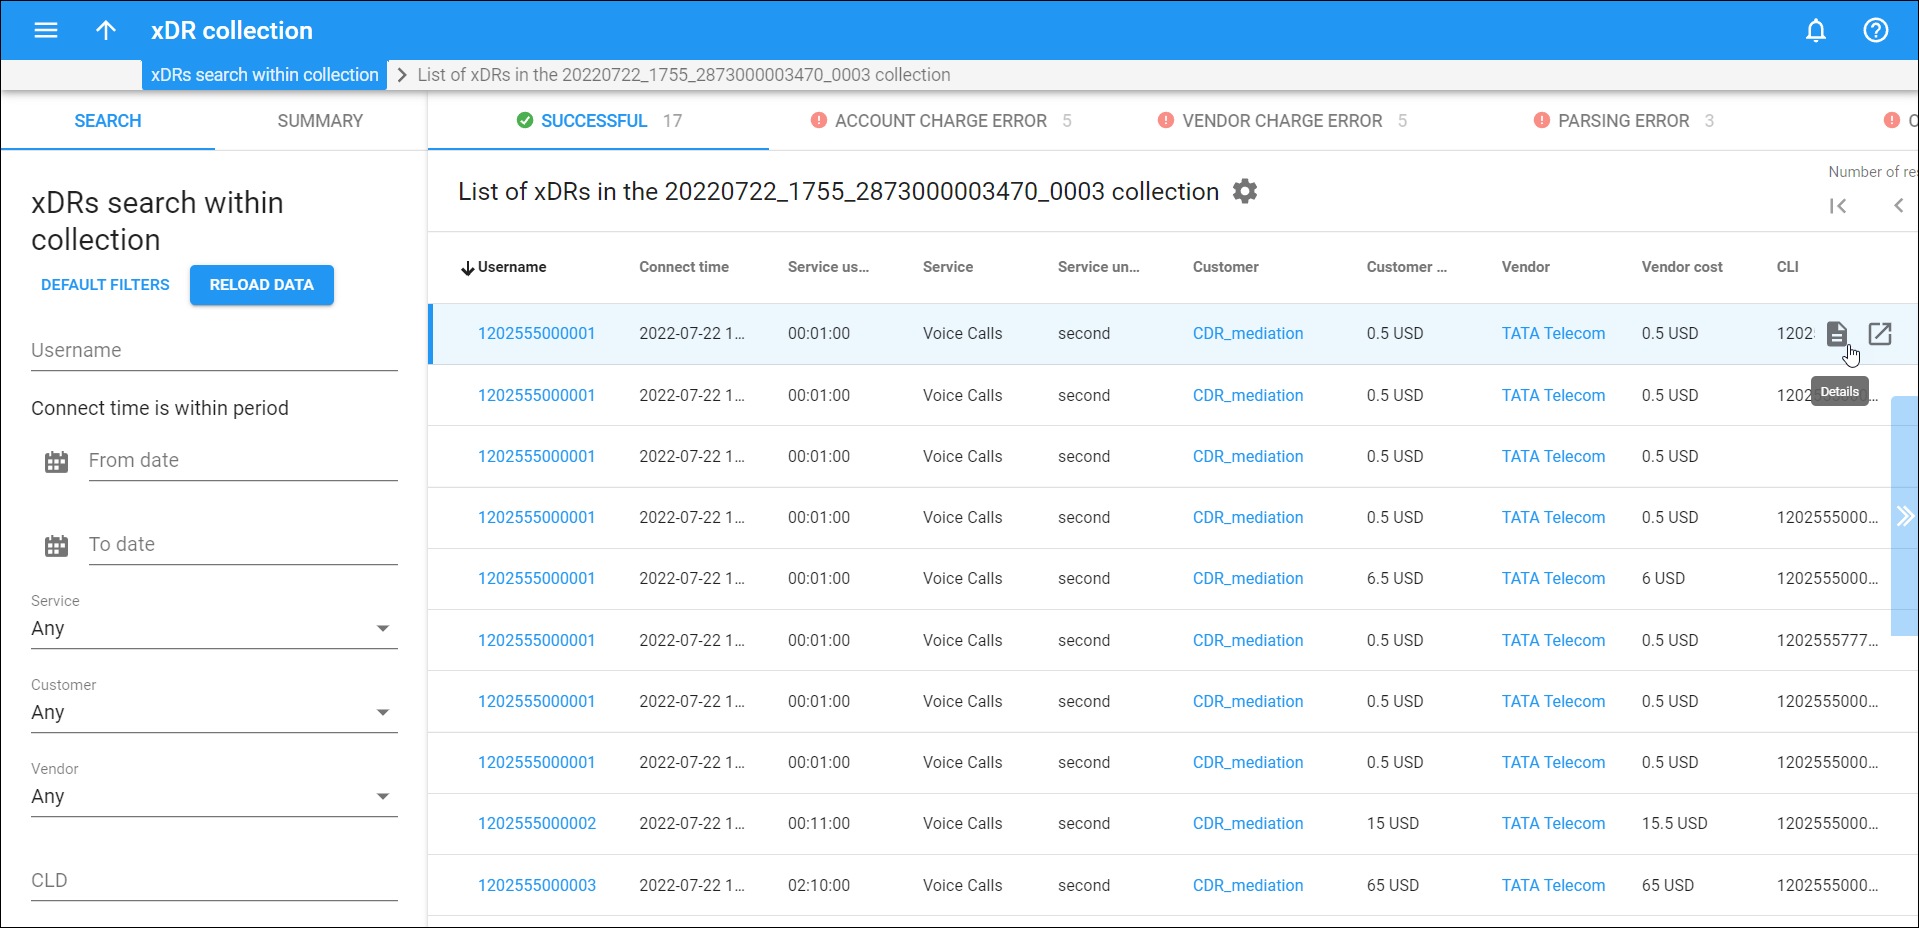
Here you can see the list of xDRs in a specific collection divided into separated tabs: the xDRs imported successfully and those rejected due to a specific error. You can initiate the re-processing of rejected xDRs on the same tab. If xDRs were rejected due to a parsing error, you can download a file with these xDRs to update it manually and import the file once again. Also, you can view the detailed information for a specific xDR and open the corresponding log.
Each entry in the xDR list consists of:
Username
The username value (it is matched with the account ID in PortaBilling). This is also a link to the corresponding account record.
Connect time
The session connect time, e.g., the time when a voice call started or a message was sent.
Service usage
The volume of consumed service, e.g., the duration of the voice call.
Service
The used service, e.g., voice calls.
Service units
The unit used for the service (the rating base to charge for the consumed service).
Customer
The customer that is charged for the consumed service. This is also a link to the corresponding customer record.
Customer charge
The amount the end user is charged for this session.
Vendor
The vendor associated with the consumed service. This is also a link to the corresponding vendor record.
Vendor cost
The cost associated with this session (the amount the service provider owes the vendor).
CLI
The session initiator, e.g., the caller ID for voice services.
CLD
The destination number.
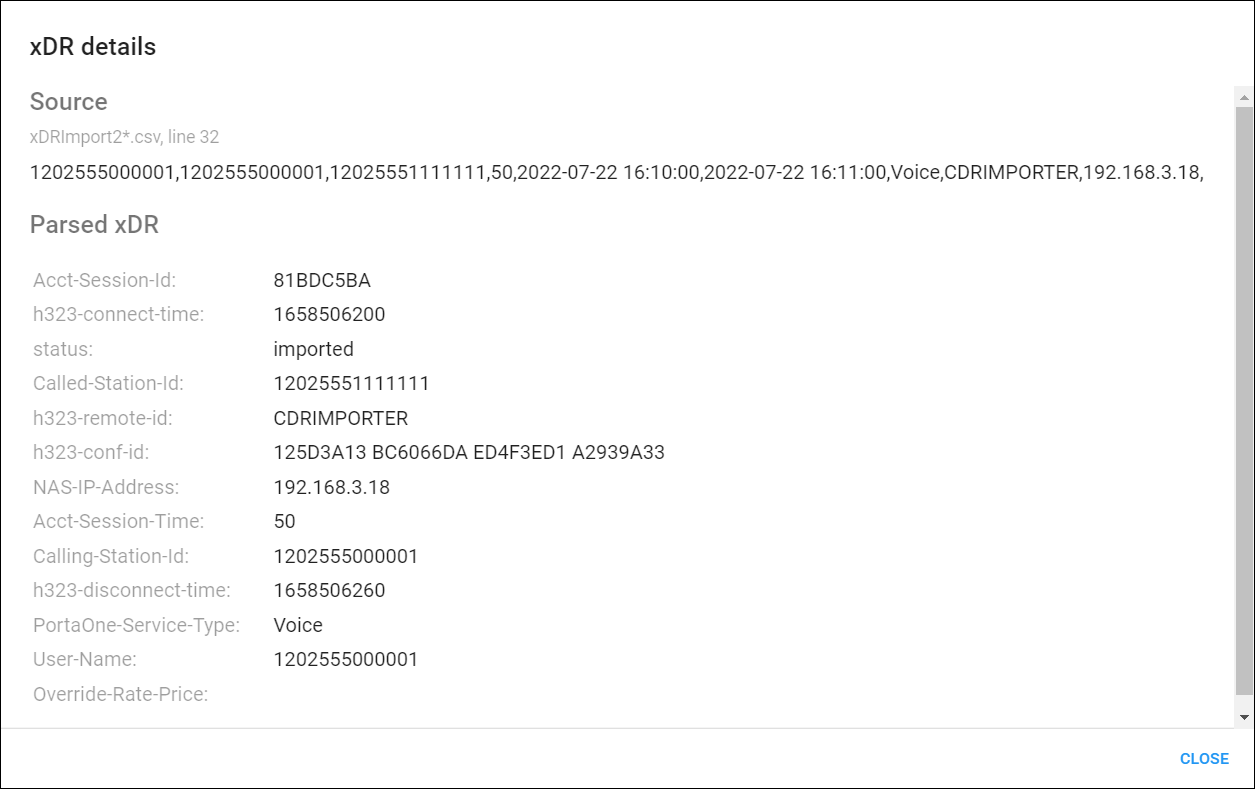
View xDR details
To view the xDR details, hover over a specific xDR in the list and click Details .
In the dialog that opens, you can view the following information:
Source – this section shows the name of the source file, which line from the file was used, and the xDR data the way it looks in the source file.
Parsed xDR – this section shows the xDR data in the parsed format.
View log
To view the PortaBilling log for a specific session, hover over the corresponding xDR in the list and click Log .
View xDRs imported successfully / rejected
To view the xDRs that are imported successfully or rejected due to a specific error, click the corresponding tab:
Successful (this tab is shown by default when you open the xDR collection) – these are xDRs that are imported successfully.
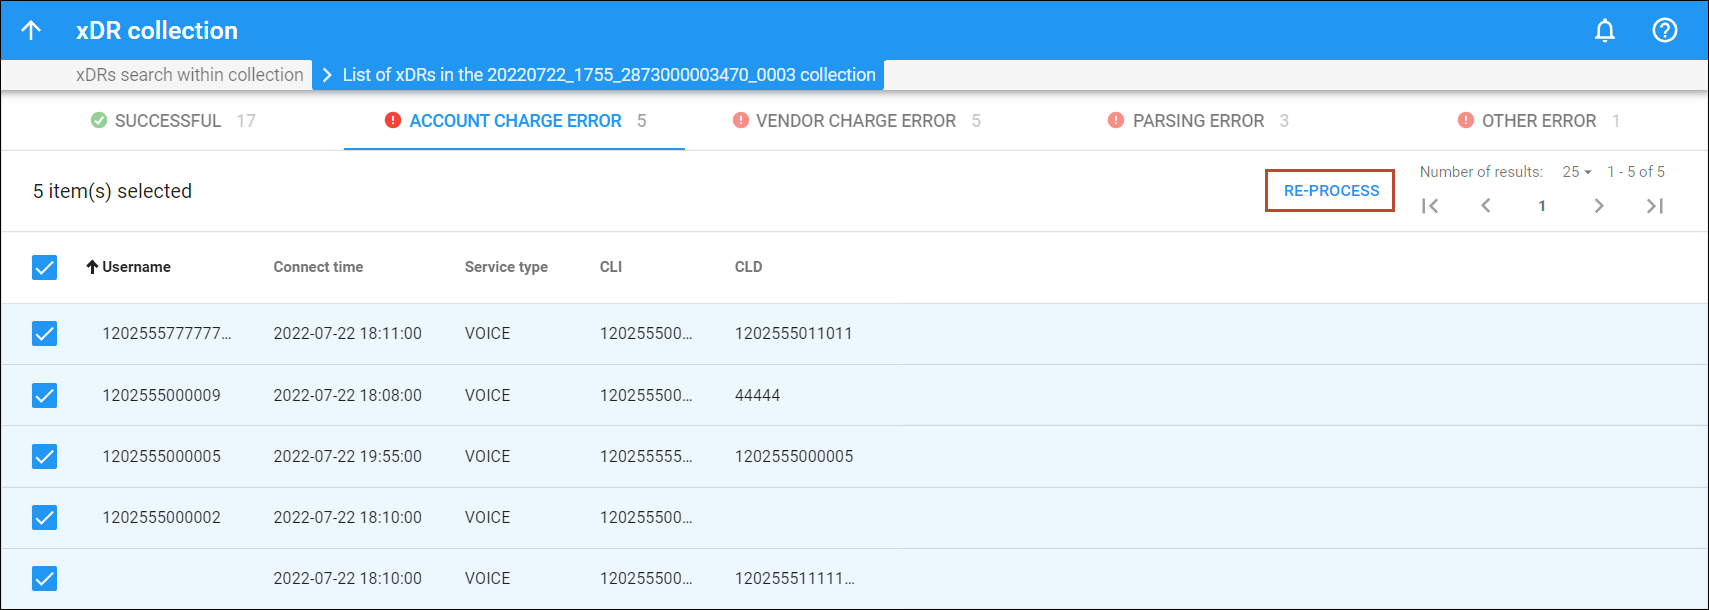
Account charge error – these are xDRs that were rejected because PortaBilling wasn’t able to charge the account (e.g., the account was not found or rates were not defined).
Vendor charge error – these are xDRs that were rejected because PortaBilling wasn’t able to process the vendor data correctly (e.g., no vendor was found, invalid gateway ID in the vendor connection, or the vendor tariff was not defined).
Parsing error – on this tab, you can download a file with xDRs that were not parsed. You can update the file and upload it once again.
Other error – these are the xDRs that were rejected because of any other issues, e.g., with RADIUS requests or responses.
How to re-process rejected xDRs
You can initiate re-processing of xDRs rejected due to a specific error (except for xDRs that were not parsed) after you fix the PortaBilling settings such as tariffs, accounts, vendors, nodes, etc. that caused the error.
For example, you found out that xDRs displayed on the Account charge error tab were rejected because there wasn’t a rate for the called destination. After you add the missing rate to the customer tariff, PortaBilling can re-process the rejected xDRs. For this, select these xDRs on the Account charge error tab and click Re-process.


