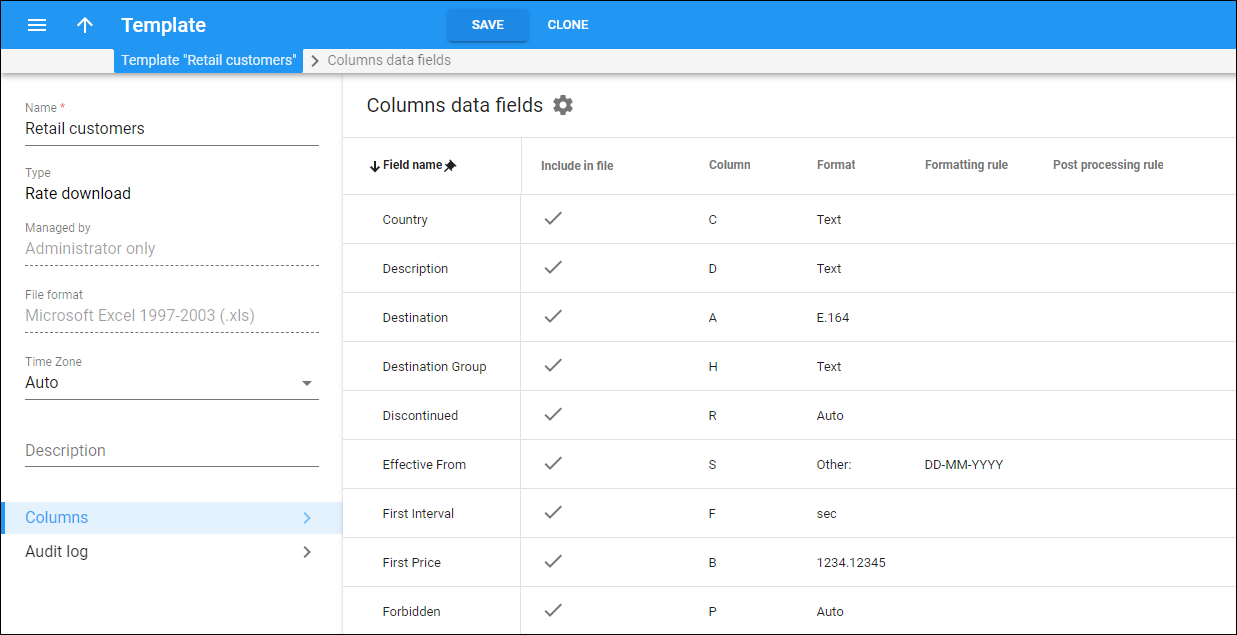
On this panel, you can edit the Columns data fields, e.g., change the column order, include or remove columns in the template. Select the needed data field and click Edit  .
.


Field name
Link copied to clipboard
The name of the column in the template.
Include in file
Link copied to clipboard
The checkmark shows that the field is included in the template.
Column
Link copied to clipboard
The order of the fields in the template.
- Select None to remove the column from the template.
- Select the digit/letter to change the column order or to include the column in the template.
Format
Link copied to clipboard
The format of the data in the template, e.g., text.
By default, the format is set automatically. Select Other: to define the custom format.
Formatting rule
Link copied to clipboard
The custom format rule in the template. For example, you can change the date format to European (DD-MM-YYYY) for the “Effective From” column.
Post processing rule
Link copied to clipboard
The specific conversion of a piece of Perl code and the value it returns. Refer to Post processing rule of the template section for more information.
Customize the panel
Link copied to clipboard
- Change table settings. Click Settings
in the title bar to customize columns and change row style.
- Re-order the columns. Move the columns right or left to place them in the order you want.
- Re-order the rows. Click the arrow
(or
) next to the column header to re-sort them. For example, the list panel displays all records in alphabetical order. You can re-sort them in reverse order.
- Change the default number of results globally. By default, there are 25 rows per panel. Use the Number of results to adjust the number of rows that appear on the panel. Once the number is changed, it is automatically saved. So, the result lists for the PortaBilling entities, e.g. customer, account, reseller, etc., show the same number of records.


