



UI plug-in is a set of application files that contain the logic for a new custom panel (e.g., step-by-step forms, fields, default values). With the help of the plug-in, you can install the panel in the main navigation menu or at a specific entity level (e.g., customer, reseller). Upon installing the plug-in, the custom panel appears in PortaBilling.
The configuration steps are described in the UI plug-ins documentation.
This way, you can integrate PortaBilling with any external system, e.g., an NMS (Network Management System) for monitoring network performance, circuit management, and configuration. Create a UI plug-in, install it in PortaBilling, and operate with the NMS from the PortaBilling web interface. When checking customer information (e.g., during troubleshooting), you must log in to both PortaBilling and to the NMS.
Each time you open customer data or modify the information (e.g., change bandwidth limits or reconfigure a router), the data is automatically sent to the NMS, in the backend PortaBilling:
- Dynamically retrieves the network information related to the customer from the NMS via the API;
- Displays the consolidated data on the web interface.
The NMS data is then displayed on the custom panel.
Asgard Telecom has a contract management system (CMS) to store and manage customer contracts. They require:
- Real-time interaction between the CMS and PortaBilling;
- The ability to manage the contracts (e.g., Contracts feature) via the PortaBilling web interface.
Asgard Telecom implements UI plug-in for the Contracts feature. After the plug-in installation, a new Contracts panel is available at the customer level. It allows managing customer contract details. When an administrator saves a contract, the plug-in pushes the data to the CMS via the API. Each time an administrator opens the Contracts panel, the data is retrieved from the CMS.
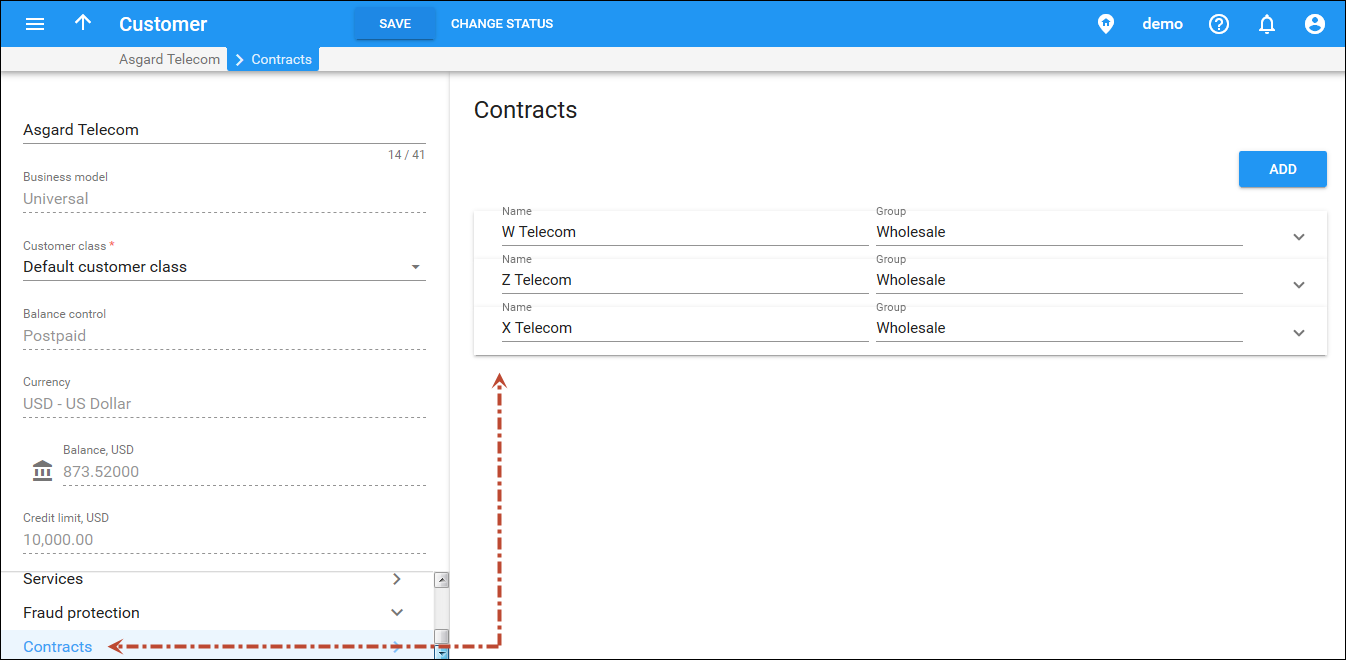
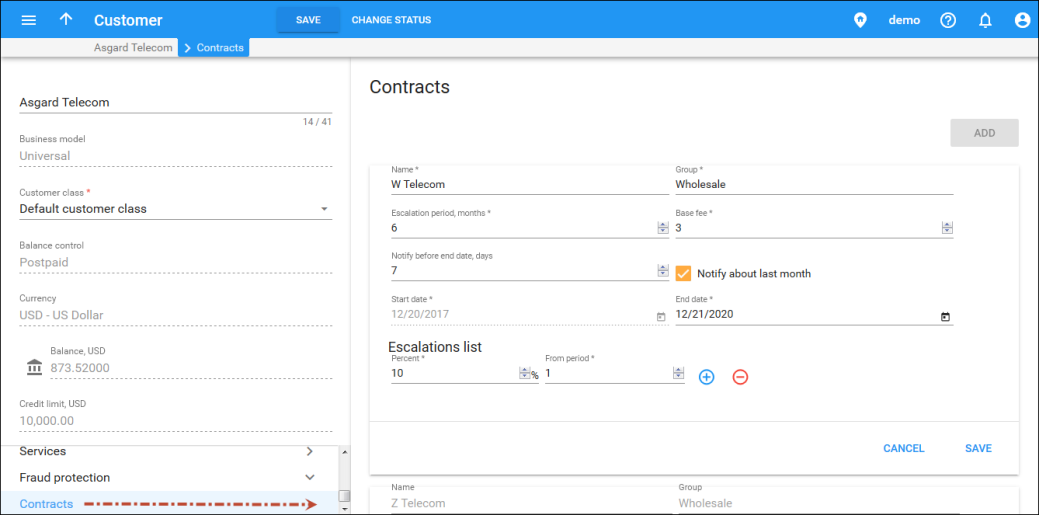
This solution allows you to integrate PortaBilling with the external systems and manage all of the data from a single place. Aside from improving workflow, it gives you additional flexibility with introducing individual business solutions using PortaBilling.
Embedded forms for reseller, distributor, and representative portals
With the help of UI plug-ins, you can embed custom panels or step-by-step forms, integrated with external systems, directly into the reseller, distributor, and representative portals. Plug-ins connect PortaBilling to external systems through middleware that works via the API.
This empowers your sales agents to handle complex workflows (e.g., onboard new subscribers) that integrate with external systems (e.g., SIM provisioning platforms) through guided steps in a single place.
A mobile operator, Owl Mobile, works with distributors to sell SIM cards. To help distributors onboard new subscribers directly from their portal, Owl Mobile deploys a custom “SIM Activation Wizard” plug-in to the distributor portal. The wizard uses the PortaBilling API to activate accounts and connects to the Amazon S3 bucket to upload and store required documents, such as ID scans and selfie with ID (used for identity verification). Jack Smith, a distributor, sells mobile services in a retail kiosk. When a new customer wants to buy a SIM card, Jack logs in to the distributor portal and starts the sign-up process. He opens the wizard page, enters the customer’s personal information (such as national ID number, date of birth, etc.), uploads a photo of the customer’s ID along with a selfie holding the ID, selects the desired service plan, and chooses an available phone number (MSISDN) from the list. The customer pays in cash, and Jack enters the amount in the final step of the wizard, which creates a manual transaction and adds funds to the new account.

For sales agents:
- Process more customers per day thanks to simplified workflows (sales agents can support a growing customer base without extra workload).
For service providers:
- Reduce mistakes by sales agents, which means fewer escalations to the service provider’s team.
- Attract more sales agents and grow the customer base.
You can install UI plug-ins in the admin web interface as well as in the distributor, representative, and reseller portals. The configuration process is the same, you only need to specify the appropriate realm (admin, reseller, distributor, or representative).
Preparation steps
Before proceeding with the custom forms configuration and embedding, perform the following steps:
- Create a ZIP archive with the following files included:
- The index.html file that describes the plug-in structure.
- The main.css file that describes the visual appearance of the plug-in.
- The main.js file that describes the logic and behavior of the plug-in.
In the plug-in code file, use the Extras.make_request API method for the plug-in to retrieve contract information from the external system, such as CRM, and display it in the PortaBilling web interface.
- Create the JSON file with the following fields:
- route – specify the ID of a panel in the portal UI where the plug-in should be shown. For example, "route":"/distributor/:id/general_info" indicates that the new plug-in is accessible from the Distributor > General Info panel of the distributor portal.
You can add your custom plug-in under the panel only if there are already other subpanels. For example, you can add a subpanel to the Customer > General info panel, as it already contains other subpanels, such as Address info, Web self-care, Life cycle panels, etc.
- routerLink – specify the link that is used as the URL of the new panel.
- linkLabel – specify the name of the new panel that will be visible to end users.Optionally, you can also specify:
- panelSize – the size of the new panel. If you want a panel that is of a standard width, use “1”. You can also set other values to adjust the size. For example, setting it to “2” will make the panel twice as wide as the standard size.
- data – any data that should be shown in the new panel, e.g., "file_max_size": 4194304.

- route – specify the ID of a panel in the portal UI where the plug-in should be shown. For example, "route":"/distributor/:id/general_info" indicates that the new plug-in is accessible from the Distributor > General Info panel of the distributor portal.
Configuration
Once the preparation steps are complete, you can upload the files and configure the options for embedding custom forms in the portals.
- Open the Configuration server web interface to upload the UI plug-in:
- Click Update tab > go to UI Plug-ins tab > click Upload Plug-in. Specify the following details:
- Plug-in name – specify the plug-in name, e.g., SIM_wizard
- Configuration string – specify a JSON string with configuration parameters
- Plug-in realm – select Distributor
- Plug-in file – select the prepared file in the .ZIP format
- Click Upload Plug-in.

- Click Update tab > go to UI Plug-ins tab > click Upload Plug-in. Specify the following details:
- Define specific plug-in options:
- Open ClusterSuite > Web Cluster > Groups > UIExternalApps > ActivatedDistributorRealmApps option and select an earlier uploaded plug-in (e.g., SIM_wizard).

- Open the TokenBasedApps option and fill in the following options in the dialog:
- TokenBasedApps_Name – SIM_wizard
- TokenBasedApps_ContentType – application/json
- Open ClusterSuite > Web Cluster > Groups > UIExternalApps > ActivatedDistributorRealmApps option and select an earlier uploaded plug-in (e.g., SIM_wizard).
- Specify the external system that the plug-in will connect to:
-
- TokenBasedApps_ServerUrl – https://SIM_wizard-bucket.s3.amazonaws.com
- TokenBasedApps_Token – specify the token
- TokenBasedApps_AuthType – Bearer
- TokenBasedApps_EnableDelegatedAuthHeaders – Y

-


