



PortaSwitch provides excellent capabilities for real-time routing (LCR, profit-guarantee routing, individual routing plans, etc.). This allows any customer’s routing to dynamically respond to even the slightest change in a vendor’s rate, so there is no need to “rebuild” the routing table or perform any other manual operations after a new tariff for a vendor is uploaded.
However, it is sometimes necessary to make minor adjustments for one or several routes only. This document describes how to make these adjustments with routing plans, using the following examples, and how to apply the routing plan:
- Example 1. Percentage-based routing
- Example 2. Consistent routing to one carrier
- Example 3. Sequential routing
- Application of the routing plan
Example 1. Percentage-based routing
For example, when sending calls to UK-Proper, 50 percent of all traffic should go to the GlobalNet carrier, 20 percent to X-Telecom, 15 percent to Y-Telecom, and 15 percent to Telecom.
- On the navigation menu on the left, select Infrastructure, then Voice calls processing and open Routing plans.
- On the Routing plan list panel, click + Add and fill in the routing plan details:
- Name – type the name of the routing plan.
- Define a specific order for the route categories – disable this option.
- Least cost routing override – enable this option.
- Code group set – select a code group set that contains the rate codes for which you want to adjust routing. Please refer to the Create a code group set and a code group section for a detailed description of a code group set configuration.

- Click Save & Edit details.
- On the Routing override panel, click Add rule.

- In the dialogue that opens:
- Code group – in the dropdown list, select the code group for which you want to configure a specific routing.
- Connection list – select the connections through which the calls will be routed before (or instead of) applying a “normal” LCR routing and click Add.

- Hover over the created rule, click Edit
 , and then click Add
  to add one more connection through which the call will be routed before (or instead of) applying a “normal” LCR routing.


- For each connection, specify the probability of being the first in the list of routes. By default, when you add more than one connection to the pool, the probability of connection usage is distributed among all the connections evenly. Set specific values in the Probability,% field:
- GlobalNet vendor – set 50% and click Lock
 . It will fix the probability usage of this connection.
 - X-Telecom vendor – set 20% probability.
The remaining probability percent (30%) will be evenly distributed between the Telecom vendor and the Y-Telecom vendor (15% will be set for each of them). The probability value of the GlobalNet connection usage won’t be affected because it’s “locked”.

- GlobalNet vendor – set 50% and click Lock
- Click Save.
Example 2. Consistent routing to one carrier
Let’s consider the example of an adjustment for a single route only, so that the traffic to Vietnam-Mobile from customer A will always go to carrier GlobalNet.


Example 3. Sequential routing
It is possible to create a list of connections for a code group in a desired routing order, and the call will be routed accordingly, before (or instead of) applying a “normal” LCR routing. An entry in the override list can be either a single connection or a percentage-share connection pool, where each connection has the probability to be the first route according to the assigned percentage value.
Let’s consider the example, where 25 percent of cases send traffic via the connection Europe Premium, 40 percent of cases send via the connection Termination to UK, and the rest (35 percent), should be sent based on LCR (Non-listed connections ordered by least cost routing). This configuration procedure is similar to the previous ones; please refer to the screenshots below for the particulars.


Application of the routing plan
With the routing plan created, the question of how to apply it arises.
There are two ways to apply the routing plan:
- To assign it to a product. Then the routing plan will be used for calls sent by all accounts with this product assigned;
- To assign it to an account. In this case it will be used for calls sent by this account only.
Assign the routing plan to the product
- On the navigation menu, select Service catalog and click Products.
- On the Product list panel, click on the name of the product you want to apply the routing plan to.
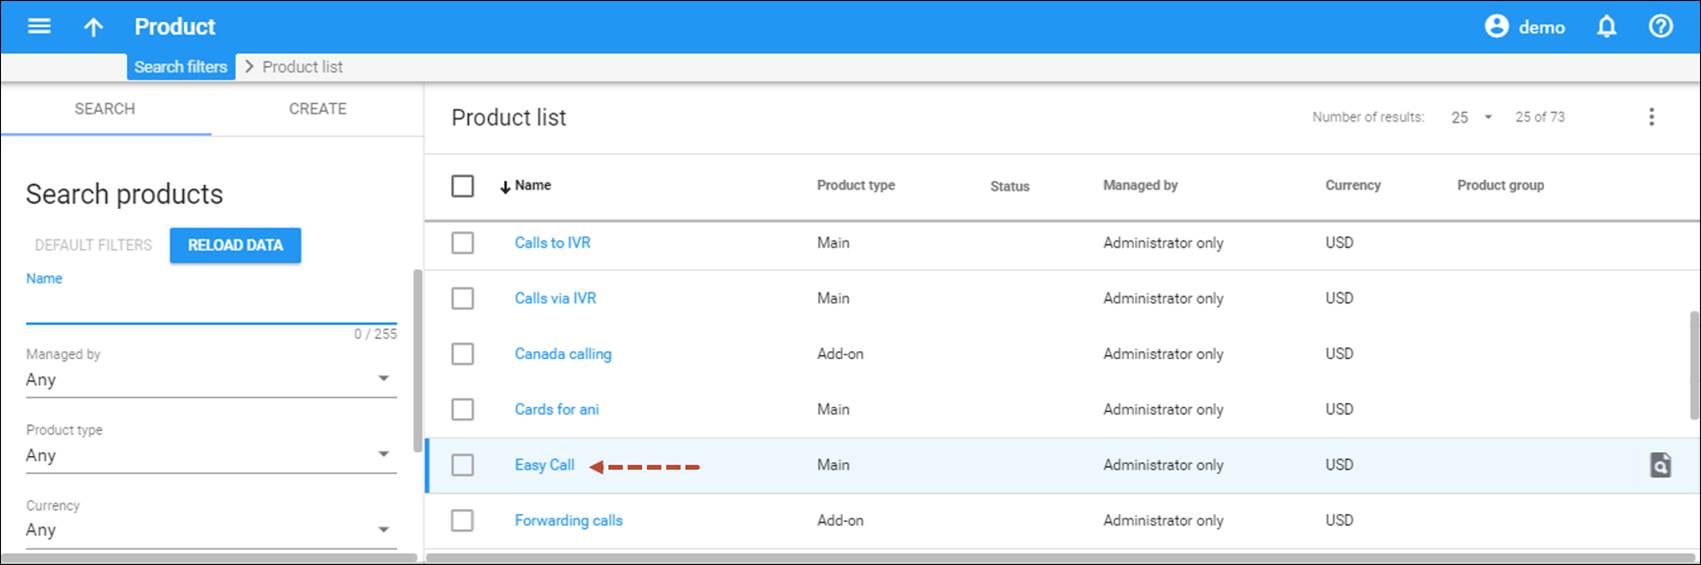
- On the Services panel, click Voice calls.
- On the Outgoing calls configuration panel, use a slider to enable the Routing plan.
- Select the routing plan you have just created in the Individual routing plan field.
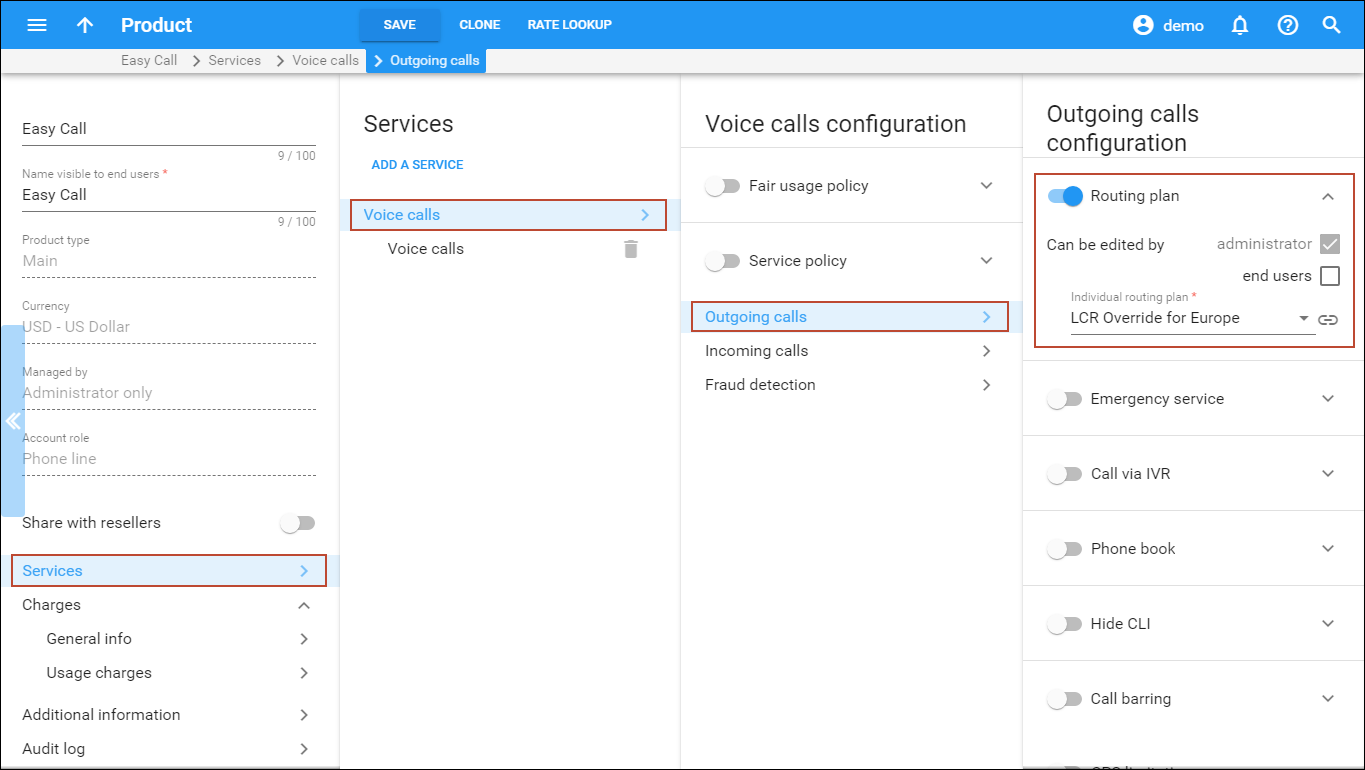
- Click Save to save the changes.
Assign the routing plan to an account
- Open the account you want to assign the routing plan to.
- Go to Voice calls > Service configuration > Outgoing calls and use a slider to enable the Routing plan.
- Select the routing plan for this account from the list.

- Click Save.


