



Mobile operators make it possible for their users to exchange short text messages known as SMSs (Short Message Service). SMS messages are transported within mobile networks via the SMPP protocol.
With PortaSwitch, you can enable your VoIP customers to send SMS messages to mobile networks.
Your customer John Doe has his account registered on a softphone (e.g., Linphone). John’s friend Mark is now abroad, so his SIP account is offnet and he is therefore not accessible via the Internet. To congratulate Mark on his birthday, John sends him an SMS from his softphone.
With PortaSwitch you can also develop a custom application to bundle voice calls and messaging services (including both IM and SMS). This allows users of other networks (e.g., mobile) to register on your VoIP network, and thus expands your customer list.
This chapter demonstrates how to configure the basic SMS service so that in addition to voice calling and instant messaging services, your VoIP customers can send SMS messages.
Configuration overview
- Configure the instant messaging service
- Create two service policies
- Configure an SMS vendor
- Set up the product
- Testing
1. Configure the instant messaging service
This handbook assumes that you have already configured instant messaging services in the system.
2. Create two service policies
2.1 Create a service policy for the transport protocol definition
Create a service policy that defines how PortaSIP routes and authorizes messages. Before sending a message, PortaSIP matches the recipient's domain with the domain pattern in the service policies. The matching policy is then used to handle the message in a specific way (e.g., send it over SMPP or SIP).
- On the navigation menu on the left, select Service catalog and click Service policies.
- On
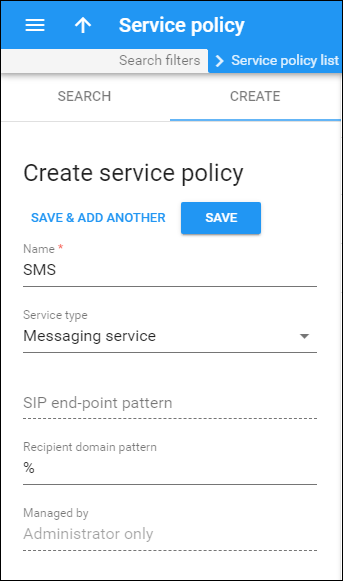
the Create service policy panel, fill in the service policy details:
- Name – specify the name of the service policy (for example, SMS).
- Service type – select Messaging service from the list.
- Recipient domain pattern – specify a pattern according to which the service policy is selected (% in our example). This means that the service policy is applied to all outgoing messages sent by your end users. If you only allow end users to send SMSs to a specific mobile operator, specify the pattern as follows %XXX% (e.g., %380% for all mobile operators in Ukraine or %38050% for Vodafone Ukraine). Then when a user sends the message to 3805551122, PortaSIP matches the pattern (e.g., 380) to select the corresponding service policy and sends the message to the SMS aggregator via the SMPP protocol.
- Click
Save.
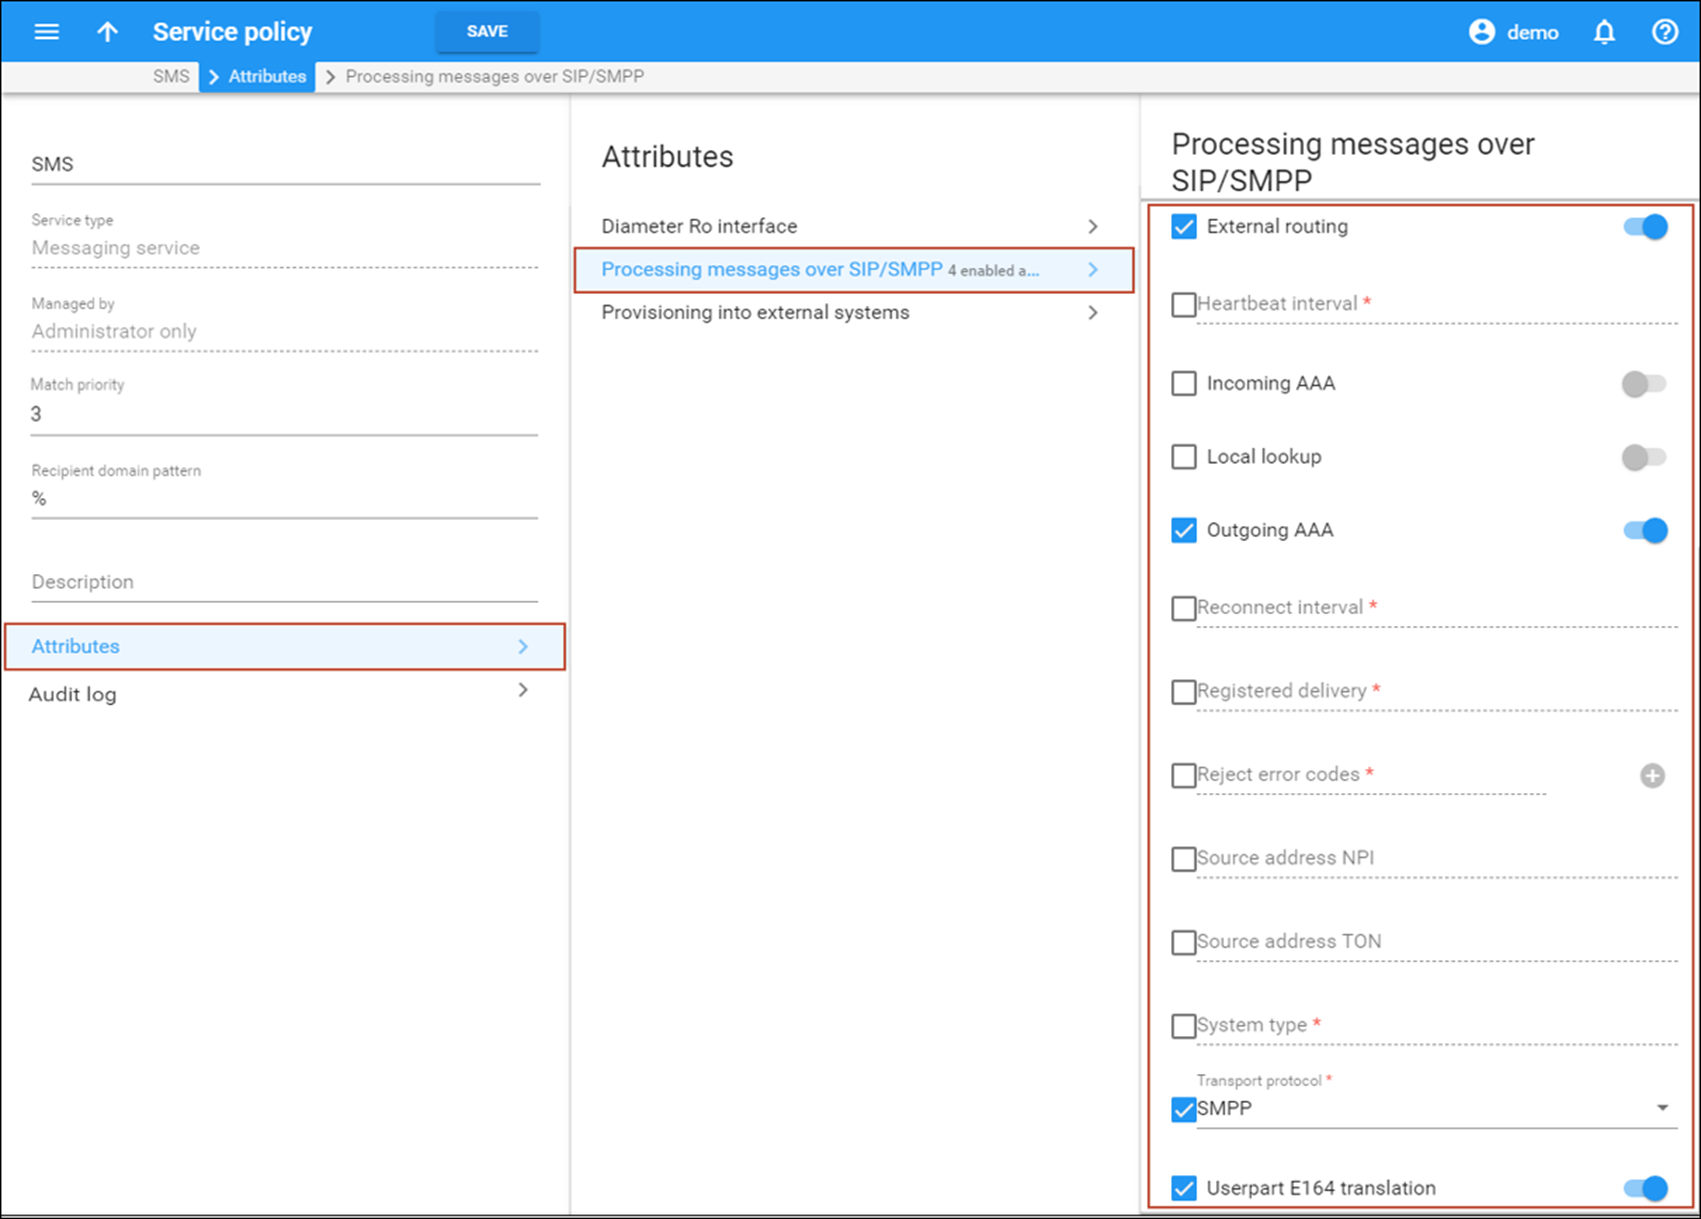
- On the Service policy panel that opens, specify 3 in the Match priority field. If several service policies are selected for the message processing, the one with higher match priority will be applied.
- Go
to the Attributes panel, select Processing messages over SIP/SMPP
and enable the following attributes:
- External routing – select a checkbox and use a slider to enable this attribute. This will allow you to send SMS messages to off net vendors.
- Outgoing AAA – select a checkbox and use a slider to enable outgoing message authorization and billing.
- Transport protocol – select a checkbox and choose SMPP from the list.
- Userpart
E164 translation – select a checkbox and use a slider to enable this
attribute.
- Click
Save.
Note that any service policy changes will not be applied immediately. It will take several minutes until they are propagated to PortaSIP.
2.2 Create a service policy for vendor connection
The service policy for a vendor connection defines the specific parameters for this connection. For these parameters to apply, the service policy must be associated with the corresponding vendor connection.
- On the navigation menu on the left, select Service catalog and click Service policies.
- On
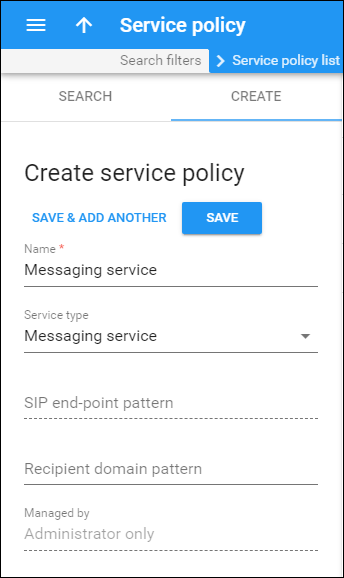
the Create service policy panel, fill in the service policy details:
- Name – specify the name of the service policy (for example, Messaging service).
- Service type – select Messaging service from the list.
- Recipient domain pattern – leave this field empty.
- Click
Save.
- On
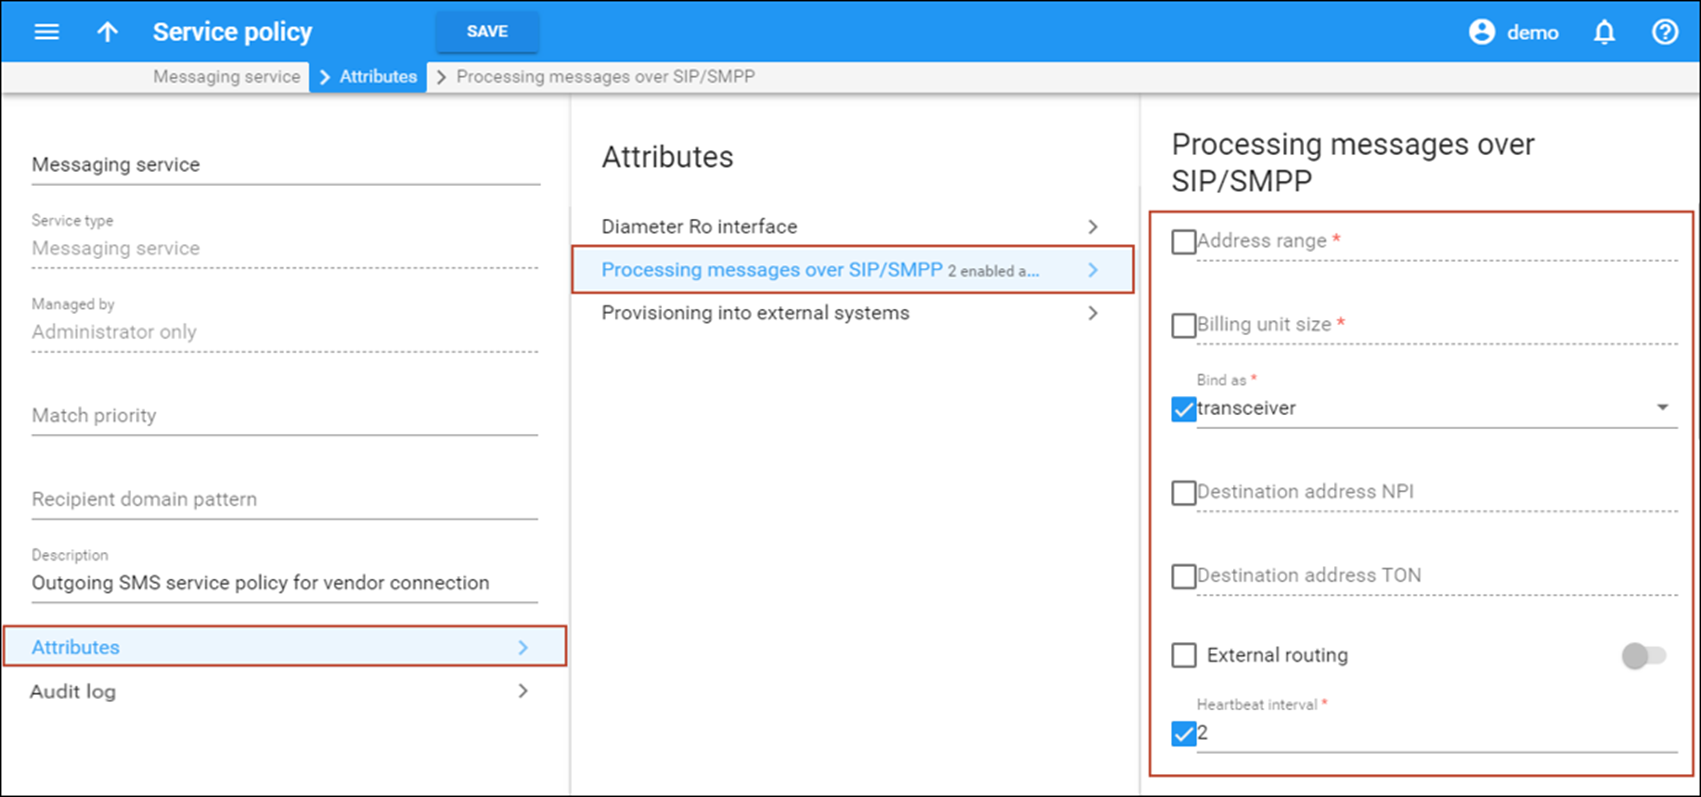
the Service policy panel that opens, go to the Attributes
panel, select Processing messages over SIP/SMPP and enable the
following attributes:
- Bind as – select a checkbox and choose the transceiver option from the list for the option to send and receive messages.
- Heartbeat
interval – select a checkbox and specify the interval (in seconds)
in which ENQUIRE_LINK requests are sent to verify the connection. The
default zero means no requests will be sent.
- Click
Save.
Note that any service policy changes will not be applied immediately. It will take several minutes until they are propagated to PortaSIP.
3. Configure an SMS vendor
3.1 Create a vendor tariff
This tariff will contain your SMS aggregator’s transmission rates.
- On the navigation menu on the left, select Service catalog and click Tariffs.
- Click +Tariff and fill in the tariff details:
- Name – type a short name for the tariff object; this is the name you will see in the select menus, e.g., SMS transmission costs.
- Currency
– choose the currency in which the vendor charges you.
The currency for the tariff may be chosen only once, and cannot be changed later.
- Service – choose Messaging Service here.
- Format – leave the default E.164 format. If your SMS provider supports the E.212 format, select E.212 from the list.
- Applied to – select Vendor.
- Routing
– turn on the toggle to enable the Routing.

- Click Save&Edit.
- Open the Rates tab. Upload per-destination sending rates provided by your SMS aggregator from a .CSV or .XLS file. As messaging services are charged per message, the rating parameters will be as follows:
- Rate code – a mobile network prefix
- Unit price – price per message (e.g., $0.01)
Please consult the Rate import section for more details.
Perform the same steps described above until you create tariffs with termination costs for each transmission partner you have.
3.2 Create a vendor
- On the navigation menu, select Infrastructure, then select Vendors.
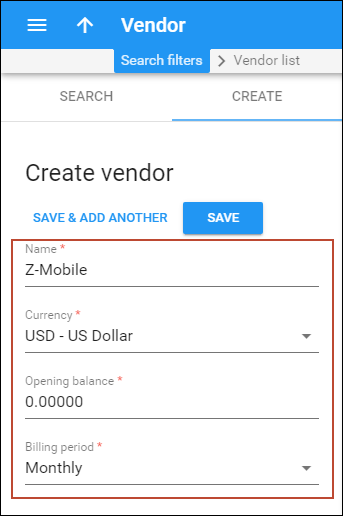
- On
the Create vendor panel, fill in the vendor details:
- Name – type a short name for the vendor object; this will be used on the web interface (i.e Z-Mobile).
- Currency – choose the currency in which this vendor charges you.
- Opening balance – this indicates a starting balance for the vendor; the default is zero.
- Billing period – split period for vendor statistics.
- Click
Save.
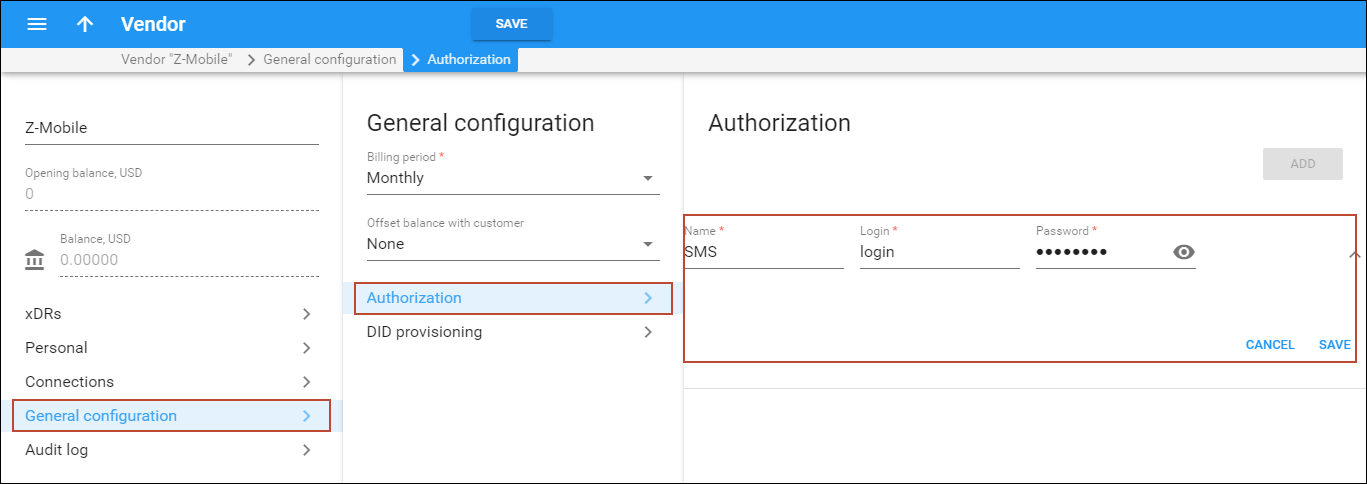
When a message is sent from your network to the vendor’s gateway, the vendor performs an authorization for the message. The vendor will provide you with a username and password to use for message authorization. These credentials should be stored with the “vendor authorization” info and then associated with a specific connection so that they can be used during actual message transmission.
- In
this case, it is necessary to create an account for digest authorization
of outgoing messages:
- On your vendor’s panel (Z-Mobile), click General configuration, then click Authorization.
- On the Authorization panel, click Add and enter the credentials provided by the vendor.
- Click
Save.
3.3 Define a connection
This connection represents the point from which messages leave your network and are directed to the SMS provider where charges are incurred.
- On your vendor’s panel (Z-Mobile), click Connections.
- On
the Create connection panel, fill in the connection details:
- Description – type a descriptive name for this connection. It will be displayed in the list of connections.
- Service type – select Messaging.
- Type of connections – select SMPP.
- Tariff – select the tariff that defines your termination costs for this connection/vendor (SMS transmission costs).
- Active
– use the slider to set this connection as active.

- Enter the Gateway ID (the IP address of the vendor’s SMS gateway).
- Port – specify the port of the SMS provider’s gateway through which SMS will be delivered to this provider. The default SMPP port is 2775.
- Select the corresponding service policy for this connection from the Service Policy list.
- Click Save.
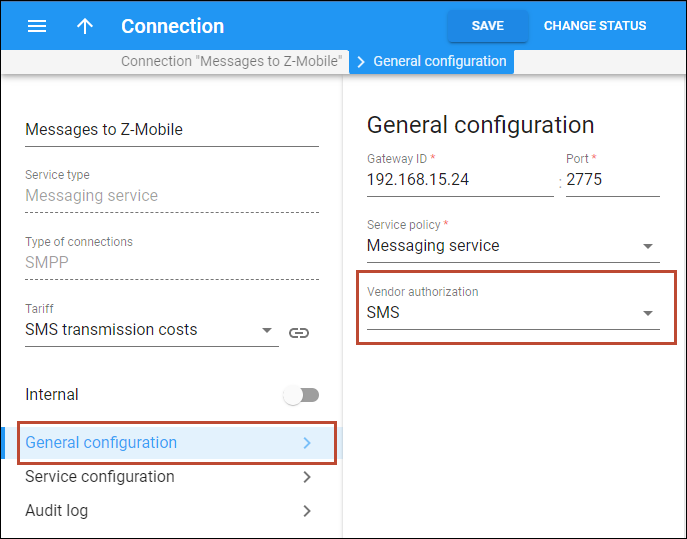
- On the Connection panel, select General configuration.
- On
the General configuration panel, select the vendor authorization
that you have created (SMS) from the Vendor authorization list.
- Click Save.
4. Set up the product
4.1 Create a customer tariff
This tariff will contain your customer’s rates for sending SMS.
- On the navigation menu on the left, select Service catalog and click Tariffs.
- Click + Tariff and fill in the tariff details:
- Name – type a short name for the tariff object; this is the name you will see in the select menus (i.e., SMS costs).
- Currency
– indicates the currency in which you charge your customers.
The currency for the tariff is chosen only once and cannot be changed later.
- Service – choose Messaging service here.
- Format – leave the default E.164 format.
- Applied to – select Customer.
- Managed
by – select Administrator only.

- Click Save&Edit.
- Open the Rates tab. To add a rate, click + Rate, and fill in the rate details.
-
- Rate
code – a phone prefix may be entered directly (e.g., 42060
for the Czech Republic Mobile) or you can select it from the dropdown list.
You should add rate codes to the system before creating a rate for them in the tariff.
- Unit
price – price per message (e.g., $0.025).

- Rate
code – a phone prefix may be entered directly (e.g., 42060
for the Czech Republic Mobile) or you can select it from the dropdown list.
- Click Save.
- Repeat these steps if you need to enter more rates.
4.2 Configure the product
To allow your customers to use the service, it is necessary to include it in the services configuration for the appropriate products. Since our example assumes that voice calls and instant messaging services have already been configured for the product, it is only necessary to add a ration entry for the SMS.
- On the navigation menu on the left, select Service catalog and click Products.
- Select the product that you wish to modify.
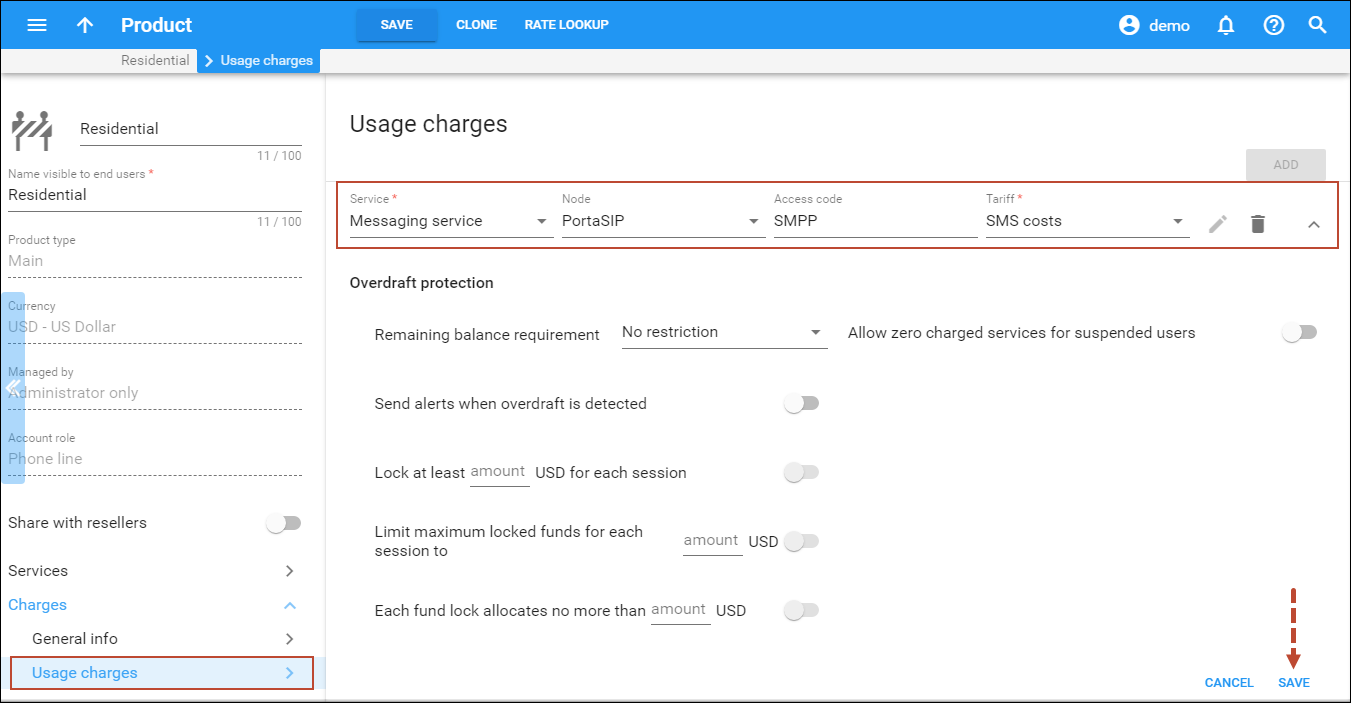
- On
the Product panel, click Charges, Usage charges and
then click Add:
- Select Messaging service from the Service list.
- Select the PortaSIP node in the Node field.
- Type SMPP in the Access code field.
- In
the Tariff field, select the tariff that applies to your customers
for sending SMS (e.g., SMS costs).
- Click
Save.
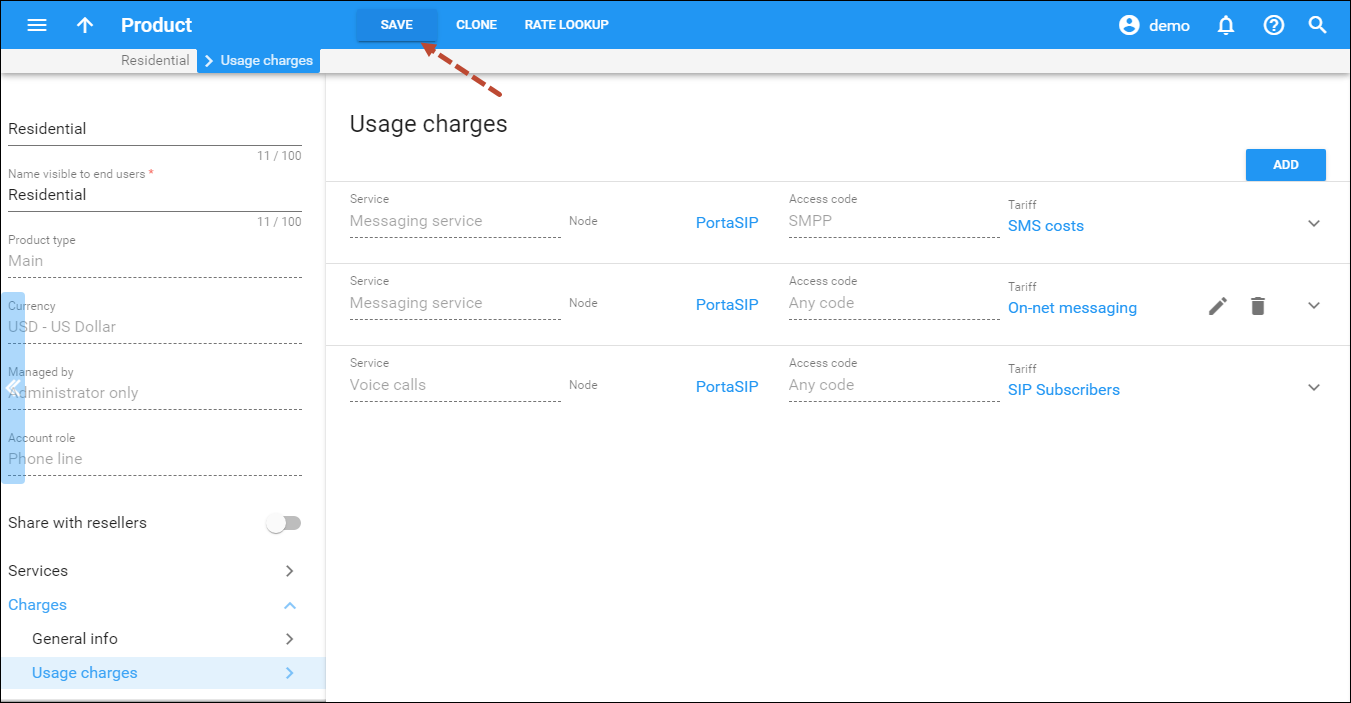
Now your SIP subscribers who have this product can send SMS in addition to VoIP and Instant messaging services.
5. Testing
Configure the messaging client as described in the Instant messaging services handbook and send an SMS.


