



The steps below for provisioning DIDs are the same whether you are an administrator or a reseller.
... Add a DID number as an account alias via on-demand DID provisioning
For example, if you want to add a UK DID to a customer’s account, you can add it as an alias.
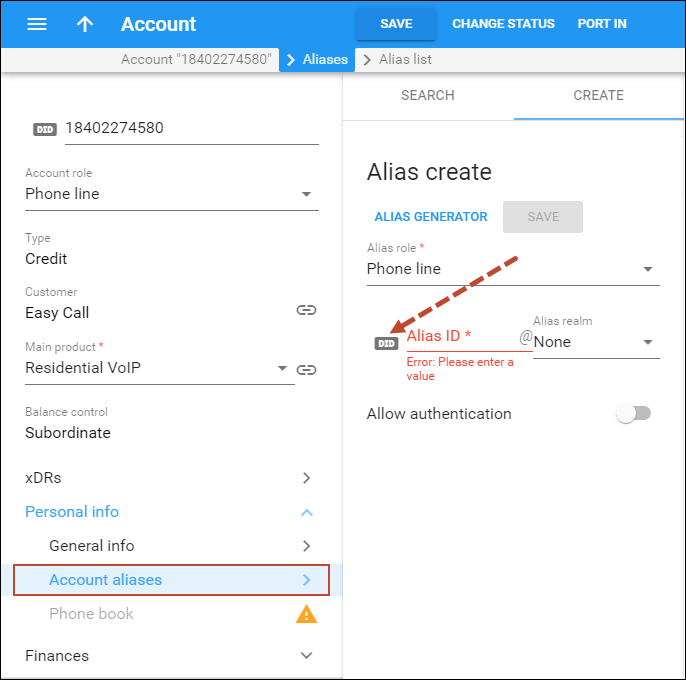
- Open the edit Account panel, click Personal info and select Account alias.
- On the Alias create, specify the account’s details:
- Alias role – select Phone line here.
- Alias ID – click the
 button to add a DID number as an alias:
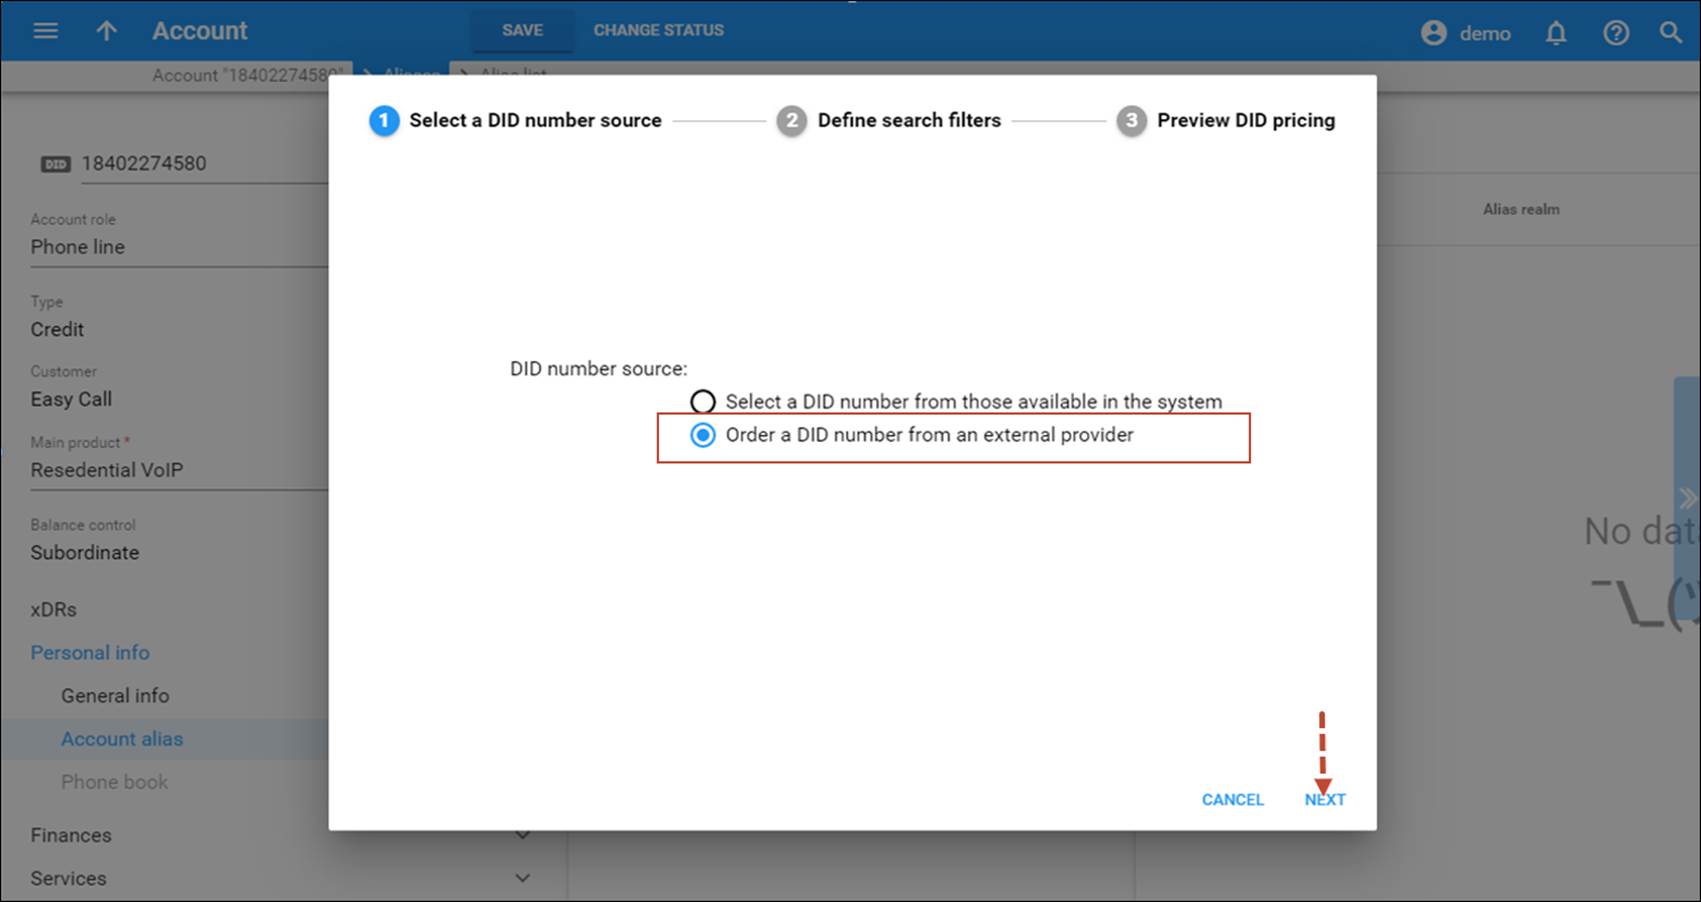
- When the Select a DID number source dialogue window opens, select Order a DID number from an external provider. Click Next.
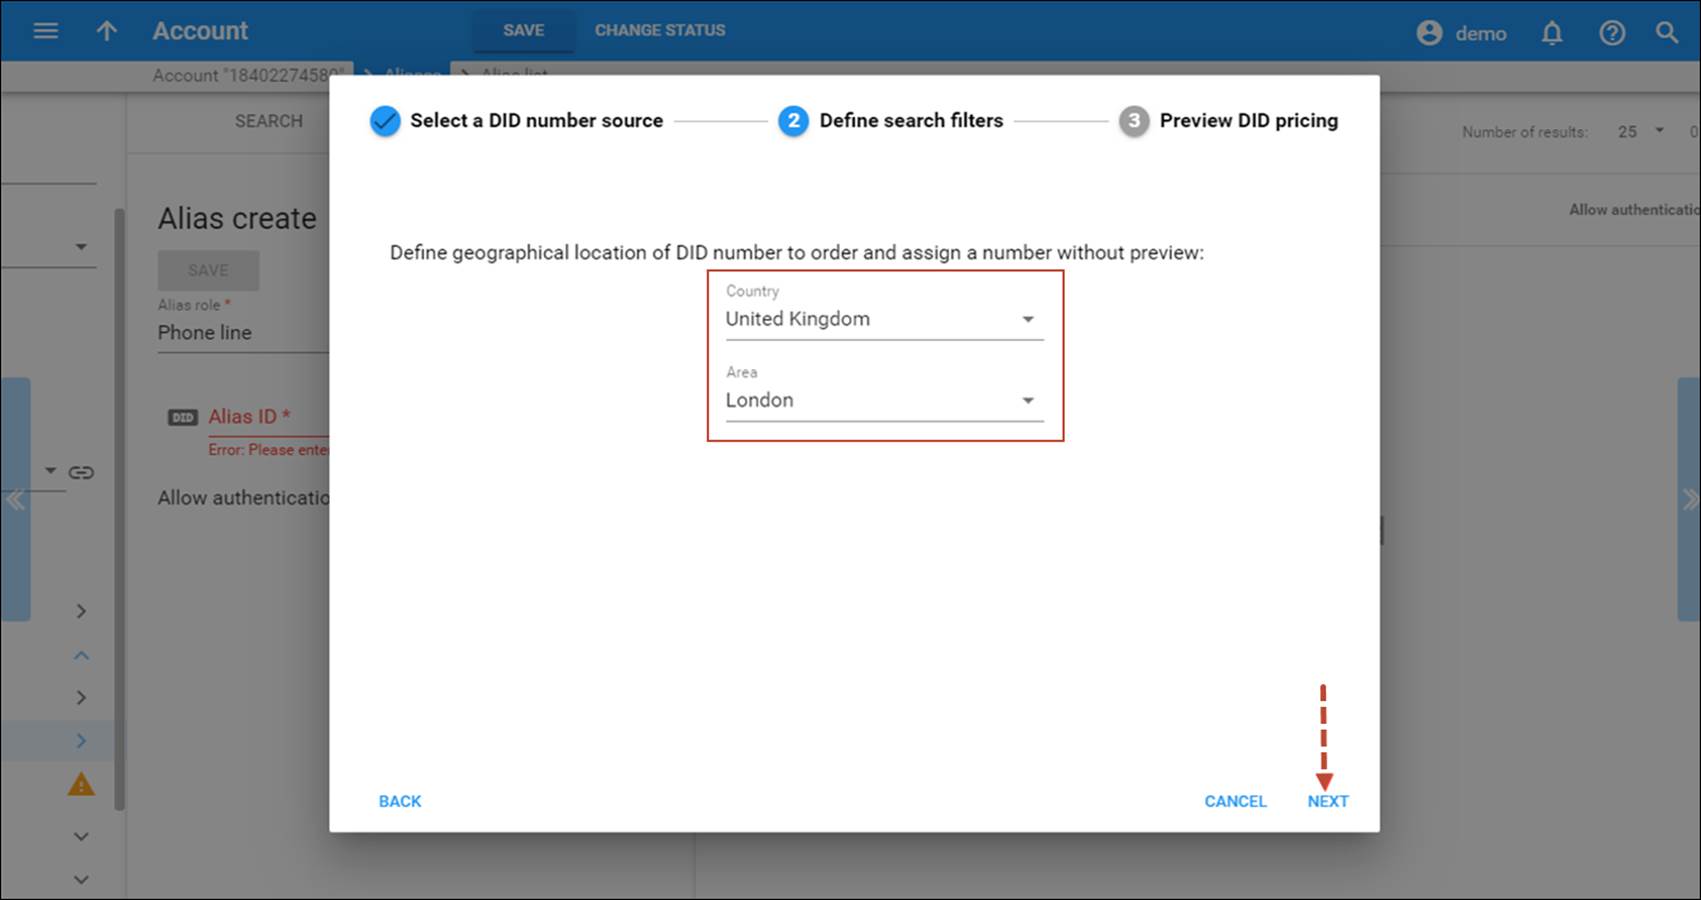
- On the Define search filters panel that opens, define geographical location of DID number. Click Next.
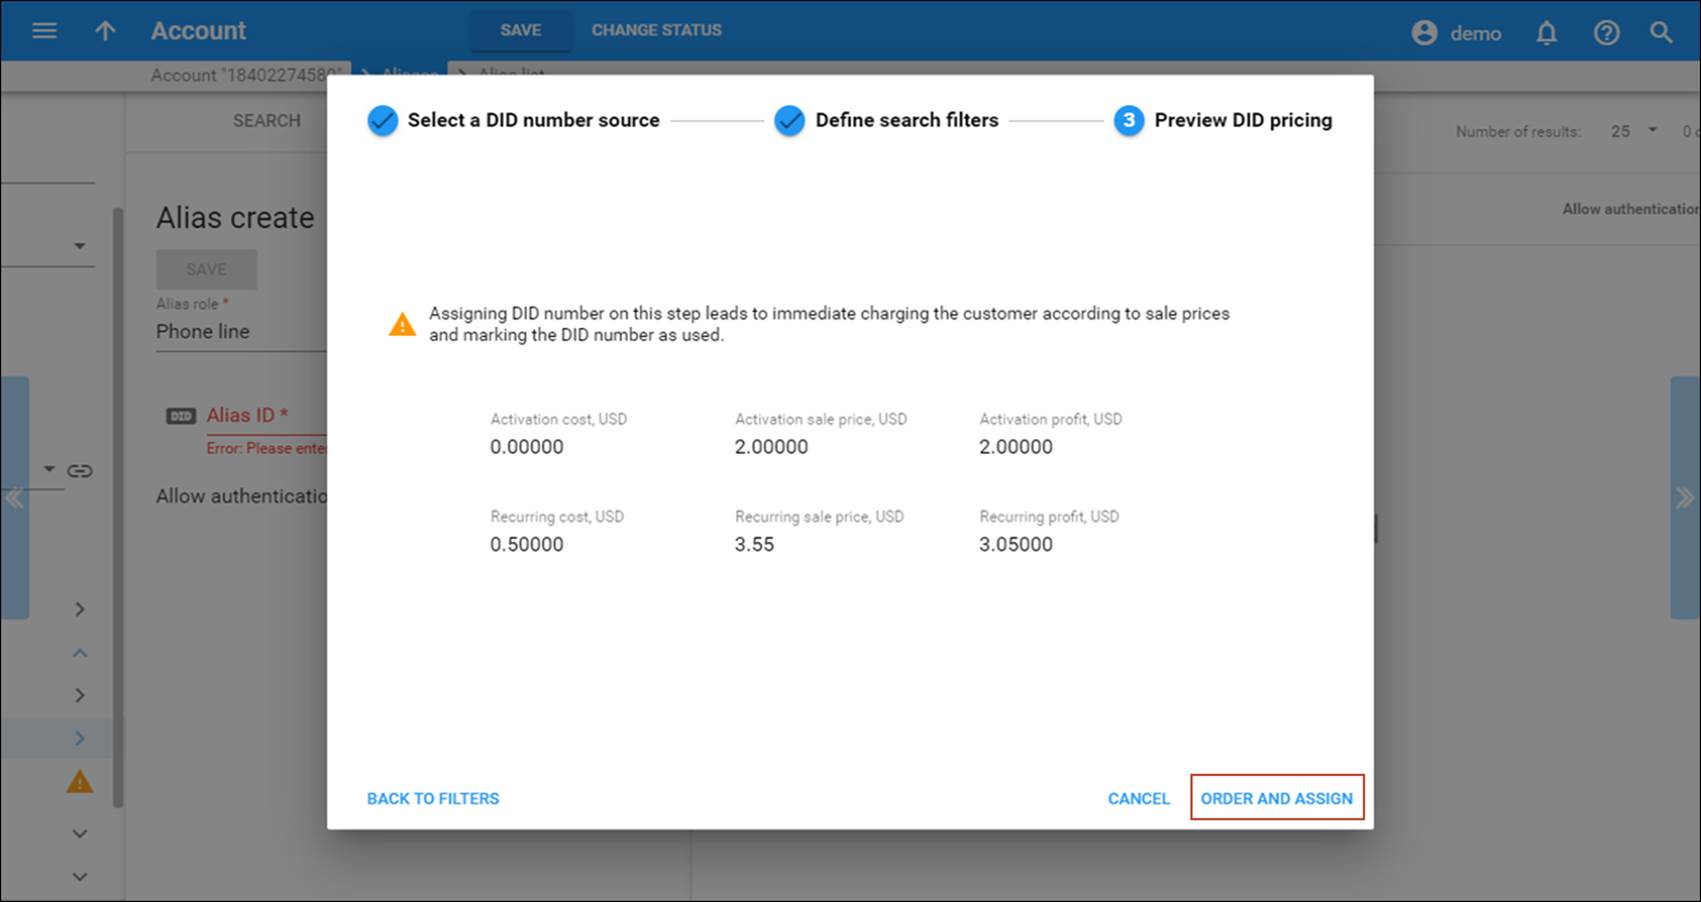
- On the Preview DID pricing panel, check the charges associated with the DID number and click Order and assign.
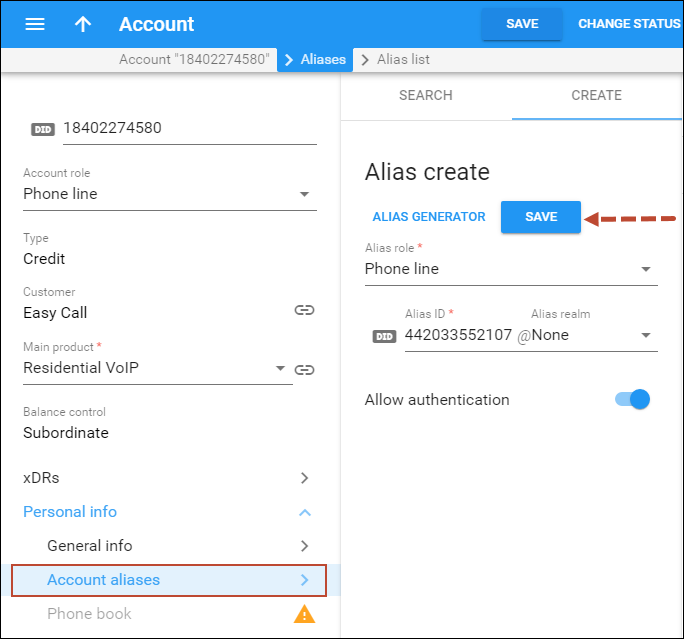
- Click Save.
- Repeat steps 2–4 to add additional aliases.
… Define individual pricing for DID
Let’s say your customer asks for an individual price when purchasing a DID number. To grant his request, modify the DID markup following the steps below:
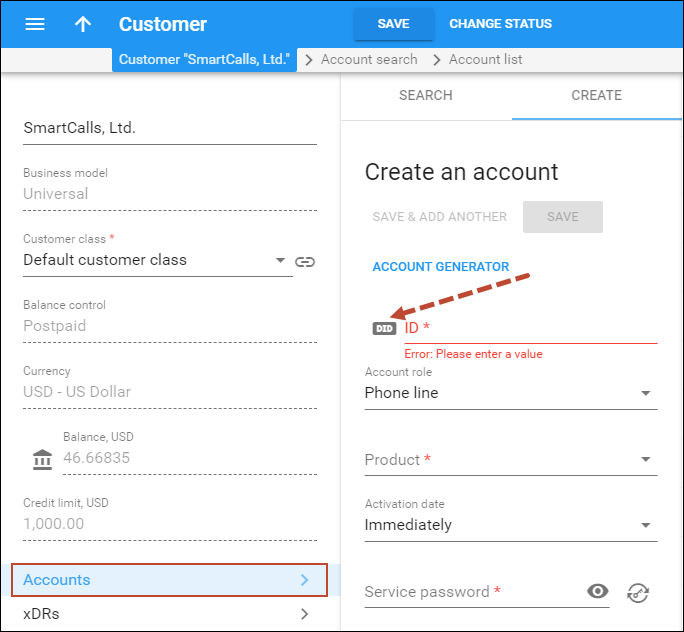
- Create an account for the customer:
- On the Create an account panel, specify the account’s details:
- Account role – The defined usage for accounts. Select Phone line from the list.
- ID – click the
 button to select a DID number from the available DID numbers list:
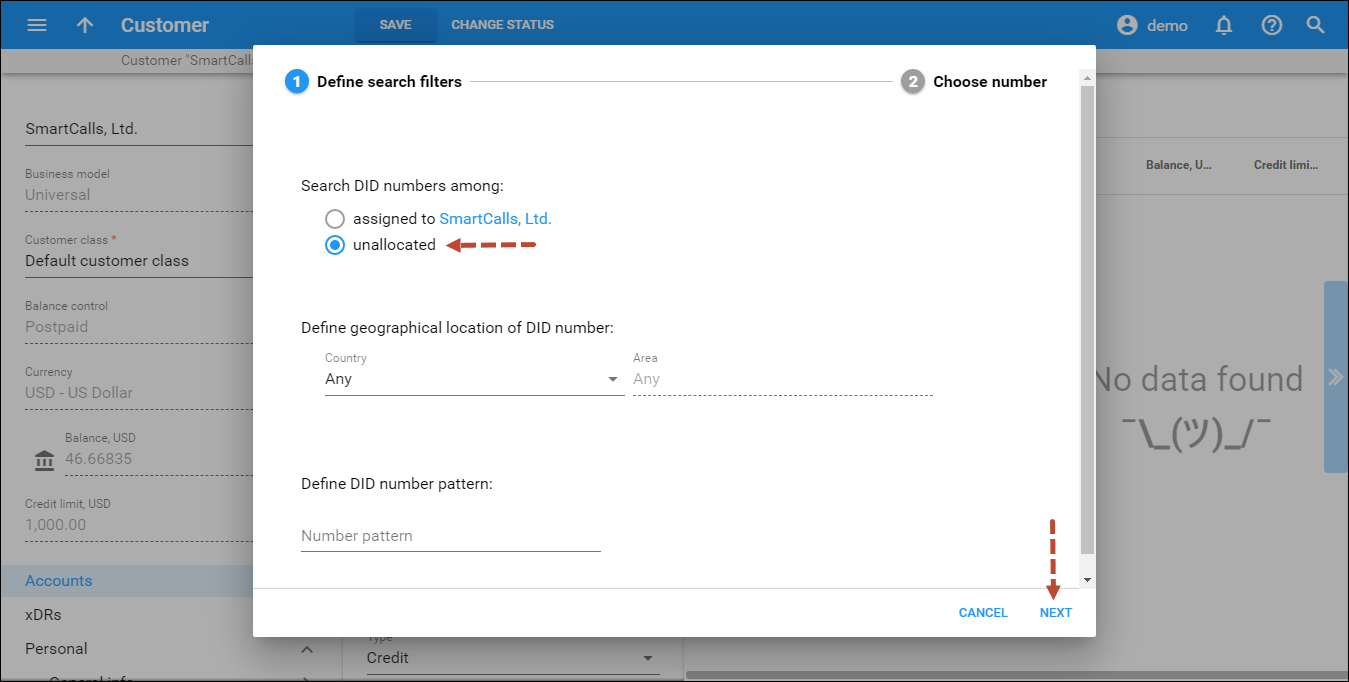
- When the Define the search filters dialogue window opens, select to search through DIDs available in DID pool. Click the Next button.
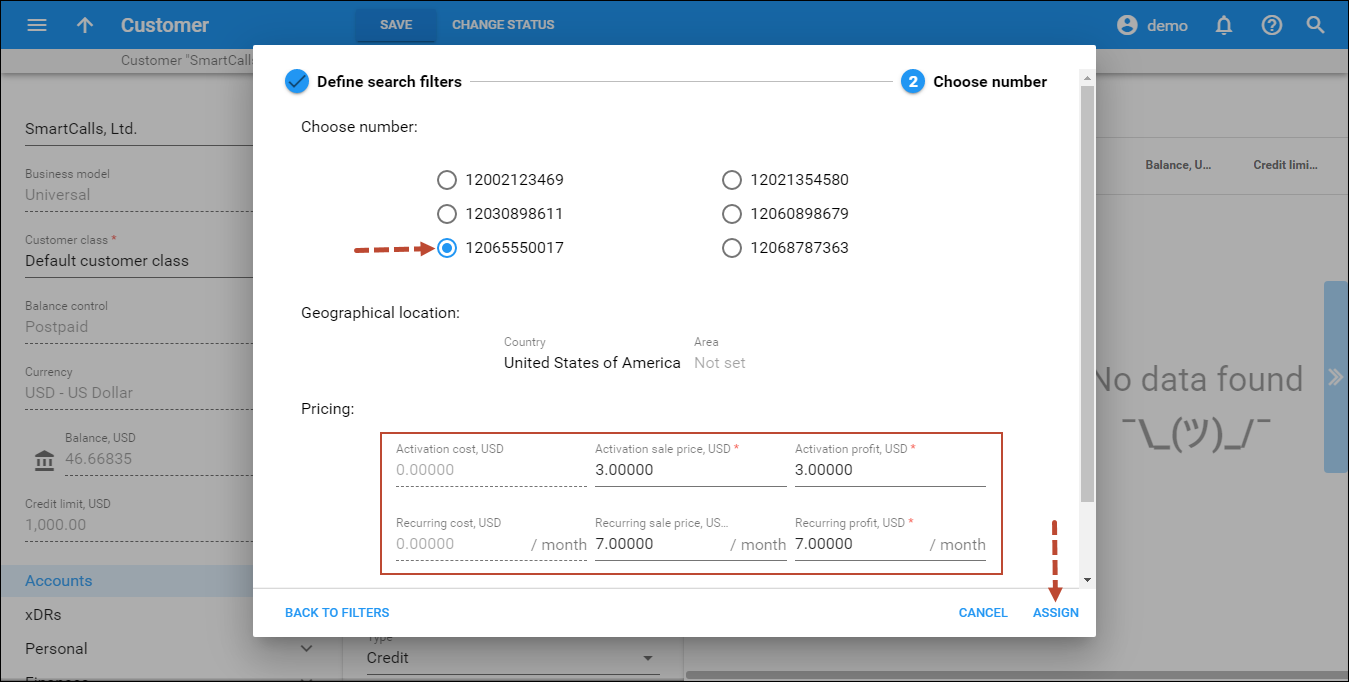
- On the Choose number panel that opens, select a DID number. Specify new fees in the Pricing section. Click the Assign button.
- When the Define the search filters dialogue window opens, select to search through DIDs available in DID pool. Click the Next button.
- Click Save.
… Allow subresellers to provision DID numbers
These actions are performed by resellers.
For example, you want to expand your DID provisioning network. Therefore, you allow your subreseller Panda Telecom to access the DID pool and provision these DID numbers to their customers. You want to receive a $3 activation fee and a $5 monthly recurring fee for every DID number provisioned by Panda Telecom.
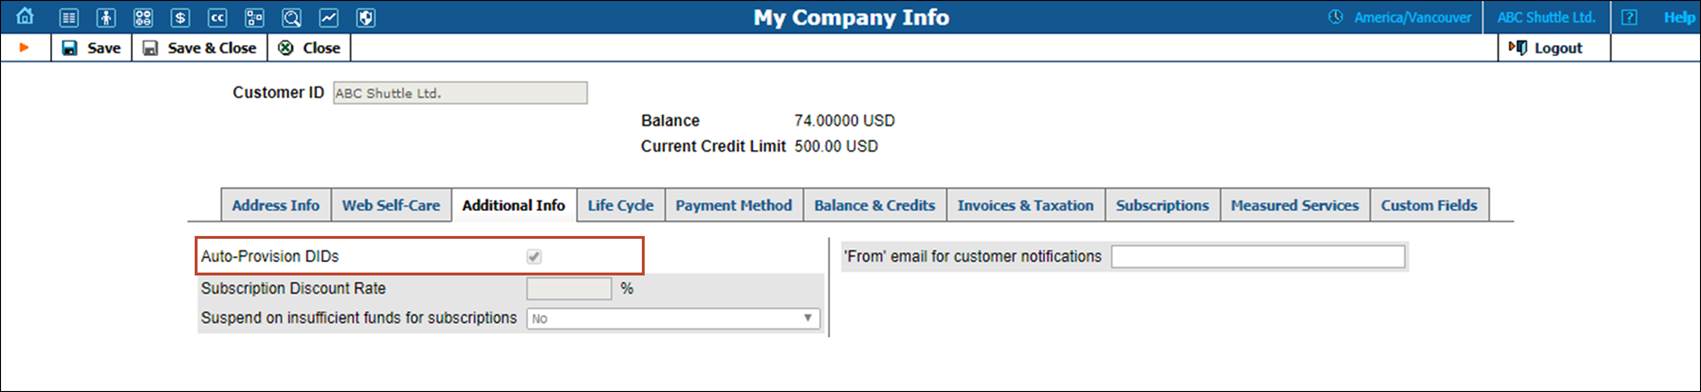
To allow DID provisioning for subresellers, perform the following steps:
- Create a DID pricing batch for the subreseller and define the DID markup within it.

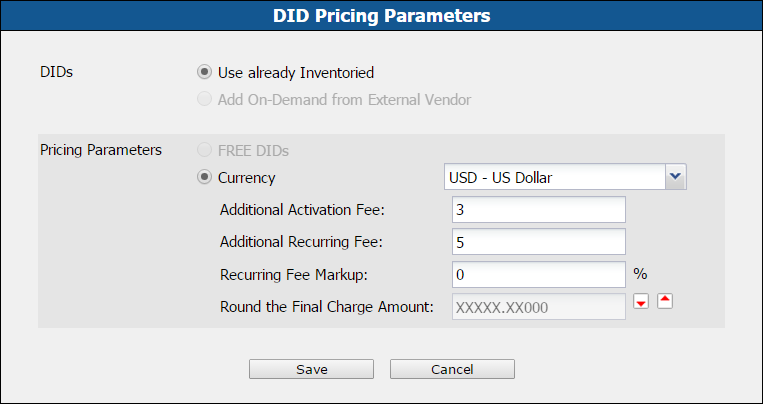
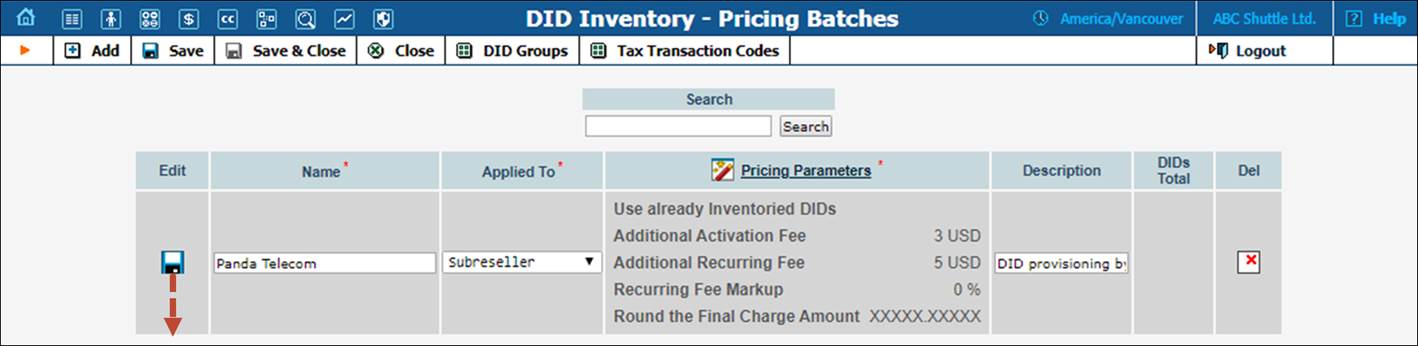
- Assign the pricing batch to the subreseller.
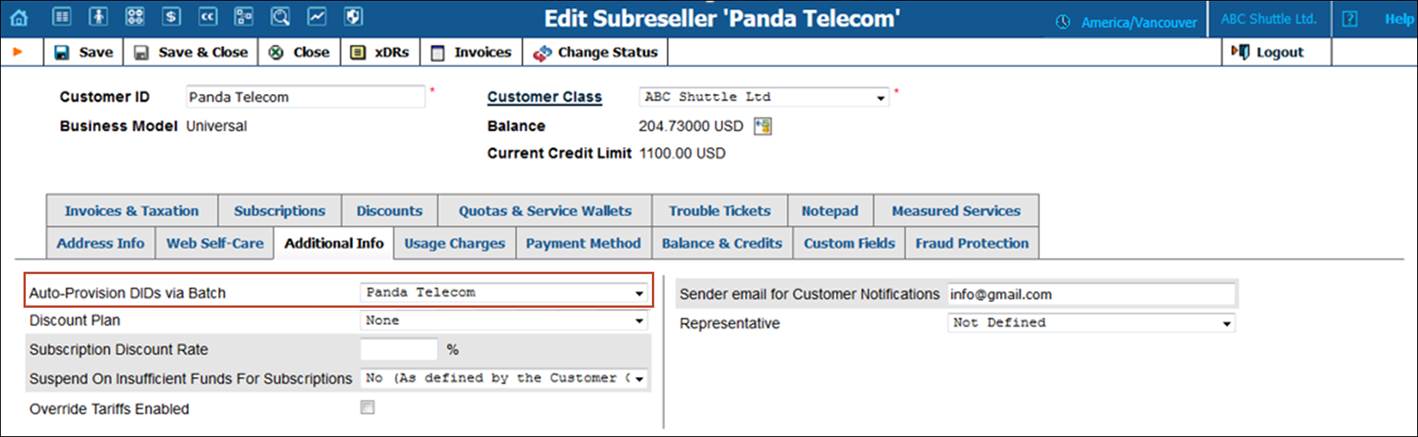
Further actions for DID provisioning are performed by the subreseller as described in the Operations to be performed by the reseller section of the DID provisioning for reseller (DID inventory) handbook.
…Upload a block of DIDs pre-purchased from an external vendor (DIDWW or DIDX) and assign them to a customer
- Create a vendor batch.
Navigate to Infrastructure > Inventory > DID/MSISDN inventory > Vendor batches, click Add, and fill in the vendor batch details:
- Name – type a vendor batch name.
- Vendor – choose DIDWW or DIDX.
- Description – you can add a comment about this vendor batch.
- Upload the block of pre-purchased DIDs into this batch.
Such blocks of DID numbers must not be released to the pool. If released, they are considered unassigned and will be deleted from the system.
- Create a pricing batch.
Navigate to Infrastructure > Inventory > DID/MSISDN inventory > Pricing batches, click Add, and fill in the pricing batch details:
- Name – type in a short name for the pricing DID batch object.
- Applied to – select Customer, since this is the batch that will be used for charging customers.
- Type of DIDs – select On-demand from external vendor option.
- Vendor – select DIDWW or DIDX.
- Assign the pricing batch to a customer for auto-provisioning.
Open the customer page, navigate to Personal > General > Additional info, and select a previously created pricing DID batch in the Auto-provision DIDs via batch field. Click Save.

- Allocate DID numbers to the customer.
Navigate to Infrastructure > Inventory > DID/MSISDN inventory > DID numbers list, and select the required DIDs. Select Assign the DID to the customer checkbox, and select the customer. Click Update DIDs.

Click Save.

Specify other pricing parameters.



