This panel displays the list of sessions that match your search query.
Each entry in the session list consists of:
Link to open the log
Click Show ![]() to view the log for this session. You will be redirected to the Log viewer page.
to view the log for this session. You will be redirected to the Log viewer page.
Account ID
The account ID identifies a user in PortaBilling. This is also a link that redirects you to the corresponding account page.
From (CLI)
The originating phone number (ANI).
To (CLD)
The destination phone number (DNIS).
Start time
The date and time when the session started.
End time
The date and time when the session ended.
Duration, mm:ss
The duration of the session.
Status
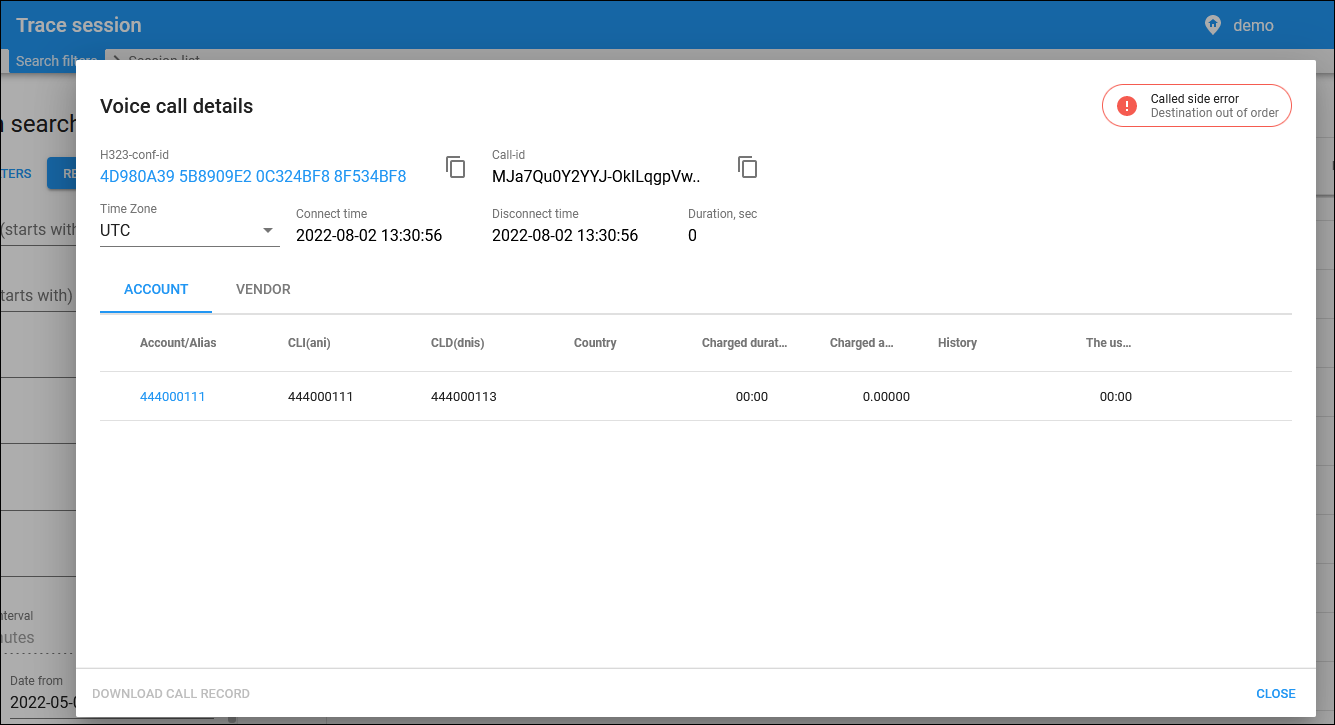
The status of the session can be “Completed” or “Failed”. For voice calls, the reason for disconnection can be shown (e.g., Normal call clearing or Destination out of order).
Details
Click View session details to see the additional details about the session such as session status and/or error code, duration, etc. Switch between the tabs in the dialog to see the session details for an account, reseller, and vendor.
Connection
The name of the used connection (displayed only in case of normal vendor termination). This is also a link that redirects you to the corresponding connection page.
Service type
The type of service provided: Voice calls, Internet access, Messaging service, Wi-Fi, Conferencing.
Customer name
The name of the customer the account belongs to. This is also a link that redirects you to the corresponding customer page.
Source IP
The IP address the call originated from or sent to.
Vendor
The name of the used vendor (displayed only in case of normal vendor termination). This is also a link that redirects you to the corresponding vendor page.
Customize the panel
- Change table settings – click Settings
in the title bar to customize columns and change row style.
- Re-order the columns – drag-and-drop the column headers right or left to place the columns in the order you want.
- Re-order the rows – click Arrow
(or
) next to the column header to re-sort the rows. For example, the Session list panel displays sessions in alphabetic order. You can re-sort them in the reverse order.
- Change the default number of results globally – use the Number of results dropdown list in the upper right corner to adjust the maximum number of rows that appear on the panel. By default, the panel displays 25 rows. Once the number is changed, it's automatically saved, so the same number of rows is shown for PortaBilling entities, e.g., customer, account, reseller, etc.


