



This handbook demonstrates how a Mobile Virtual Network Operator (MVNO) can configure LTE service in PortaBilling.
PortaBilling is integrated with a variety of LTE network equipment such as Packet Data Network Gateway (P-GW), and Home Subscriber Server (HSS) which belong to the Evolved Packet Core (EPC) architecture. The configuration steps may vary based on the type of equipment used.
For managing user access to the Internet and implementing content-based charging, the LTE network typically includes the Policy and Charging Rules Function (PCRF). MVNOs may use the PCRF provided by their MNO within their LTE network or their own PCRF. The policy rules, such as applying distinct bandwidth limitations for peak and off-peak periods, can be configured either directly on the PCRF or on the PortaBilling side, depending on the specific LTE network setup. Note that to limit bandwidth on the PortaBilling side, the network equipment should be capable of receiving commands about bandwidth from PortaBilling.
In this handbook, we assume that:
- MVNO relies entirely on the LTE network infrastructure of the host Mobile Network Operator (MNO) and uses the PortaBilling system for online charging and billing. When a SIM card is assigned to an account, PortaBilling automatically provisions the SIM card and corresponding account information into MNO’s HSS. Now, once the user attempts to connect to the LTE network with their SIM card, they will be authenticated and the service usage will be allowed.
- The LTE network is deployed using the WTL Packet Data Network Gateway (P-GW). PortaBilling communicates with this gateway via the Diameter (Gy) interface.
- The subscriber data provisioning to WTL’s HSS is performed based on PortaOne Workflows. Events such as SIM card assignment, account blocking/termination, or service package changes trigger corresponding updates in WTL’s system via an API.
- The bandwidth limitations are configured on the WTL’s HSS side and PortaBilling will only notify WTL’s HSS which set of parameters should be used for a specific account via an API. This communication is facilitated by PortaOne Workflows integration.
Example
Suppose you, as an MVNO, offer your prepaid customers a package that:
- Includes 5 GB of mobile Internet (after these 5 GB are used up, the service becomes unavailable).
- Is priced at $10.
- Has a 30-day lifecycle. When the 30-day period ends, a customer automatically receives another 5 GB for $10. If a customer lacks sufficient funds ($10), they will receive another 5 GB only after they top up their balance.
- Allows rollover of unused volume to the next 30-day cycle.
- Provides a bandwidth limitation of 10 Mbps.
Preparation
Before you proceed with the configuration steps, coordinate with your MNO on the following:
- Establish a reliable network connection between the mobile carrier’s core and PortaSwitch (if needed create a VPN connection).
- Decide on the “host” and “realm” values that will be used as your system identifiers in the LTE network, e.g., ocs.company-domain.com as “host” and company-domain.com as “realm.” The MNO’s network equipment should be configured with these identifiers, for the equipment to “know” where to send the Diameter requests (these values will be specified in the Destination-Host and Destination-Realm attribute-value pairs).
These values should also be set on the Configuration server web interface (step 1) within the Origin-Host and Origin-Realm options.
- Obtain the MNO’s network P-GW identifiers to further specify them in the node settings (step 2). These identifiers are sent in the Origin-Host (e.g., node.companywtl.com) and Origin-Realm (e.g., companywtl.com) AVPs in the Diameter requests sent from the LTE network to PortaBilling.
This way, PortaBilling will be able to “understand” which piece of network equipment it’s interacting with. For example, you may use two separate gateways, one for providing regular internet access and another for internet access in roaming, provided at a different rate. In this case, you need to configure these two gateways as two separate nodes and use them in combination with two different tariffs.
The same approach applies when you operate multiple virtual environments in PortaBilling. Configure separate nodes with distinct Origin-Host and Origin-Realm values in each virtual environment so PortaBilling can associate requests with the correct billing environment. - To provide Internet service with a 10 Mbps speed, this value should be set on the WTL’s HSS first. Obtain the ID of the created policy rule and the EPS profile name from MNO.
- The EPS profile value is needed on the Create a service policy step to define the QoS parameters, APN settings, and bearer configurations for a subscriber’s session.
- The policy rule ID is needed on the Create a service policy step. It is matched with the ID of the service policy in PortaBilling to enforce the bandwidth speed limitation via PortaOne Workflows.
Currently, the integration with WTL for LTE service provisioning does not allow the automatic enforcement of different bandwidth limits for peak and off-peak hours. You can only specify one speed limitation per service policy.
Configuration overview
- Setup on the Configuration server web interface
- Create a node
- Enable the external systems provisioning framework
- Create the LTE service
- Create a service policy
- Configure MNO as a vendor:
- Set up the service package:
- Add SIM cards into SIM inventory
- Configure a mobile Internet subscriber:
1. Setup on the Configuration server web interface
To set up LTE service, ensure that the NetAccess service type is enabled in the system, and allow the PortaBilling server and gateway to exchange packages via the Diameter (Gy) protocol.
For this, log in to the Configuration server web interface and perform the following:
1.1 To enable the NetAccess service type, set the BillingEngine.NetAccess.Enabled option to Yes

1.2 To allow billing via the Diameter (Gy) protocol, go to BillingEngine > Diameter group and configure the following global options:
- Enabled – set to Yes
- Origin_Host – specify the “host” value that is configured as your system identifier on the MNO’s network equipment, e.g., ocs.company-domain.com (on the MNO’s side, it’s the Destination-Host value)
- Origin_Realm – specify the “realm” value that is configured as your system identifier on the MNO’s network equipment, e.g., company-domain.com (on the MNO’s side, it’s the Destination-Realm value)
Leave the default values for other fields.

2. Create a node
If you haven’t previously configured the equipment that enables Internet access, such as EPC for 4G LTE or similar, you must add it as a node to enable exchanging charging requests with PortaBilling.
2.1 To add a node for the WTL equipment:
- Navigate to Infrastructure > Nodes.
- Click Add and fill in the node details:
- Name – a short descriptive name for this node (e.g., “LTE Node”)
- Node ID – specify the “host” value identifying the MNO’s network P-GW (on the MNO’s side it’s specified in the Origin-Host AVP, e.g., node.companywtl.com)
- IP – specify the IP address of the MNO’s P-GW. Since the node is identified solely by the Node ID, PortaBilling will not use the specified IP address, so you can specify a “dummy” value.
- Manufacturer – select “PortaOne”
- Type – select “Generic”
If the LTE network is built based on other equipment communicating via the Diameter protocol, select the respective manufacturer and type.

2.2 Enable communication with PortaBilling via the Diameter protocol:
- Go to Node > Communication with billing.
- Turn on the Enable the communication with billing toggle
- Fill in the details:
- Client protocol – select Diameter
- Realm – specify the “realm” value identifying the MNO’s WTL P-GW (on the MNO’s side it’s the Origin-Realm value, e.g., companywtl.com)
- Use Re-Auth-Request – turn off the toggle

- Click Save.
3. Enable the External Systems Provisioning Framework
PortaBilling uses the External Systems Provisioning Framework (ESPF) to automatically notify the mobile core network when a new SIM card should be activated for a specific account and which policy rule to apply. The ESPF captures changes in the account configuration within PortaBilling and sends provisioning events, such as “SIM card has been assigned to an account” or “account product has changed,” to the mobile core network. Then, a code written by PortaOne or a third party translates those events into changes in the mobile core network, such as creation of a new record representing a SIM card with a specific IMSI in HLR/HSS.
For the step-by-step instruction on how to configure ESPF handlers and enable sending the needed events to the mobile core network, refer to the ESPF configuration handbook.
The integration with WTL infrastructure operates via the following EventSender handler:
- Account/Blocked
- Account/Unblocked
- Account/Product/Changed
- Account/ProductAddon/Inserted
- Account/ProductAddon/Changed
- Account/ProductAddon/Deleted
- Account/Id/Changed
- SIMCard/StatusChanged
4. Create the LTE service
In PortaBilling, a service defines how charges are calculated (e.g., whether customers are charged based on the time they stay online or by the amount of data transferred) and how the service is presented on self-care portals such as Mobile Account Self-Care Portal.
To add a new service:
- Navigate to Service catalog > Services.
- Click + Service and fill in the details:
- Name – specify a short descriptive name for this service that will be used in select menus and shown on the self-care portal (e.g., “LTE”)
- Type – select Internet access
- Rating base – select upload+download (kilobytes)
- Base unit – specify kilobyte
- Billing unit – specify megabyte
- Base ratio – specify 1024
- Usage charge – select Yes
- Tax code – select the needed tax code for the LTE service

- Click Save.
5. Create a service policy
In the given example, a bandwidth limitation is set to 10 Mbps. As this value is configured on the WTL’s HSS, you just need to create a PortaBilling service policy that will be matched with WTL’s service policy via PortaOne Workflows
To create an internet access policy in PortaBilling, follow these steps:
- Navigate to Service catalog > Service policies.
- Click + Policy and fill in the details:
- General tab:
- Select Internet access type
- Name – specify a descriptive name (can be any)
- Managed by – select Administrator only

- Attributes tab:
- Go to WTL HLR/HSS
- Click the EPS profile field and specify the EPS profile’s name received from MNO

- General tab:
- Click Save.
6. Configure MNO as a vendor
In the PortaBilling system, the MNO is configured as a “vendor.” A tariff needs to be specified for a vendor to calculate the costs incurred for utilizing the MNO’s network resources and store the corresponding xDRs (extended Detail Records) for reconciliation purposes. If you don’t intend to calculate costs, specify zero “0” rate for the vendor tariff.
6.1 Create a vendor tariff
- Navigate to Service catalog > Tariff
- Click + Tariff and fill in the tariff details:
- Name – specify a descriptive name for the tariff, e.g., “Vendor LTE tariff,” which will be used within the system
- Currency – choose the currency in which the vendor charges you
The currency for the tariff may be chosen only once and cannot be changed later.
- Service – select the service “LTE service” created at step 4
- Applied to – choose Vendor

- Click Save&Edit to add rates to the tariff.
- Go to Rates and click + Rate.
- On the Add rate panel, fill in the rate details:
- Rate code – specify “NETACCESS”
To add a rate, you need a rate code. For the LTE service, use a symbolic NETACCESS rate code. Make sure that the NETACCESS rate code has been added to the system (special rate codes are included in a default code set provided by PortaOne). See more detail on how to create rate codes in the Initial configuration of PortaBilling handbook.
- Rating mode – select Flat rate
- Rounding – leave the default “1” value for this example. See more info on the Rounding option in the UI help
- Unit price – price per billing unit (in this example, per megabyte). You can specify “0”

- Rate code – specify “NETACCESS”
- Click Save.
6.2. Create a vendor
This step is only required if you have not entered vendor information in the system before.
- Navigate to Infrastructure > Vendors.
- Click + Add and fill in the vendor details:
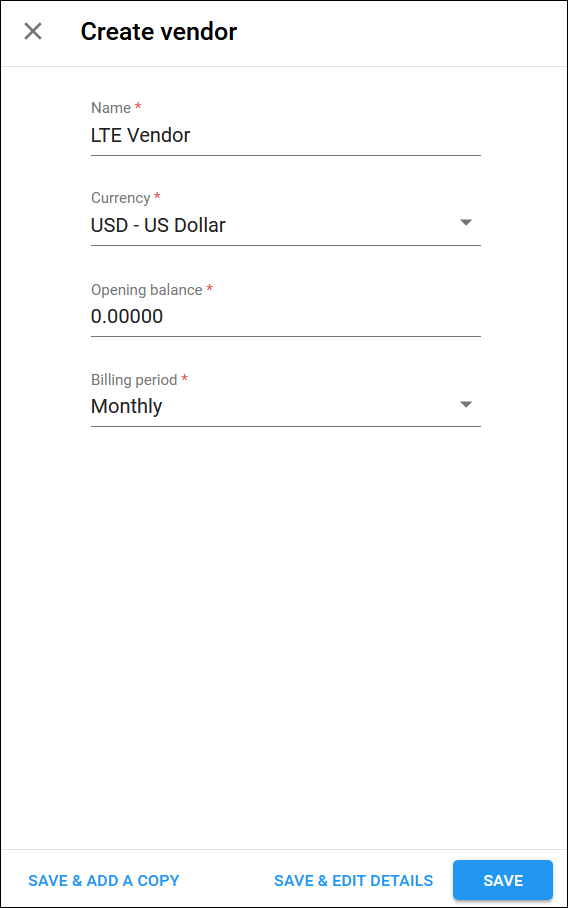
- Name – specify a descriptive name for the vendor (e.g., “LTE Vendor”)
- Currency – leave the base currency
- Opening balance – this option is usually used when you migrate a vendor from a legacy system to PortaSwitch. Leave “0” here
- Billing period – choose a billing period for the vendor. A billing period defines how often the vendor will bill you, e.g., monthly
- Click Save.
6.3 Define a vendor connection
- Open Vendor > Connections.
- Click Add and fill in the connection details:
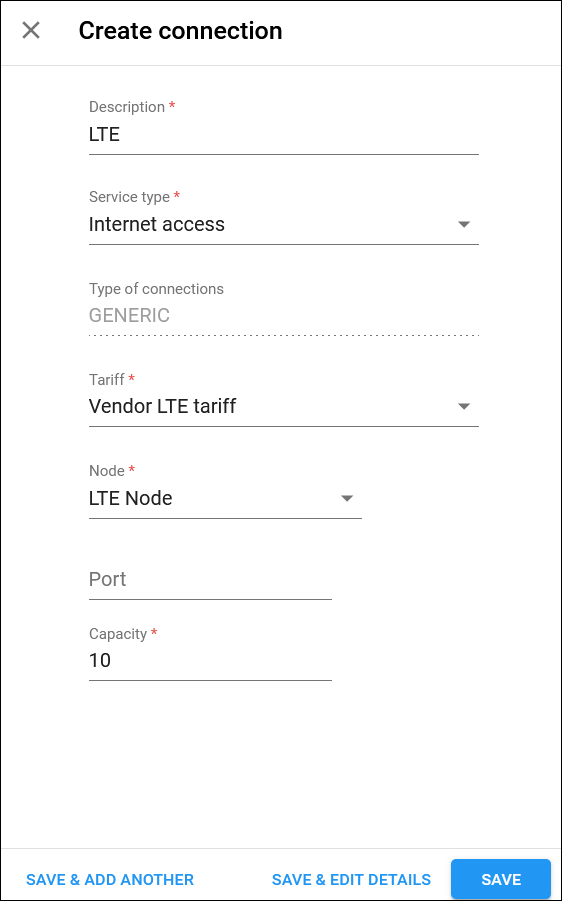
- Description – type in a short description for this connection (e.g., “LTE”)
- Service type – select “Internet access”
- Tariff – select the vendor tariff that you created at step 6.1
- Node – select the LTE node that you created at step 2
- Capacity – specify the maximum number of sessions you anticipate handling on this gateway in the near future. This parameter is only used for correctly scaling the load graph for the connection
- Click Save.
7. Set up the service package
To provide LTE service to your customers as described in the example, you need to create a Product that includes:
- A Tariff with at least one rate, as it should always be included in any main product in PortaBilling.
- A Bundle with the internet service volume 5 GB.
7.1. Create a customer tariff
- Navigate to Service catalog > Tariffs.
- Click + Tariff and fill in the tariff details:
- Name – type in a short name for the customer tariff; this name will be shown within the system
- Currency – select the currency in which you will charge your customers
- Service – select the service created at step 4 (“LTE”).
- Applied to – select Customer as this tariff will be used to charge your customers
- Managed by – select Administrator only

- Click Save&Edit to add rates to the tariff.
To add a rate, you need a rate code. For the LTE service, use a symbolic NETACCESS rate code. Make sure that the NETACCESS rate code has been added to the system (special rate codes are included in a default code set provided by PortaOne). See more detail on how to create rate codes in the Initial configuration of PortaBilling handbook.
- Go to Rates and click + Rate, and fill in the rate details:
- Rate code – type in the NETACCESS rate code directly or select it from the list
- Rating mode – select Flat rate here
- Rounding – leave the default value of “1” for this example. See more info on the Rounding option in the UI help
- Unit price – specify price per billing unit (in this example, per megabyte). If you do not plan to offer pay-as-you-go access beyond the consumed quota, you can specify the unit price as “0”

- Click Save.
7.2. Create a code group set and a code group
In PortaBilling, a bundle (<ahref=”#7-3-create-a-bundle-and-define-the-internet-quota”>step 7.3) always incorporates a code group set, which must consist of at least one code group. A code group may include phone prefixes (e.g., 1206) and/or special rate codes (e.g., NETACCESS) used for the services provided within the bundle. Since in the given example the customers are granted internet service access, only the NETACCESS rate code should be included. To create a code group set and a code group:
- Navigate to Service catalog > Code group sets.
- Click + Add and fill in the required information:
- Name – type in a descriptive name for the code group set (e.g., Internet Access)
- Type – leave the default type Regular

- Click Save&Edit details to open the created code group set.
- Click + Add and fill in the Code group name and description, e.g., “Internet access”.

- Click Save to save the code group.
- To add the NETACCESS code to the created code group:
- On the Code group page, click the default All rate codes group

- On the Rate code search panel, specify the parameters (e.g., format, prefix, country) to find the required rate code in the list and click Apply filters

- On the Rate code list panel, select the prefix you want to include (NETACCESS) in the code group and click Assign to group

- Select the code group (Internet Access) and click Assign. The selected prefixes will be added automatically to the code group

- Click Save.
- On the Code group page, click the default All rate codes group
7.3 Create a bundle and define the internet quota
The internet quota (e.g., 5 GB) that has auto-renewal for a defined renewal fee (e.g., $10) can be provided within a prepaid bundle. To configure a bundle with the quota:
- Navigate to Service catalog > Bundles.
- Click + Add and fill in the bundle details:
- Name – specify a unique bundle name (e.g., “LTE bundle”)
- Currency – select the currency in which you charge your customers
- Code group set – select the code group set created at step 7.2
- Bundle type – select Balance-dependent renewable
- Automatic renewal – select On sufficient funds to automatically renew the bundle if the customer has enough ($10) on their balance
- Amount to activate or renew – specify $10
- Bundle lifetime, days – specify 30 days
- Managed by – select Administrator only
- Apply bundle if a code is found that – leave the default option, Matches the rate exactly
- Description – optionally, you can add a short description for this bundle

- Click Save&Edit.
- Go to Bundle items.
- Click + Add and fill in the bundle item details:
- Click Save&Edit details (you will be redirected to the Bundle item panel).
- Go to Bundle item > Configuration and set up the bundle item according to the given example:
- Set “Block the service” within the If the volume is used up option. This way, the service will become unavailable when the allocated 5 GB are used up.
- Turn the Allow rollovers toggle to allow rolling over the unused volume to the next 30-day cycle.

- Go to Bundle item > Notifications to configure notifications that will be sent to customers:
- Notify end users when remaining service volume – set a specific value to notify a customer when their remaining service volume drops, e.g., to 1 GB
- Service volume is depleted – turn on the toggle to notify customers when the allocated service volume (5 GB) is depleted

- Click Save.

7.4 Create a product
Create a product which will be assigned to accounts for service provisioning:
- Navigate to Service catalog > Products.
- Click Add and fill in the product details:
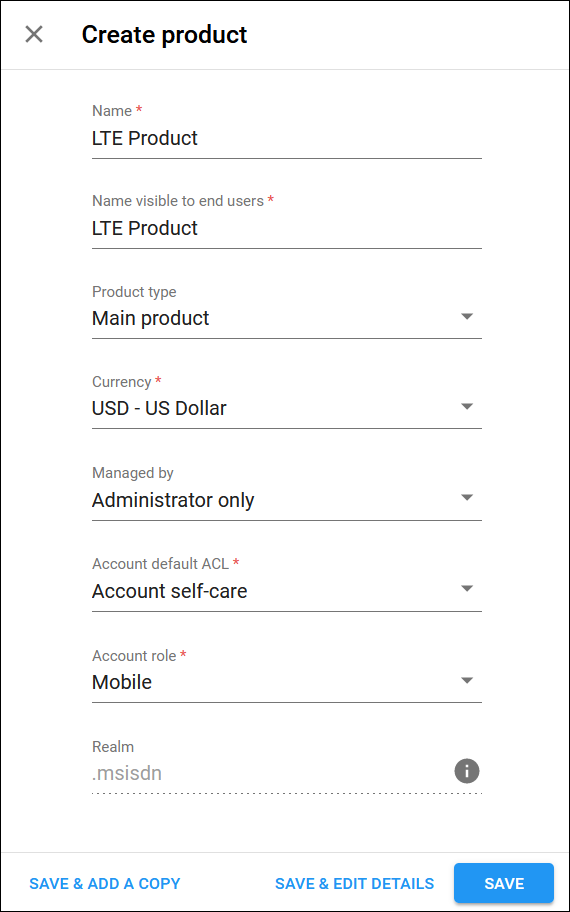
- Name – type in a short name for the product; this name will be used within the system
- Name visible to end users – specify the name of this product that your customers will see on their self-care web interface
- Product type – select Main product here
- Currency – choose a currency the product will be priced in
- Managed by – select Administrator only here, since we are setting up a service without the involvement of resellers
- Account default ACL – choose an Access Control List (ACL) for accounts with this product assigned. ACLs control which objects end users can access and which actions they can perform
- Account role – select Mobile to associate this product with mobile subscribers
- Click Save.
- Go to Product > Services and click Add to select services included in the product. For this product, you need to include the LTE service created at step 4.

- To configure the LTE service, click Internet Access and fill in the details:
- Session limit – turn on the toggle if you need to define the limit for simultaneous sessions
- Access policy – turn on the toggle and select the service policy created at step 5

- Configure general info:
- Go to Product > Charges > General info and fill in the details:
- Overdraft protection – leave the toggle turned on (turning off the overdraft protection is not recommended for general use)
- Default bundle – select the bundle created at step 7.3
- Click Save.
- Go to Product > Charges > General info and fill in the details:
- Configure usage charges:
The rating list has two functions: it defines permitted access points (nodes and access numbers) and specifies which tariff should be used for billing in each of these points.
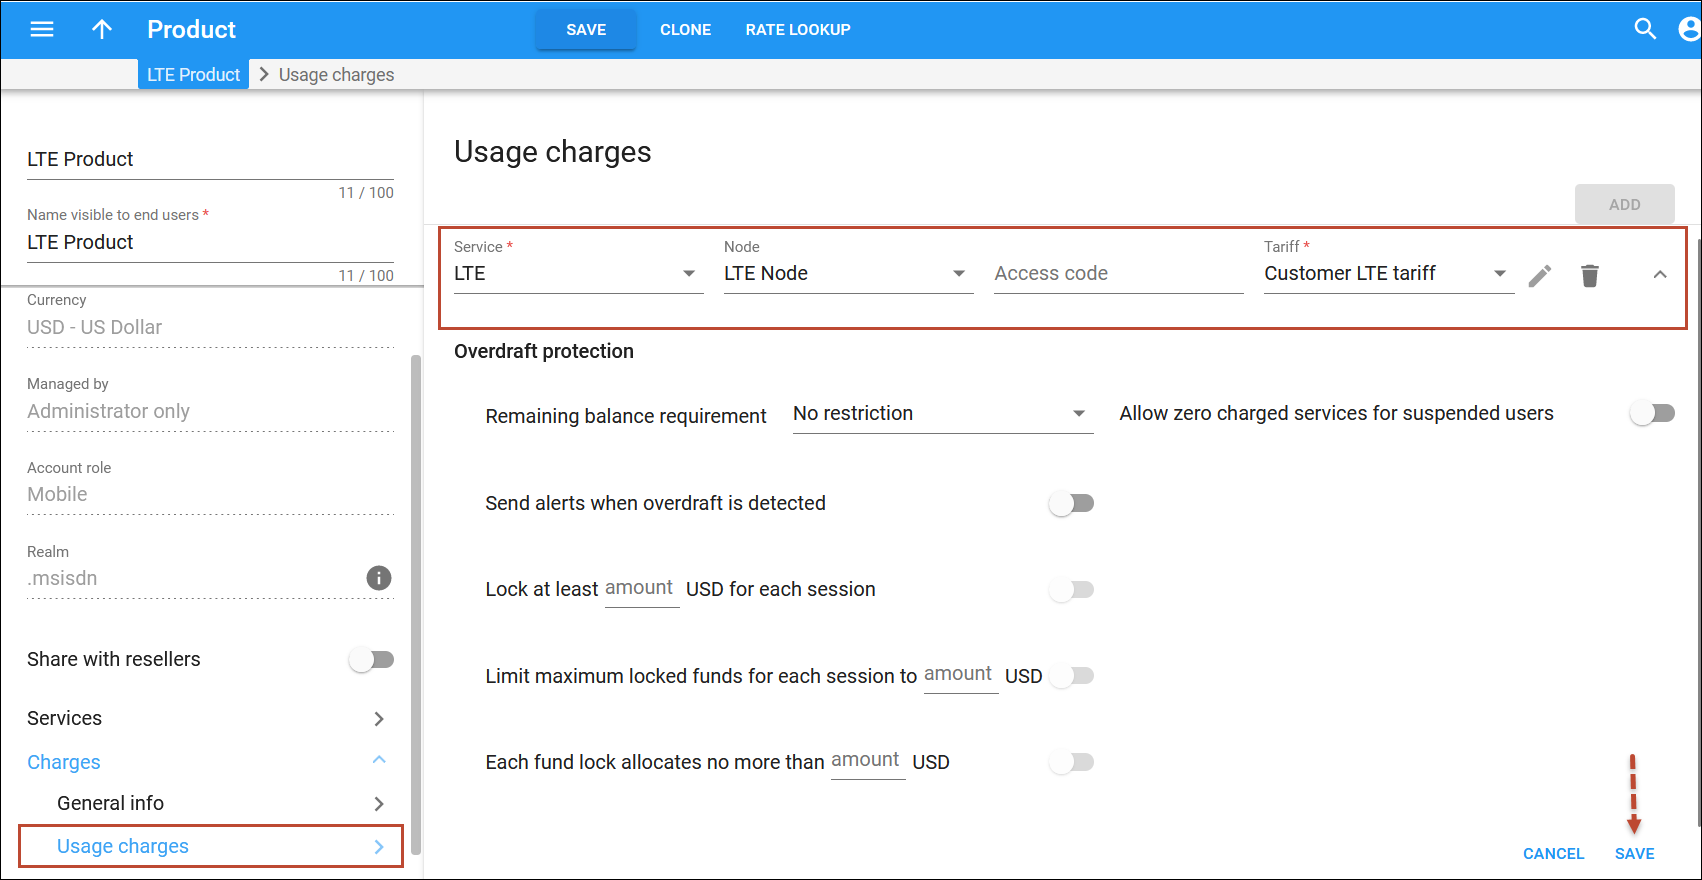
- On your product’s panel, click Charges, then click Usage charges.
- On the Usage charges panel, click Add.
- Fill in the required information:
- Service – select LTE
- Node – select the LTE node
- Access code – leave this field empty
- Tariff – select the tariff that applies to your customers when they use the LTE service
- Overdraft protection – to configure overdraft protection for this product, consult the Overdraft protection configuration handbook. In short, overdraft protection locks a certain amount of resources, such as megabytes, for each session. This enables the simultaneous consumption of the same quota across different sessions on various devices. Although it’s typically not a concern for basic LTE service, where customers generally use only one SIM card, it’s a good practice to leave the overdraft protection turned on. This precaution may become important when billing involves multiple rating groups (e.g., general data and video streaming data)
- Click Save.
8. Add SIM cards into the SIM card inventory
Refer to the Enter SIM Cards into the SIM Card Inventory section of the MVNO service provisioning handbook to find out how to add SIM cards into the SIM card inventory.
9. Configure a mobile Internet subscriber
9.1 Create a customer
A customer is an owner of accounts. Customer contact information is used for distributing account usage information, Internet access statistics, invoices, etc. You usually need to create one customer per each retail prepaid LTE user.
- On the navigation menu, select Sales, then select Customers.
- Click + Customer and fill in the customer details:
- Select Prepaid
- Name – type a short name for the customer object; this will be used on the web interface
- Currency – choose the currency in which this customer will be billed
- Available funds – the amount of funds available for the customer to spend on services (e.g., $10 for bundle activation). If the customer has a debit account, the account’s funds will be used
- Business model – a business model defines what type of service is to be provided to the customer. Select Mobile for this customer
- Customer class – customer class allows you to define a policy for automated payment collection. By choosing a specific class here the customer will automatically inherit all of the class properties (grace period, invoice template, etc.). Select the previously created customer class
- Billing period – choose a billing period for the customer
- Billing period time zone – choose a time zone in which the customer’s billing period will be closed, and invoices will be generated

- Click Save.
9.2 Create an account
Create an account for each device that has a unique SIM card.
- On your customer’s panel, click Accounts / DIDs.
- Click + Account and specify the account details:
- General tab:
- Select Credit
- Account role – select Mobile
- ID – you can type in the user’s mobile phone number manually or provision it from the DID inventory
- Balance control – select Subordinate from the list (the account doesn’t have a separate balance – the customer’s prepaid balance will be used)
- Activation – set the date from which the account becomes active

- Additional info tab:
- IMSI – click on IMSI
 , define search filters, and select one of the available SIM cards from the SIM Card inventory

- IMSI – click on IMSI
- Products tab:
- Product – select LTE Product here

- Product – select LTE Product here
- General tab:
- Click Save to create an account.


