



This panel displays a list of sessions that match your search query.

Session search
Specify one or more search criteria and click Search. If you want to stop the search, press “Esc” on the keyboard. Click More  to view all available search criteria.
Click Default filters  to reset the search criteria to their initial values. To refresh the search results, click Search.
By default, PortaBilling automatically loads sessions made within the last five minutes once you open the Trace session panel. You can turn off data autoload if you don’t want all those sessions to load each time you use the Trace session functionality. This saves you time, as you don’t have to wait to apply specific filtering criteria. Click Settings  and clear the check mark for the Automatically start searching upon opening the page option.
By default, PortaBilling shows records grouped by session. To see each routing attempt as a separate record, click Settings and select Display xDRs > separately (search in vendor xDRs only).

From (CLI)
Filter sessions by originating phone number (ANI number). By default, PortaBilling filters sessions with a number that starts with your input.
To change the search filter, click Matching mode  . You can choose the matching mode to filter sessions by the originating phone number that:
- Contains – contains your input (anywhere in the number).
- Starts with – starts with your input.
- Ends with – ends with your input.
- Exactly matches – exactly matches your input.
For example, if you choose the Contains matching mode and enter 777, the search results can be 7771209088, 12077760203, 12022201777, etc. PortaBilling automatically saves matching mode from the previous search.
To (CLD)
Filter sessions by destination phone number. By default, PortaBilling filters sessions by a number that starts with your input.
To change the search filter, click Matching mode . You can choose the matching mode to filter sessions by the destination phone number that:
- Contains – contains your input (anywhere in the number)
- Starts with – starts with your input
- Ends with – ends with your input
- Exactly matches – exactly matches your input
For example, if you choose the Starts with matching mode and enter 178, the results can be 1780807928, 17852049603, 17855522910, etc. PortaBilling automatically saves matching mode from the previous search.
Session type
Filter sessions by type: calls, messages, registrations, Internet sessions, subscribe – subscriptions to presence status (the Busy Lamp Field (BLF) service), other – quantity-based and time-based sessions.
Connection
Filter sessions by connection. Select a specific connection from the list.
Period
Filter all sessions performed within the specified period. Click Calendar  to select the date and time or type it in the “YYYY-MM-DD HH:mm” format (2022-09-14 00:00).
To clear the selected date, click Cancel  .
.
Source IP
Filter sessions by the IP address of the equipment participating in a session.
Account ID
Filter sessions by specific account ID.
Status
Filter sessions by their status:
- Any – display all sessions
- Failed – display only failed sessions
- Completed – display only completed sessions
Session list
Each entry in the session list consists of:
Actions
This column shows the available actions you can perform for a specific session.
- Click Show
 to view the log for this session. You will be redirected to the Log viewer page.
 - Click View session details
 to see the additional details about the session, such as session status and/or error code, duration, etc. Switch between the tabs in the dialog to see the session details for an account, reseller, and vendor.
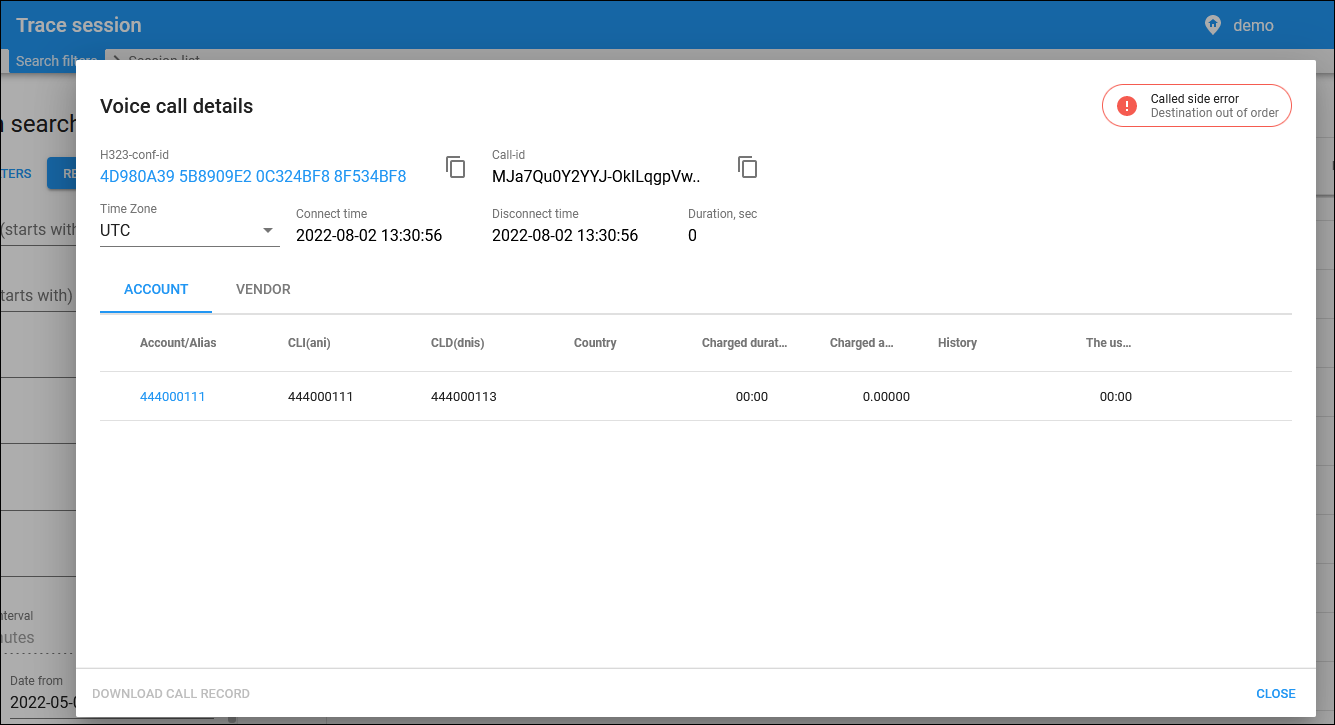
If the Download call record is unavailable for a successful call, hover over the Info next to it to see the reason. The possible explanations are:
- Call recording was off at the time of the call
- Recording is still being processed
- Codec used during the call is not supported by call recording
Account/Alias
The account/alias identifies a user in PortaBilling. This is also a link that redirects you to the corresponding account page or alias panel.
From (CLI)
The originating phone number (ANI).
To (CLD)
The destination phone number (DNIS).
Start / End time
The date and time when the session started and ended.
Duration, mm:sec
The duration of the session.
Status
The status of the session can be “Completed” or “Failed”. For voice calls, the reason for disconnection can be shown (e.g., Normal call clearing or Destination out of order).
Connection
The name of the used connection (displayed only in case of normal vendor termination). This is also a link that redirects you to the corresponding connection page.
Service type
The type of service provided: Voice calls, Internet access, Messaging service, Wi-Fi, Conferencing.
Customer name
The name of the customer the account belongs to. This is also a link that redirects you to the corresponding customer page.
Source IP
IP address of the equipment participating in a session.
Vendor
The name of the used vendor (displayed only in case of normal vendor termination). This is also a link that redirects you to the corresponding vendor page.
Customize the panel
- Change table settings – click Settings in the title bar to customize columns and change row style.
- Re-order the columns – drag-and-drop the column headers right or left to place the columns in the order you want.
- Re-order the rows – click Arrow
 (or
(or  ) next to the column header to re-sort the rows. For example, the Session list panel displays sessions in alphabetic order. You can re-sort them in the reverse order.
 - Change the default number of results globally – use the Number of results dropdown list in the upper right corner to adjust the maximum number of rows that appear on the panel. By default, the panel displays 25 rows. Once the number is changed, it's automatically saved, so the same number of rows is shown for PortaBilling entities, e.g., customer, account, reseller, etc.


