



Resellers can provide their employees with individual credentials and role-based permissions to access the reseller web portal. The feature, called “reseller individuals”, is an enhanced replacement for the old web portal for resellers’ customer care (CC) staff. Resellers can offer their staff a user-friendly portal with permissions tailored to their specific roles, such as “Helpdesk agent” or “Operations manager.” A required role must be preconfigured by the service provider and added to the list of “allowed roles” for the reseller.
Say your reseller needs to provide access to the customer data for two categories of team members:
- Helpdesk agent: Mary, a helpdesk agent, should be able to view customer data, including invoices and payment history, and trace sessions (e.g., view call details) to troubleshoot issues. However, she is not authorized to issue refunds or change products.
- Operations manager: Bob, operations manager, assists with general customer management, handles complaints, and addresses billing issues. He has broader permissions than Mary, including the authority to issue refunds within a specified daily limit and change products for a customer’s account.
To grant access to the reseller portal for Mary and Bob with the corresponding permissions:
- The reseller requests their service provider to enable the roles “Helpdesk agent” and “Operations manager” with the described permissions.
- The service provider creates two roles – “Helpdesk agent” and “Operations manager” – with the specified permissions and adds these roles to the list of allowed roles for the reseller.
- Reseller logs in to their portal and creates two reseller individuals:
- Mary with the role “Helpdesk agent”
- Bob with the role “Operations manager”
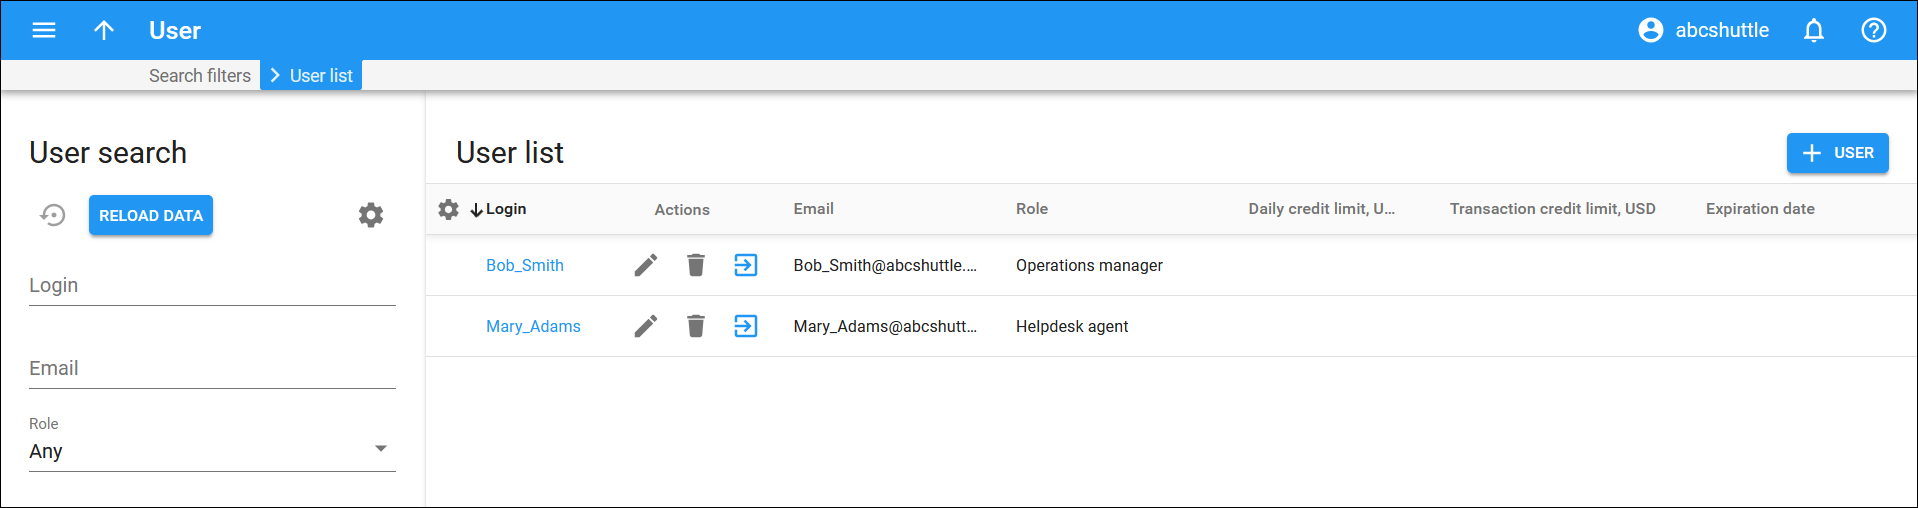
Credentials are automatically sent to Mary and Bob via email, allowing them to log into the reseller portal with corresponding permissions.
- Resellers’ staff have access to a modern, user-friendly web interface that streamlines daily operations.
- Resellers can control access to their portal data.
- To set up a custom role, the service provider’s admin needs to create a role of the “Reseller” type and adjust its default permissions.
Configuration
Setting up access to the reseller portal with role-based permissions and individual credentials involves two key stages:
- Service provider’s admin actions: the admin is responsible for creating and configuring roles for reseller employees. By default, each reseller has two allowed roles – “CC staff” and “Senior CC staff”. However, if different permissions are required, the admin must create and configure new roles with the appropriate permissions.
- Reseller actions: a reseller creates “users” for their employees and assigns them the appropriate roles with the corresponding permissions.
Steps to be performed by a service provider’s admin
1. Create a new role for the reseller:
- Log in to PortaBilling and navigate to My company > Roles.

- Click Add on the Roles list panel and fill in the role details:
- Name – type in a name for the role (e.g., Helpdesk agent).
- Type – select the Reseller type.
- Description – you can add the description of the role.

- Click Save & Edit details.
2. To configure the permissions for the created role, go to Permissions. To see a more detailed list of permissions, turn on the Advanced mode toggle and unfold a specific section in the portal resource tree.

The admin can assign the following levels of access to the role within the portal resource tree:
- Restrict – this means that individuals with this role cannot access the specified resource.
- Read – this permits individuals with this role to view the specified resource.
- Modify – this permits individuals with this role to view, update, create, and delete the specified resource.
3. To allow a reseller to create individuals with the created role, open the reseller record > navigate to General info > Web self-care > Allow roles, and select the role from the dropdown list. Click Add  to allow more roles.

Once you add a role, such as “Helpdesk agent,” to “Allowed roles” for a specific reseller, this reseller can create users with this role on the reseller portal.
Steps to be performed by a reseller
1. Log in to the reseller portal and navigate to My company > Users.

2. On the User list panel, click Add user and fill in the required details about the reseller’s employee:
- Login – type in the login of the employee. They will use it to access the reseller’s web interface.
- Password – enter the password for the employee. You can enter it manually or click Generate
 to generate a random, hard-to-guess password. To show or hide the generated password, click Show password
  .
. - Role – select a role from the dropdown list, previously created by the service provider’s admin.
- Email – enter the email address of the employee, where the credentials will be sent once the user record is created.

Navigate to the Limits tab to enable the employee to issue credits/refunds for customers and temporarily increase the credit limit for customers.
3. Click Save.
As soon as you, as the reseller, create the required user for your employee, credentials are automatically sent to them via email, allowing them to log into the reseller portal with the corresponding permissions.


