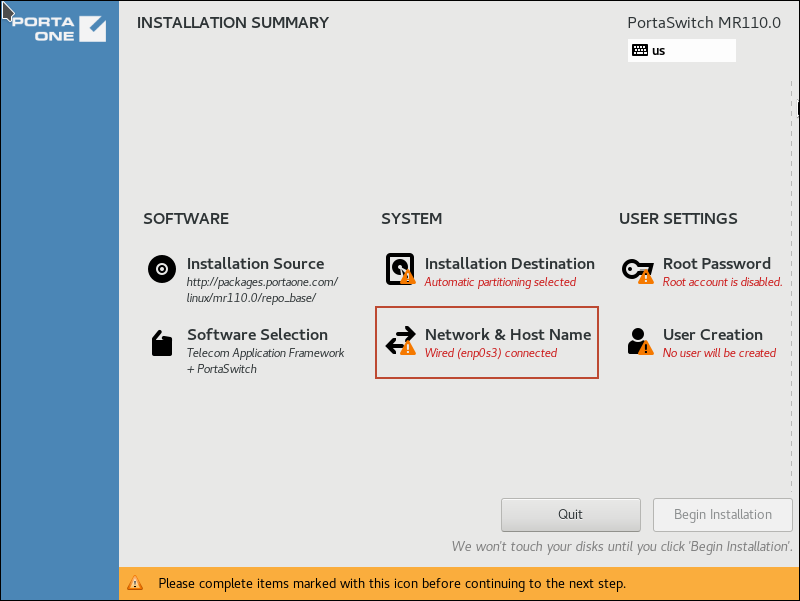
- On the Installation summary page, choose Network & Host Name.
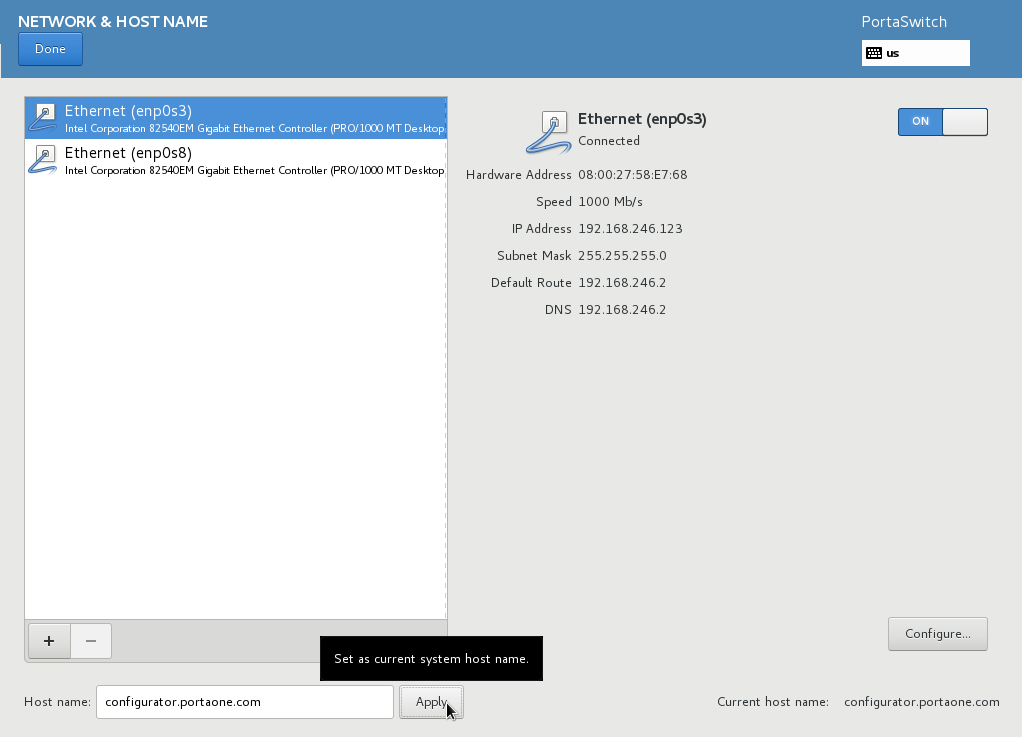
- Specify a fully qualified host name for the current server.
The host name should not contain dashes.
- Choose the network interface that is connected to a private LAN segment and click the Configure button.
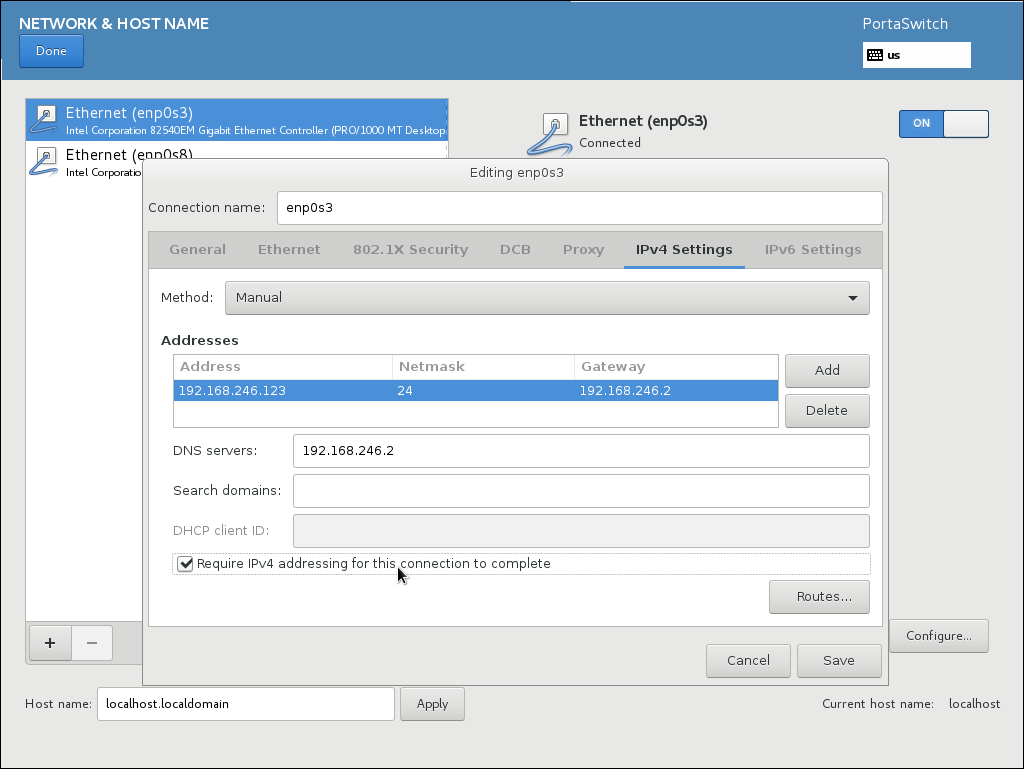
- Go to the IPv4 Settings tab.
- From the Method menu, choose Manual.
- In the Addresses section, click the Add button and specify the following network details:
- Private IP address that will be used for internal communications between servers Network mask
- Default gateway
- Specify DNS servers.
- Use commas to separate multiple DNS server addresses.
- Select the Require IPv4 addressing for this connection to complete checkbox.
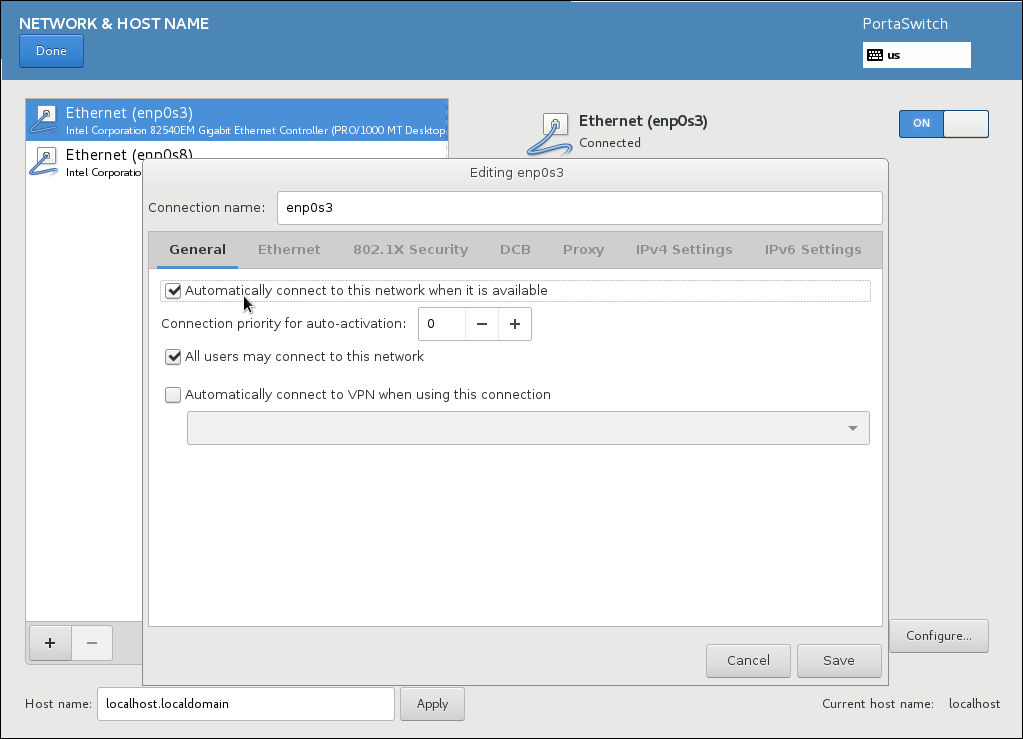
- Go to the General tab.
- Select the Automatically connect to this network when it is available checkbox.
- Click Save.
- Make sure that this network is enabled and that the corresponding switch button is set to “ON.”
- If the server also requires a public IP address, choose the network interface that is connected to a public LAN segment and repeat steps 4–11 (specifying network details that will be used for external communication for steps 5–6).
- Click Done.
Make sure that the Automatically connect to this network when available checkbox is selected for both networks.


