



This panel shows the results of your search. Here you can create a new call quality profile.
To create a call quality profile, click + Profile and fill in the details.
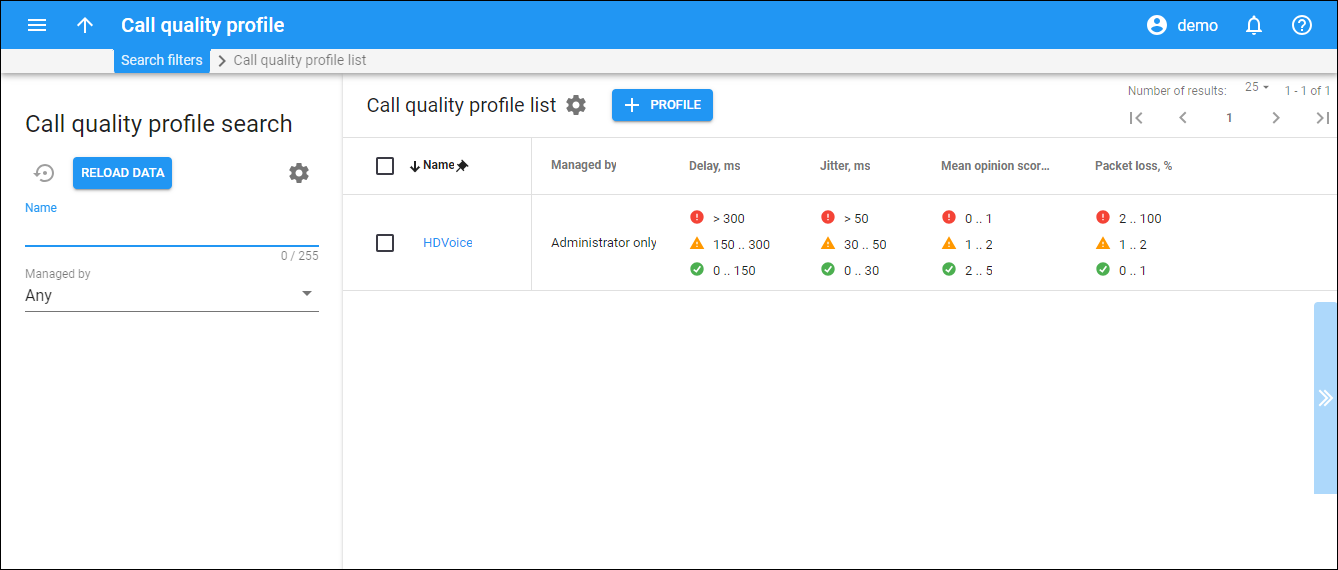
Each entry in the Call quality profile list consists of:
Name
The name of the call quality profile. Click the name to edit the profile.
Thresholds
Shows the thresholds for the metrics you defined for every call status. An empty cell means that a particular metric is not defined in the call quality profile.
-
Delay – the delay in voice packet delivery from source to destination
-
Jitter – the variability in time it takes for voice packets to reach their destination
-
Mean Opinion Score (MOS) – the average rating of voice quality on a scale from 1 to 5, where 5 indicates the highest quality
-
Packet loss – the number of voice packets not received by the destination
Delete a call quality profile
To delete a call quality profile, select the checkbox next to its name in the list and click Delete on the toolbar. To delete all call quality profiles, select the checkbox next to the column name.
You can delete call quality profiles, that aren't assigned to customers or customer sites.
Customize the panel
- Change table settings – click Settings
 in the title bar to customize columns and change row style.
 - Re-order the columns – drag-and-drop the column headers right or left to place the columns in the order you want.
- Re-order the rows – click Arrow
 (or
(or  ) next to the column header to re-sort the rows. For example, the Call quality profile list panel displays call quality profiles in alphabetic order. You can re-sort them in the reverse order.
 - Change the default number of results globally – use the Number of results drop-down list in the upper right corner to adjust the maximum number of rows that appear on the panel. By default, the panel displays 25 rows. Once the number is changed, it's automatically saved, so the same number of rows is shown for PortaBilling entities, e.g., customer, account, reseller, etc.


