



It is popular among users to install messengers (i.e., web applications like WhatsApp) on either their mobile phones or computers and exchange messages via the Internet within the same network.
For instance, if a user has registered with WhatsApp, they can send free on-net messages (i.e., instant messages) to other WhatsApp users. This service is known as Instant messaging.
With PortaSwitch, you can enable your VoIP customers to use Instant messaging service by registering their SIP accounts with various messengers (that support the SIP protocol).
Moreover, you can develop a custom application to bundle voice calls and messaging services and then distribute the application among users of different networks (VoIP and mobile), and thereby expand your customer list.
This chapter demonstrates how to configure an Instant messaging service so that in addition to voice calling, your VoIP customers can send instant messages.
Configuration overview
- Initial configuration of PortaBilling
- Setup on the Configuration server web interface
- Create rate codes
- Create a service policy
- Set up an internal vendor
- Set up the product
- Testing
1. Initial configuration of PortaBilling
If you have just installed the PortaBilling software or dedicated a new billing environment to configure the services described in this handbook, make sure to first perform the initial configuration of PortaBilling. To do this, use the Initial Configuration of PortaSwitch handbook.
2. Setup on the Configuration server web interface
- Clone the existing configuration.
- Select
BillingEngine on the Configuration Tree. Enable the Messaging
Service in the ServiceTypes group.
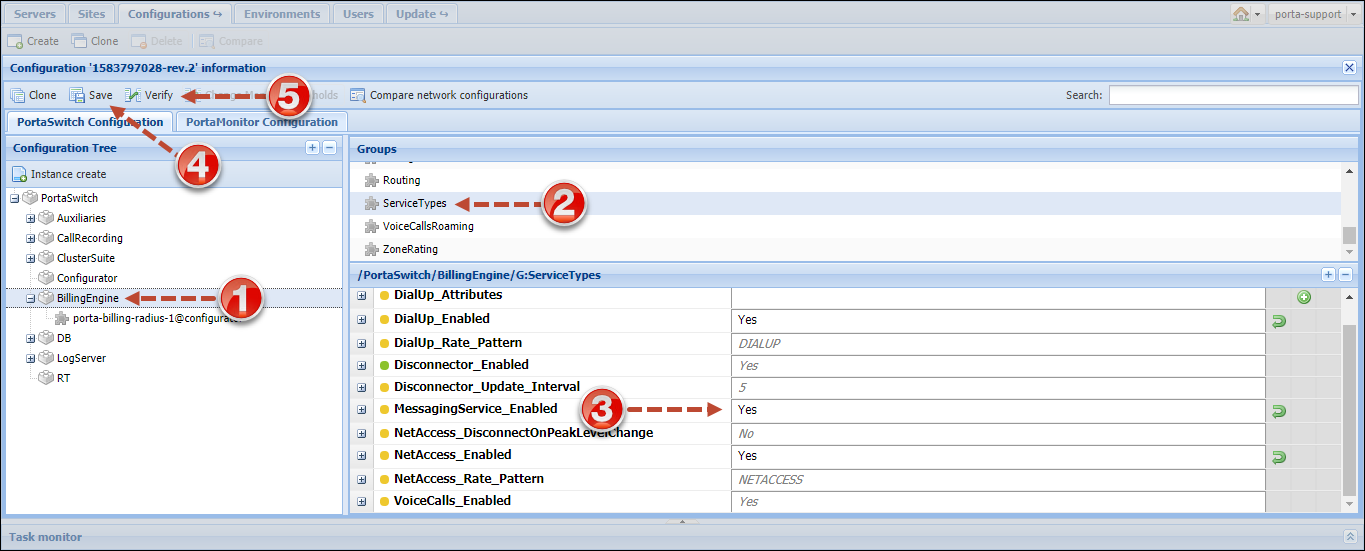
- Click Save and then Verify.
- Verify the new configuration and click Check/Apply.
3. Create rate codes
The special MSGN rate code covers messages sent to an IP phone connected to PortaSwitch (regardless of the actual phone number). Adding a rate for this rate code allows you a set a unified price for all on-net messages. Please consult Special rate codes.
- On the navigation menu, select Service catalog > Rate codes.
- Click + Add and fill in the rate code details:
- Format – select Custom.
- Prefix – type in MSGN.
- Description
– write a short description for the rate code.

- Click Save.
4. Create a service policy
Create a service policy that defines how PortaSIP routes and authorizes messages. Before sending a message, PortaSIP matches the recipient's domain with the domain pattern in the service policies. The matching policy is then used to handle the message in a specific way (e.g., send it over SMPP or SIP).
- On the navigation menu on the left, select Service catalog and click Service policy.
- Click + Policy and fill in the service policy details in the General tab:
- Service type – select Messaging service.
- Name – specify the name of the service policy, e.g., Instant messaging.
- Recipient domain pattern – this is the pattern according to which the service policy is selected. Specify % in this field. This means that the service policy is applied to all outgoing messages sent by your end users.
- Match priority – specify 5. Refer to the PortaBilling
Help for a detailed description of this field.

- Go to the Attributes tab, select Processing messages over SIP/SMPP, and enable the following attributes:
- Local lookup – select Enabled to allow the lookup for destinations within the network.
- Outgoing AAA – select Enabled to allow outgoing message authorization and billing.
- Transport protocol – select SIP from the list.
- Userpart
E164 translation – select Enabled to allow dialing
rules for a phone number translation.

- Click Save.
5. Set up an internal vendor
5.1 Create a vendor tariff
To correctly bill for on-net instant messages (i.e., those delivered to accounts within your network), you will need to create a special tariff for the internal (virtual) vendor:
- On the navigation menu on the left, select Service catalog and click Tariffs.
- Click + Tariff and fill in the tariff details:
- Name – type a short name for the tariff object; this is the name you will see in the select menus (for example, Instant messaging).
- Currency
– choose the currency in which the vendor charges you.
The currency for the tariff may be chosen only once, and cannot be changed later.
- Service – choose Messaging service here.
- Applied to – select Vendor.
- Routing
– leave the Routing option disabled for this tariff.

- Click Save&Edit.
- Open the Rates tab. To add a rate, click + Rate, and fill in the rate details:
- Rate сode – type in ‘|’ (pipe) in the field. This will create a special rate that matches any number the message is sent to.
- Rating mode – select Flat rate here.
- Unit
price – set zero as the price since there are no actual costs for
on-net instant messages.

- Click Save.
5.2 Create an internal vendor connection
In this step, you will add a new connection to the internal vendor.
- On the navigation menu, select Infrastructure, then select Vendors.
- On the Search vendor panel, type the vendor name and click Apply filters.
- On
the Results panel click the vendor name.

- Go to Connections, click +Add, and fill in the connection details:
- Description – type a descriptive name for this connection. It will be displayed in the list of connections (e.g., Instant messaging).
- Service type – select Messaging service.
- Type of connections – select SIP/SIMPLE.
- Tariff – select the tariff that you have created before (e.g., Instant messaging.)
- Internal – use the slider to set this connection as internal.
- Use for – leave the Route to internally registered SIP accounts (SIP-UA) option.
- Click
Save.

6. Set up the product
6.1 Create a customer tariff
- On the navigation menu on the left, select Service catalog and click Tariffs.
- Click + Tariff and fill in the tariff details:
- Name – type a short name for the tariff object; this is the name you will see in the select menus, e.g., On-net messaging.
- Currency
– choose the currency in which you charge your customers.
The currency for the tariff may be chosen only once, and cannot be changed later.
- Service – select Messaging service here.
- Applied to – select Customer.
- Managed by – leave Administrator only.
- Click
Save&Edit.

- Open the Rates tab. To add a rate, click + Rate, and fill in the rate details:
-
- Rate
сode – select MSGN.
A rate code may be entered directly or you can start typing the rate code and then select it from the list.
- Rating mode – select Flat rate here.
- Unit
price – specify the price per message or put a zero if you provide
instant messaging services free of charge.

- Rate
сode – select MSGN.
- Click Save.
6.2 Configure the product
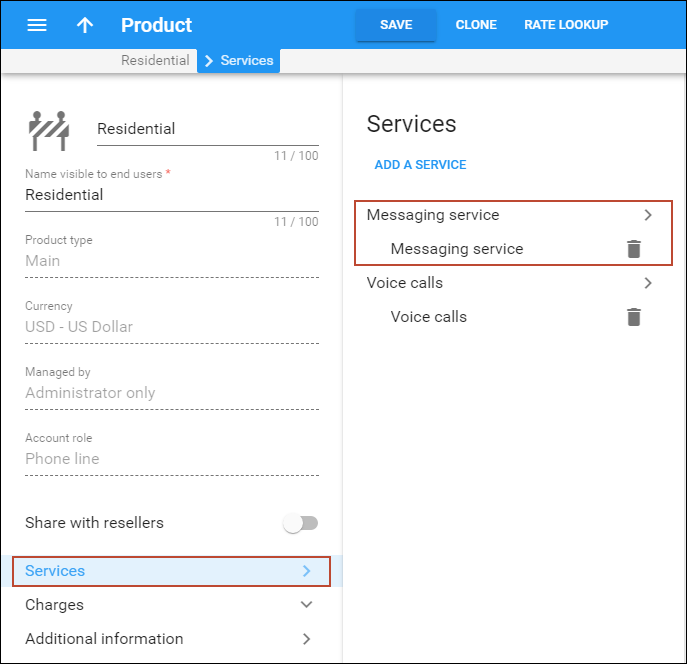
Since the IP devices and applications connect to PortaSIP via SIP protocol for both messaging and voice calls services, the product for messaging product must include voice calls and messaging services.
- On the navigation menu on the left, select Service catalog and click Products.
- Select the product that you wish to modify.
- On the Product panel, click Services and then Add a service.
- Select
the Messaging service and click Add.
- On
the Product panel, click Charges, Usage charges and
then click Add:
- Select Messaging service from the Service list.
- Select the PortaSIP node in the Node field.
- In
the Tariff field, select the tariff that applies to your customers
for sending instant messages (e.g., On-net messages).
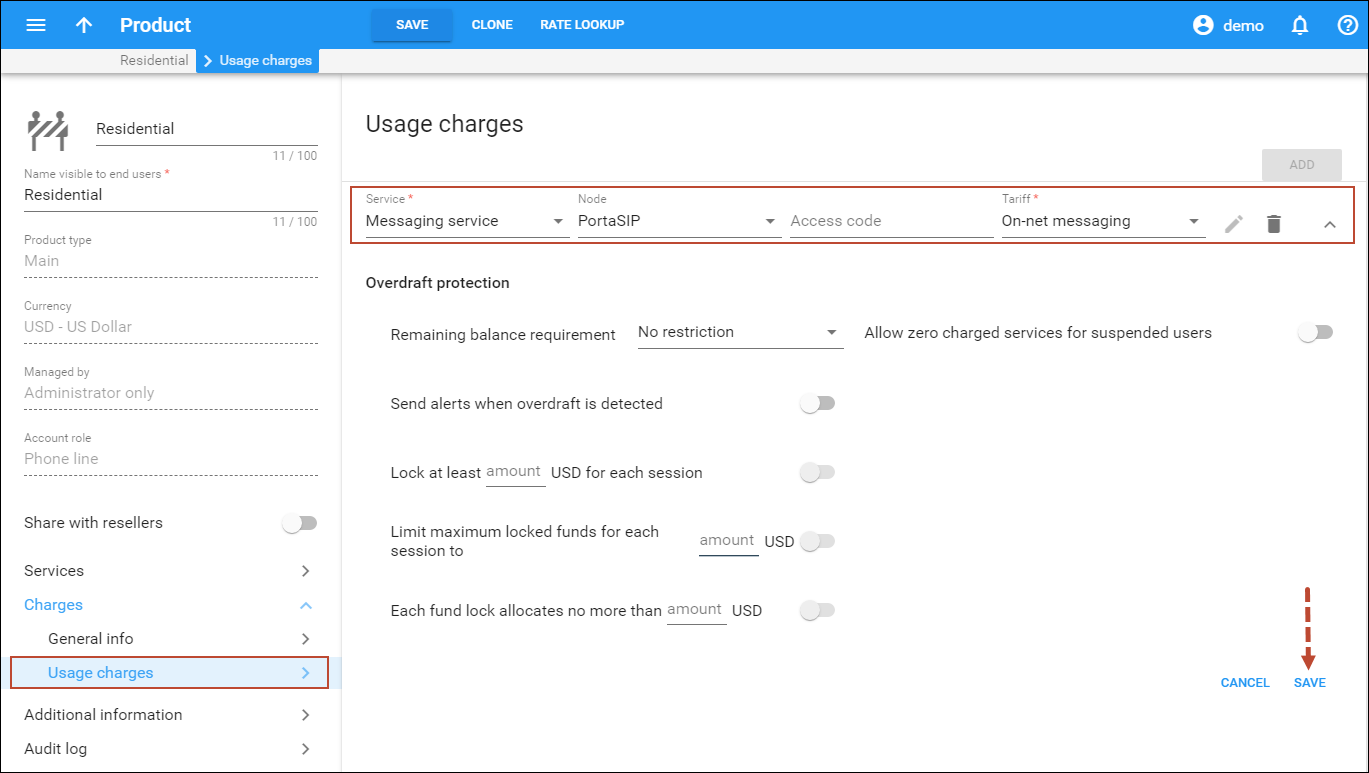
- Click Save.
Now your SIP subscribers who have this product can use instant messaging service in addition to VoIP services.
Note that if you have more than one virtual environment where you will provide instant messaging service, you will need to perform the above steps for each virtual environment.
7. Testing
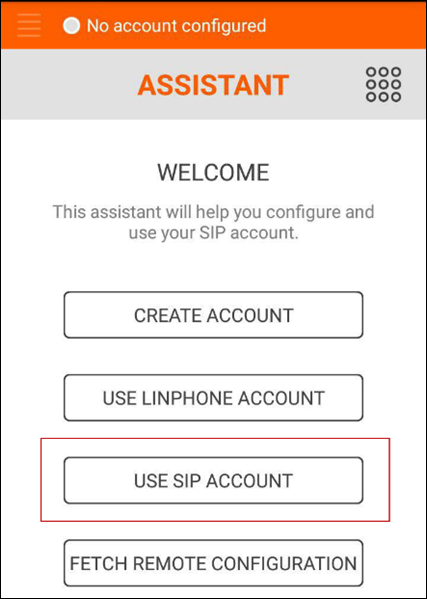
Configure the messenger client. As an example, we use Linphone.
Download Linphone and perform its configuration.
- On
the main page, select Use SIP account:
- Fill in the Assistant form.
- The
most important fields are:
- Username – specify your account ID here.
- Password – specify the service password in this field.
- Domain – specify the VIP of your PortaSIP cluster.
- Display name – specify your name. This is a display name that will be shown to the party you call or send messages to.
- Transport
– select UDP.
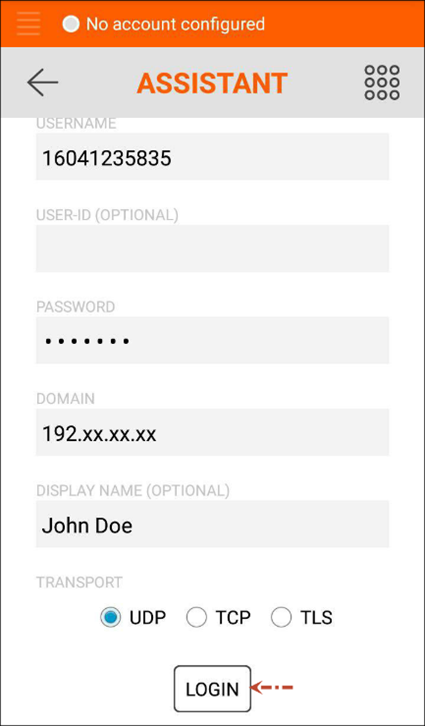
- Click Login.
- Select
Chat and Add Conversation.
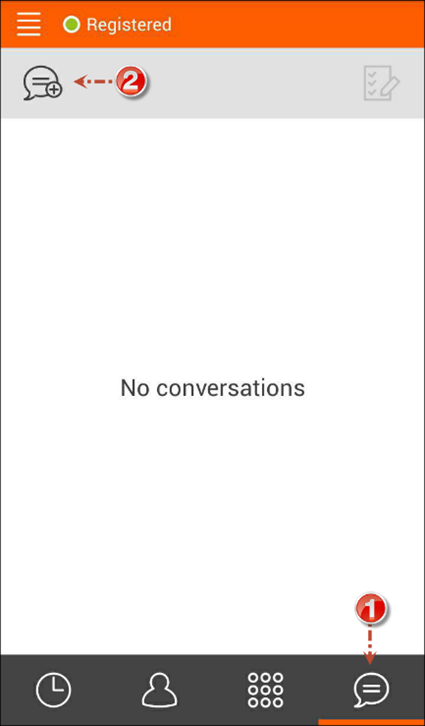
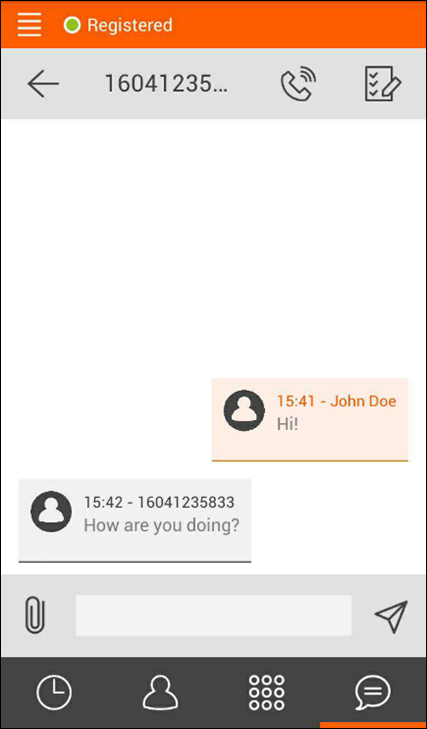
- Enter
the number and send a message.
Note that with PortaSwitch you can use the following Windows clients for instant messaging service:


