Call recording allows PortaBilling users of PBX services to record phone conversations for their extensions which can be played back later.
Consider the following example:
A call center needs to record calls from and to their customers so that operators can later listen to the recordings. The manager of the company asks the service provider to enable call recording functionality for his company. An administrator creates an add-on product that provides the call recording service and assigns it to the call center’s desired extensions.
The sections below provide you with all the steps necessary for configuring a call recording.
Checklist
Use this checklist to check off the operations you have completed while performing the system setup according to the instructions in this chapter. Please be sure to perform all of the operations in the order designated (all of the boxes should be checked), otherwise, the service will not work.
The checklist below assumes that you have already configured the basic PBX service according to the instructions provided in the PBX handbook.
|
Operation |
Done |
|
General configuration |
|
|
Ask PortaOne support to update license information in PortaOne CRM and to add a dedicated server to your installation |
|
|
Add the call recording instance on the Configuration server web interface |
|
|
Rating configuration |
|
|
Create a subscription plan that will define the charges for customers for call recording usage |
|
|
Create an add-on product that will provide the call recording service |
|
|
Account provisioning |
|
|
Assign the add-on product to the accounts of the PBX customer |
|
|
Testing |
|
|
Make some test calls and browse recorded calls |
Primary configurations
Call recording is performed by the Call recording instance. The steps below provide instructions for how to configure call recording on the dedicated server.
If you configure call recording on one of the existing servers (e.g., for testing purposes), add a new IP address to use for the Call recording service on that sever. Please consult the Server chapter of the PortaSwitch Configuration Web Reference guide for detailed instructions on how to add an IP address.
Add the call recording instance on the Configuration server
- Go to the Configurations tab on the Configuration server.
- Clone the existing configuration.
- Select CallRecording under the Configuration tree.
- In the SipClusters field, specify the processing node instance the call recording will be available for. Click
 to add a new line and select one more instance, if necessary.
When the call recording feature is activated, conversations are recorded in the .wav format by default. To record and store conversations in .mp3, select the .mp3 format from the RecordingFormat option.
 - From the Configuration Tree, select Web Cluster.
- On the Environments panel, select Global.
- Select Yes for the Enable_Call_Recording option in the CDR group.
- Click the Save button and then the
 Verify button.
 - Verify the new configuration and click the
 Check/Apply button.
Create subscription plan
In order to charge your customers for additional services (i.e., call recording), create a subscription plan and perform its configuration as described in the Charging for Value-added Services handbook.
Create add-on product
Create an add-on product that provides call recording functionality.
- On the navigation menu to the left, select Service catalog and click Products.
- On the Create product panel, fill in the product details:
- Name – type an internal product name that will be shown on the administrator interface.
- Name visible to end users – type a name of the product that will be shown to end users on their self-care interfaces.
- Product type – select Add-on product here.
- Priority – define the priority for the product.
- Currency – choose a currency the product will be priced in.
- Managed by – select Administrator only here, since we are setting up a service without the involvement of resellers.
- Account role – select Phone line since this product is intended for making and receiving calls.
- Click Save.
Services
Define which service types are included in the product.
- On your product’s panel, click Services.
- On the Services panel, click Add a service.
- In the Select services to add dialog box, select Voice calls and click Add.
Service configuration
Define the default values of service attributes for all accounts for which this add-on product will be assigned.
- On the Services panel, click Voice calls.
- On the Voice calls configuration panel, move the slider to enable the Call recording feature.
Charges
Subscriptions
This allows you to choose a subscription plan for the product, so that this subscription plan will be automatically applied to every account with this product assigned. Select a subscription plan from the list. Click the arrow next to the subscription plan to see the detailed information about it.
Additional info
Define the main products this add-on product will be compatible with.
- On the Additional info panel click the Add product button.
- Select the product from the list and click OK.
- Click the Save button in the toolbar to save the product configuration.
Assign the add-on product to an account
To provide your customer with the additional functionality requested, assign the add-on product to the corresponding account.
- On the Account panel, select Finances and click Add-on products.
- In the Add-on products panel, check the add-on product that you want to assign to this account.
- Click the Save button in the toolbar.
 TIP: If you want the add-on either to take effect some time in the future or expire after some period of time, or both, specify the add-on activation and/or expiration date.
Browse recorded calls
You can browse the recent call recordings via the customer or account self-care interfaces.
Log in to the customer self-care interface using your login and password. Go to the Cloud PBX tab and select Call Recordings. Choose the date range for which you want to see a list of calls and click Search.
Click Download  to download and listen to the recording of the call. This call will be downloaded to your hard drive in the .wav format. To delete a recording select the checkbox and click Delete.
Send the call recording via email (optional)
To send call recordings to users via email, perform the following steps:
- On the Configuration server web interface, set the RecordsDelivery.Enabled option to Yes.
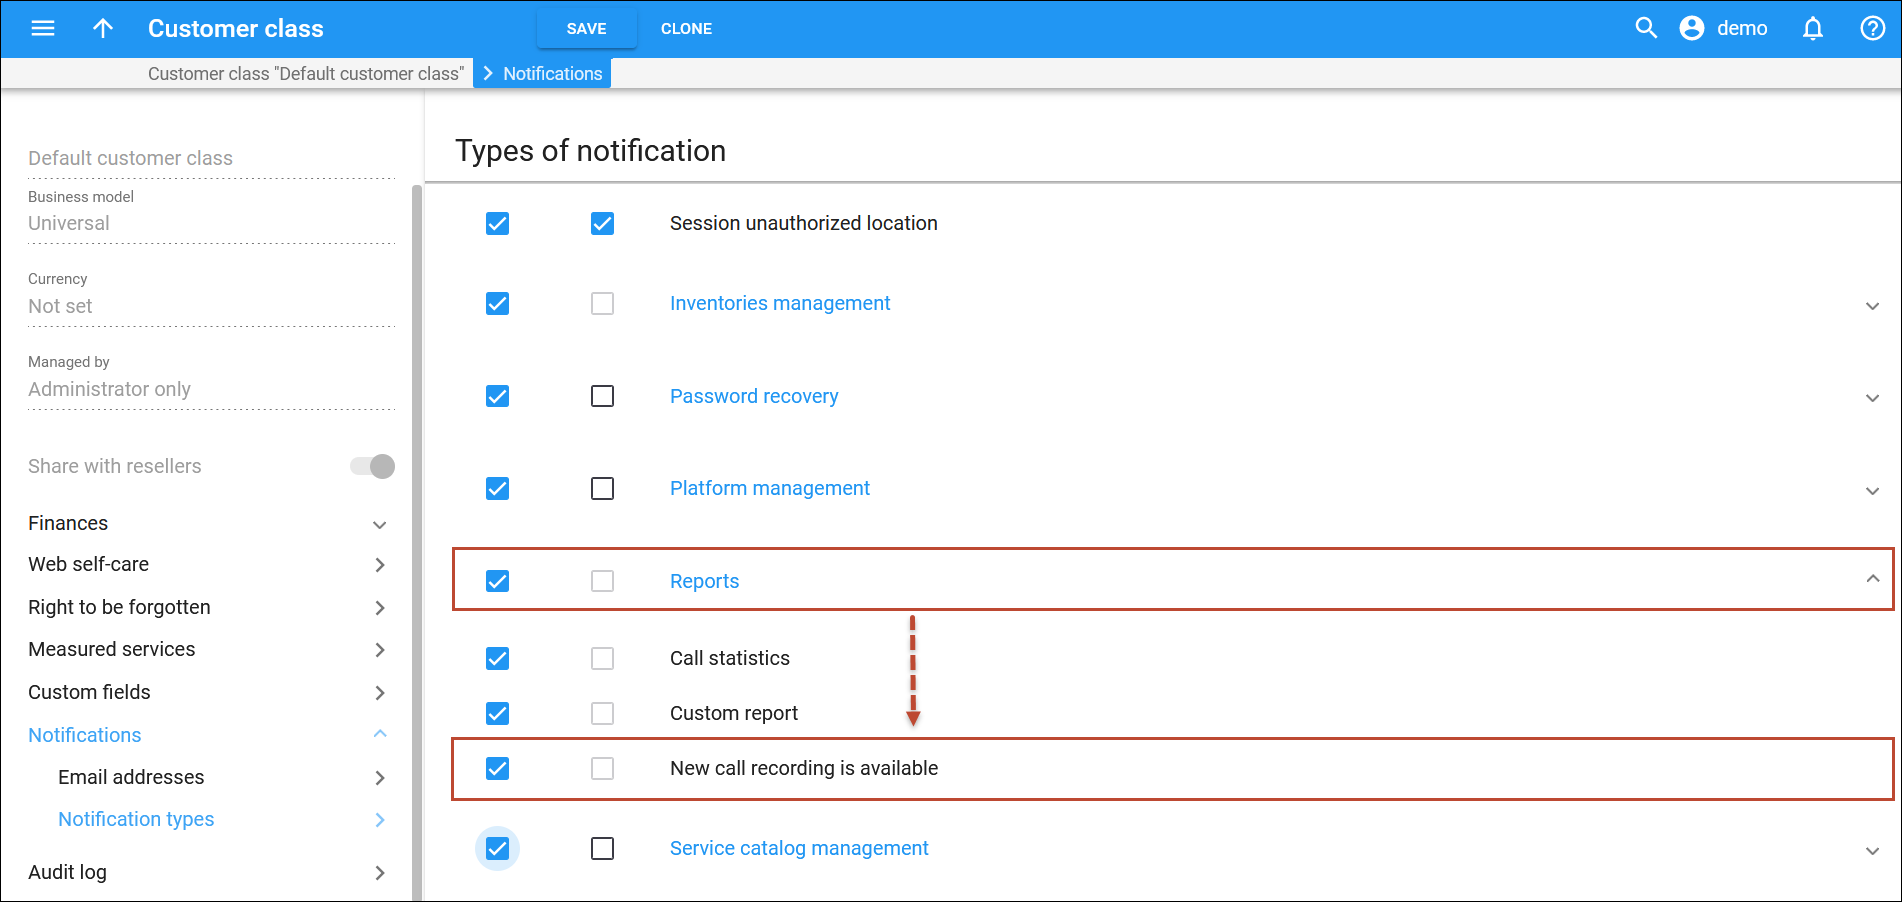
- Open the PortaBilling web interface and enable the New call recording is available notification in the customer class assigned to the specific customer.
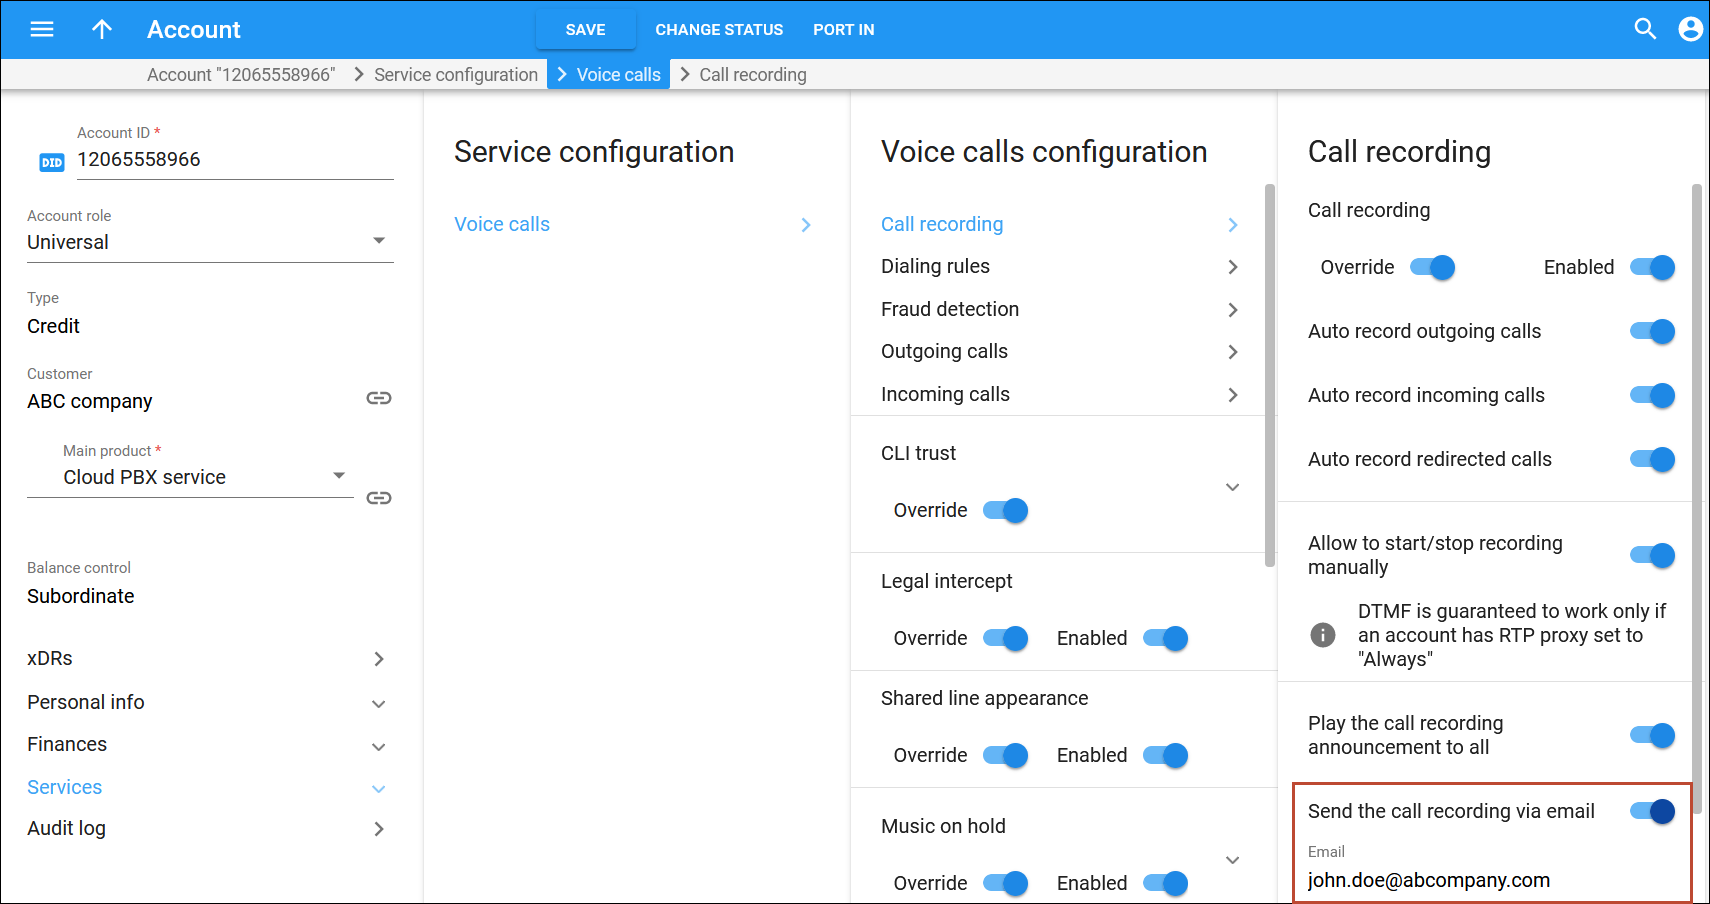
- Go to the needed Account > Services > Service configuration > Voice calls > Voice calls configuration > enable Send the call recording via email option and specify the email address in the dedicated field.


