



This chapter demonstrates how to configure and install the Avalara taxation plug-in in PortaBilling and how to set up taxation parameters for service providers and their customers.
Configuration overview
- Activate the customer mode service in Avalara
- Enable the Avalara module on the Configuration server
- Install Avalara’s middleware
- Configure the Avalara taxation method
- Define your taxation parameters
- Define taxation parameters for customer class
- Override taxation parameters for a customer (optional)
Activate the customer mode service in Avalara
Prior to configuring PortaBilling, register an account in Avalara. Follow this link https://communications.avalara.com/contact-us and fill in the contact form. Select PortaOne in the Back-Office Solution list and click Let’s Get Started.
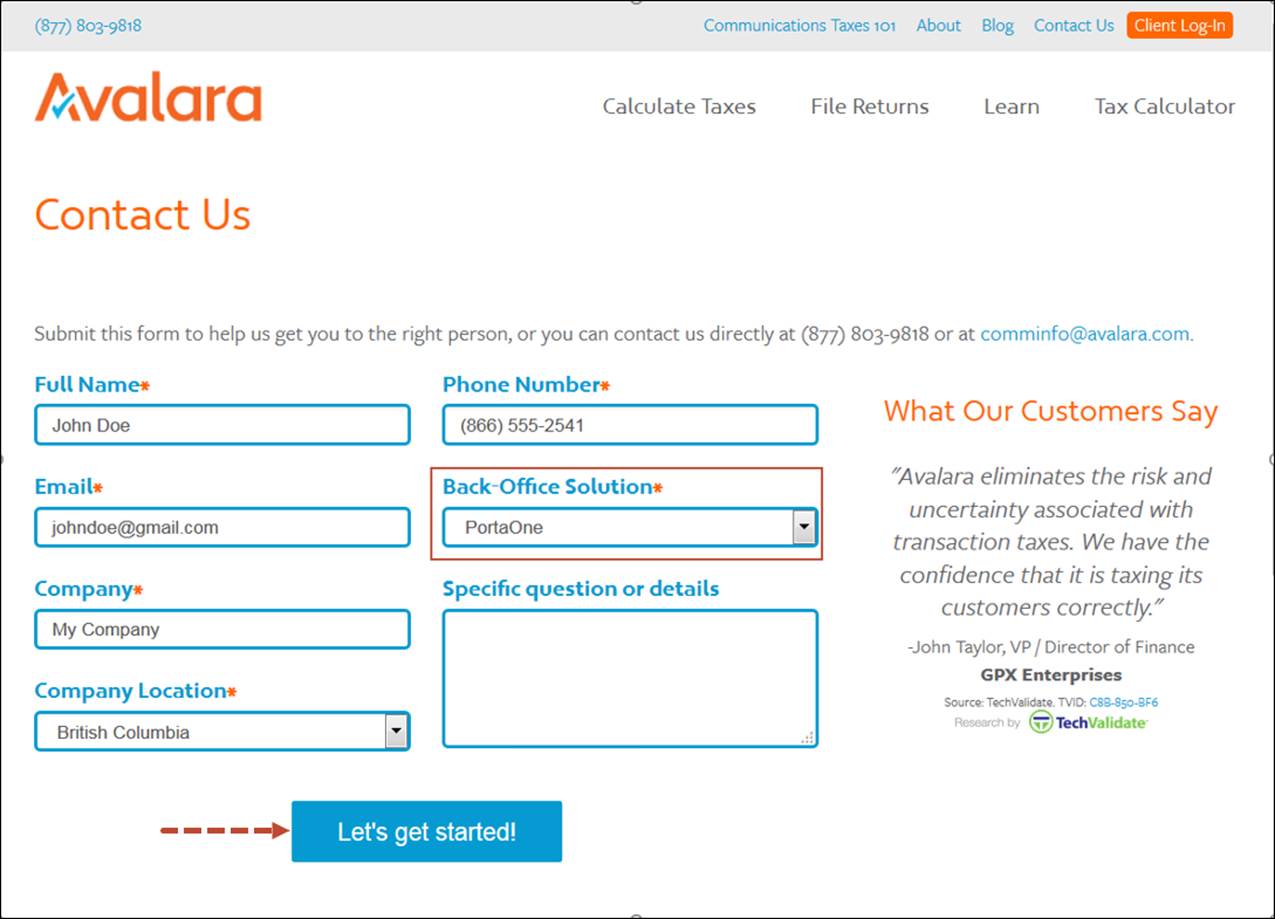
An Avalara representative will contact you and lead you through the registration procedure.
Contact the Avalara support team (support@avalara.com) to activate the Customer Mode service. Customer Mode is mandatory for group transactions which apply to a single customer and in addition, speed up the tax calculation process.
Upon successfully completing the registration procedure, you will be provided with the following information:
- A three-valued company code to be used for taxation requests;
- FTP credentials for the Avalara libraries download; and
- Credentials for communicating with Avalara via API.
Enable the Avalara module on the Configuration server
- On the Configuration server, clone the active configuration to modify it.
- From
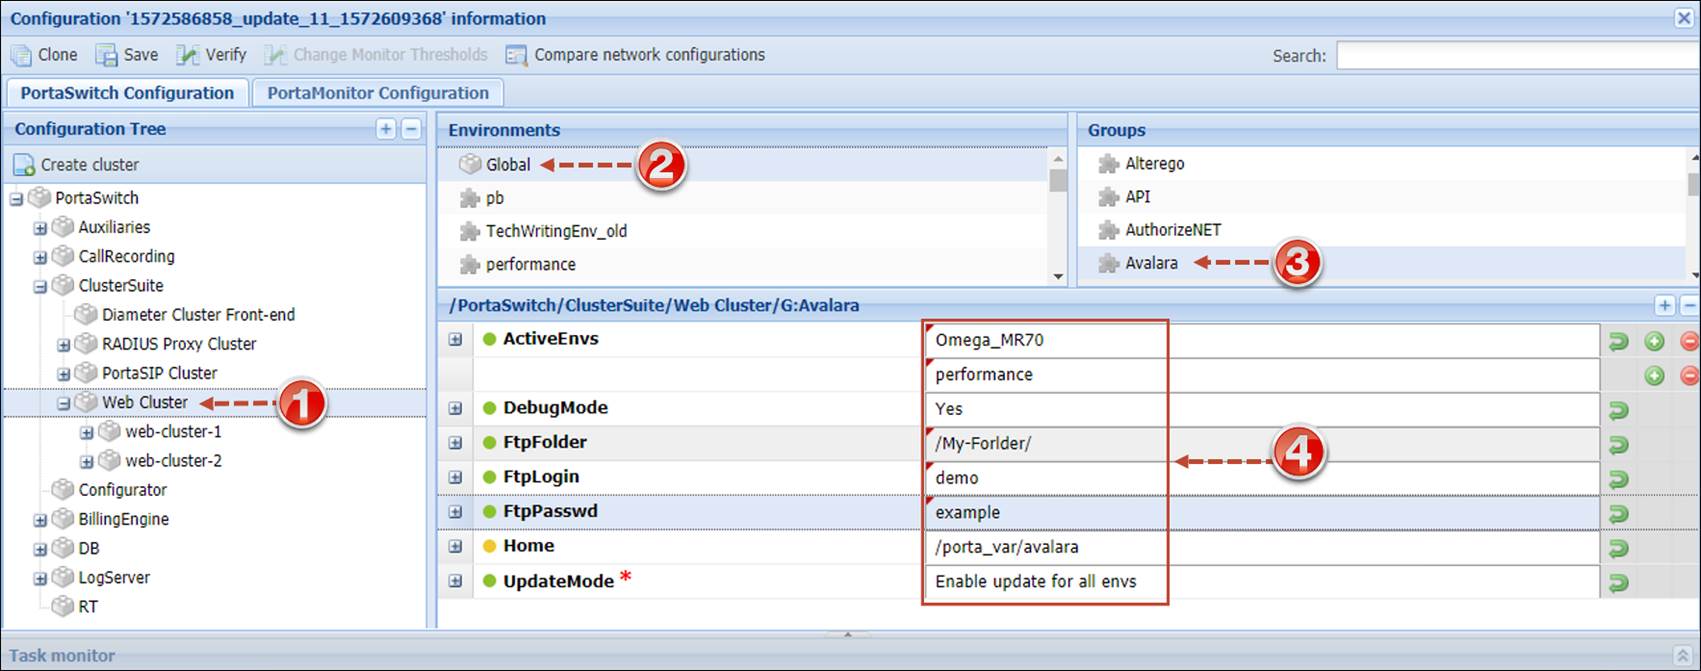
the Configuration tree select ClusterSuite > WebCluster > Global > Avalara
and fill in the following parameters:
- ActiveEnvs – specify the billing environments in which the Avalara module must be updated.
- DebugMode – enable the debug mode.
- FtpFolder – specify your company folder created on the Avalara FTP server.
- Specify your FTP credentials (login and password) in the FtpLogin and FtpPassword fields. These will be used to download the Avalara libraries.
- Home – the folder with the installed plug-in (e.g. /porta_var/avalara).
- UpdateMode
– select how to update the Avalara module. Select the Enable update
for specific envs option.
- Click
the Save button and then the
 Verify button.
 - Verify
the new configuration and click the Check/Apply button.
Install Avalara’s middleware
- Log in to your PortaBilling admin server using ssh.
- Run the installation script executing the following command:
sudo -u porta-admin PORTAHOME_WEB=/home/porta-admin/ /home/porta-admin/cron_utils/avalara_installer.pl --verbose --install per_env 3
where 3 is the unique id of your billing env (e.g. the id for env performance is 3).
The script downloads and installs the Avalara software for the defined billing environment and uploads the Avalara dictionaries to the database.
Wait until the installation process is complete. This may take up to several minutes.
 TIP:
If you wish to enable taxation with Avalara for all billing environments,
select the Enable update for all envs option for the UpdateMode
field on the Configuration server. Then install the Avalara middleware
by executing the following command:
TIP:
If you wish to enable taxation with Avalara for all billing environments,
select the Enable update for all envs option for the UpdateMode
field on the Configuration server. Then install the Avalara middleware
by executing the following command:
sudo -u porta-admin PORTAHOME_WEB=/home/porta-admin/ /home/porta-admin/cron_utils/avalara_installer.pl --verbose --install default
Configure the Avalara taxation method
At this step it is necessary to configure the Avalara taxation method.
- On the navigation menu, select Financial and click Taxation.
- On the Taxation panel, go to Taxation plug-ins and select Avalara from the Taxation plug-ins list.
- On
the panel that opens, enable the Use Avalara taxation plug-in option
and specify the plug-in credentials:
- Login – type your login to communicate with Avalara using the API.
- Password – type the password to communicate with Avalara using the API.
- Company identifier – specify your three-digit company code provisioned within the Avalara system.
- Description
– provide the conventional description for this plug-in.

- Click Save to save the plug-in configuration.
Define your taxation parameters
At this step, you must define the taxation parameters that apply to you as the service provider. They will be used to tax the services you provide.
- On the navigation menu, select My сompany and click Company info.
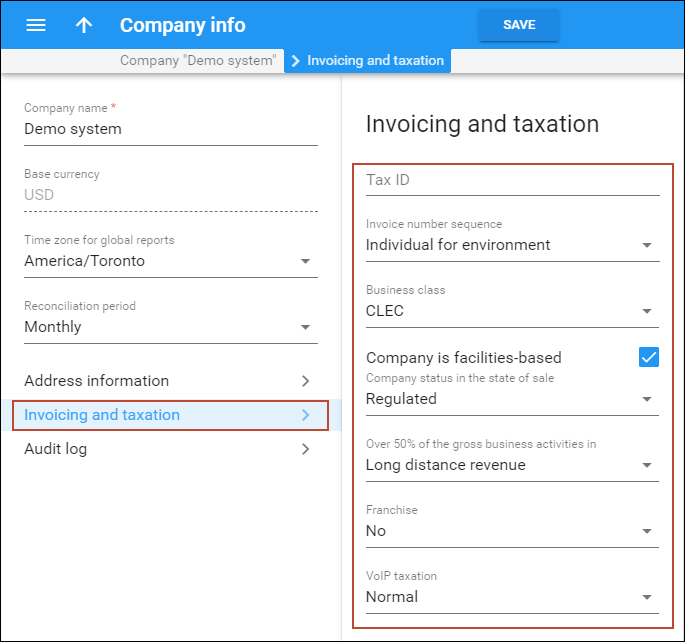
- On the Company info panel, click Invoicing and taxation, and specify your taxation parameters:
- Tax ID – type in your taxation ID.
- VoIP
taxation – specify the method for taxing your VoIP services:
- Normal – this method is conservative; it returns tax on VoIP-related transactions/service type codes. VoIP services are taxed using Transaction code 19.
- Aggressive – this method does not return tax on VoIP-related transactions/service type codes. VoIPA services are taxed using Transaction code 20.
- Specify
other relevant taxation parameters that apply to you as the service provider.
Click Help
 for the additional information
about available fields.
for the additional information
about available fields.
- Click the Save button.
Define taxation parameters for customer class
- On the navigation menu on the left, select Sales and then Customer classes.
- In
the Create a customer class sidesheet, fill in the customer class details:
- Name – type a short name for this customer class.
- Business model – select which customers this customer class will apply. Select Residential VoIP from the list.
- Currency – specify the currency in which you want to set the Collection threshold. When specified, this customer class can only be assigned to customers with the same currency. Once the currency selection is saved, it cannot be changed.
- Managed by – select Administrator only.

- Click Save.
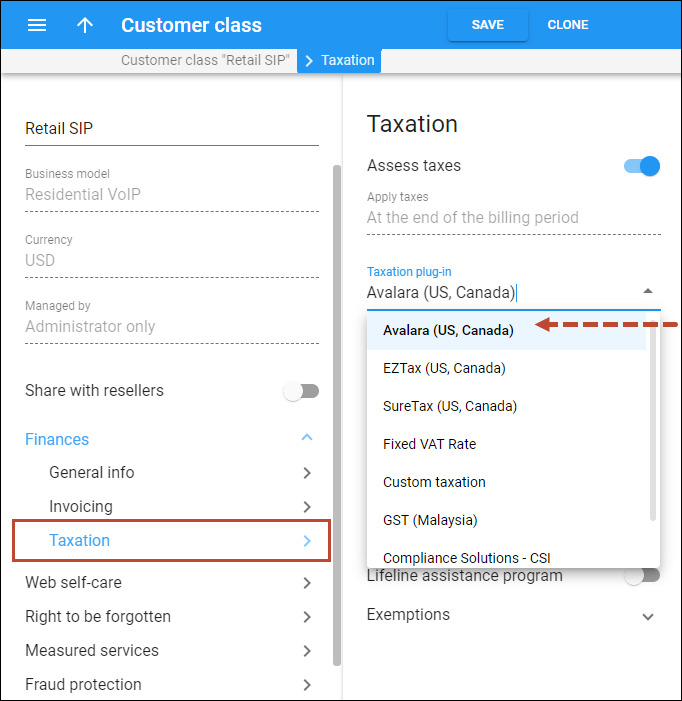
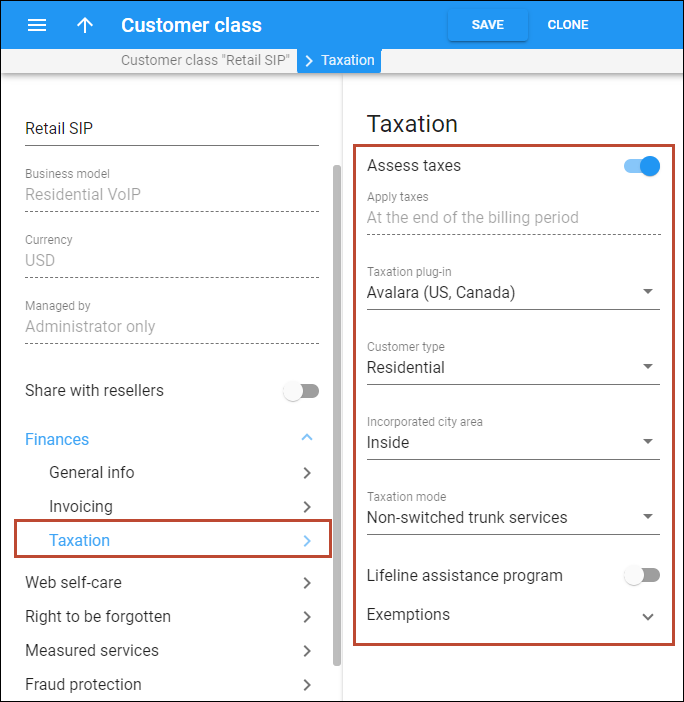
- On the customer class panel, click Finances, then click Taxation.
- On
the Taxation panel, select Avalara (US, Canada).
- Specify
the taxation parameters that will apply to the customers of this customer
class:
- Assess taxes – taxes can only be applied at the end of the billing period.
- Customer type – select Residential.
- Incorporated city area – define the customer’s location: inside or outside the incorporated city area.
- Taxation mode – specify which additional taxes must be calculated for a customer. For residential customers select the Non-switched trunk services option for calculating taxes based on the number of DID numbers a customer uses.
- Lifeline assistance program – use slider to entitle customers to a Lifeline assistance program.
- Exemptions – select which taxes the customers of this customer class are exempt from.
Complete the customer class configuration as described in the Basic residential VoIP service handbook.
- Click Save.
Override taxation parameters for a customer (optional)
If necessary, you can define different taxation parameters for an individual customer (e.g. customer John Doe is exempt from both federal and state taxes and is located outside an incorporated city area).
- On the navigation menu on the left select Sales and then Customers.
- Use search parameters to search for the desired customer, e.g. John Doe.
- Click the customer name to enter their record.
- On the Customer panel, go to Finances > Financial info.
- In the Taxation section, change Avalara (US, Canada) (As defined by the customer class) taxation plug-in to Avalara (US, Canada).
- Change
the necessary taxation parameters.

- Click Save.


