



This chapter shows you how to use off-peak periods to create different rates for different times of the day or week, and also how to apply different discounts based on time period. For more information on off-peak periods, please refer to the Rating individual calls section.
In the example that we use in this chapter, we assume that the goal is to set up a product that will provide calls to Germany with:
- 100 free weekend minutes.
- 200 free night minutes.
Configuration overview
- Enable off-peak periods on the Configuration server
- Define off-peak periods
- Define rates for off-peak periods
- Define service volumes for off-peak periods
1.Enable off-peak periods on the Configuration server
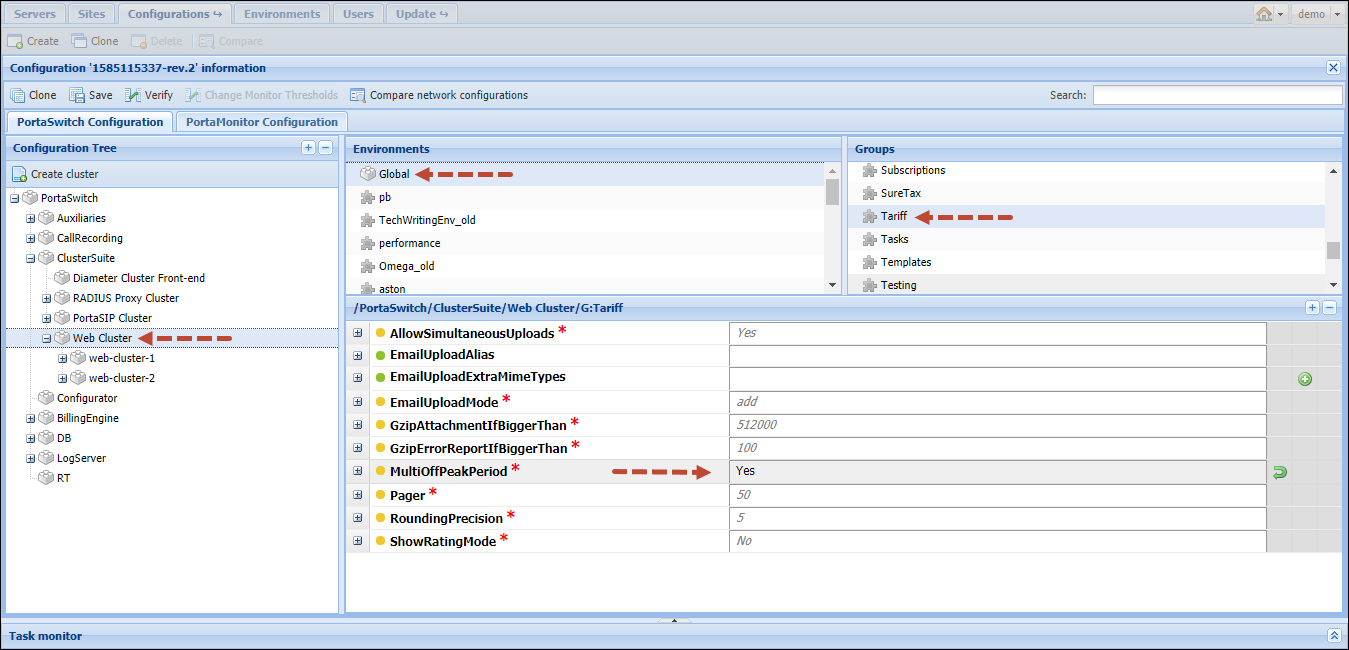
- Click the Save button and then the
 Verify button.
 - Verify the new configuration and click the Check/Apply button.
2.Define off-peak periods
Off-peak periods are defined per tariff as shown on the sequence of screenshots in this section. We will define two off-peak periods:
- weekends (from the midnight of Saturday until the midnight of Monday) as the first off-peak period, and
- night hours (from 9 PM until 8 AM) as the second off-peak period.
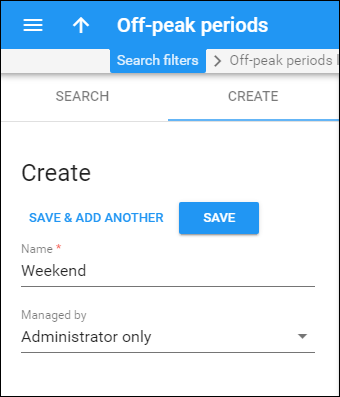
- On the navigation menu on the left, select Service catalog and click Off-peak periods.
- On the Create off-peak periods panel, specify the following details:
- Name – type a short name for the off-peak object;
- Managed by – select Administrator only here.
- Click Save.
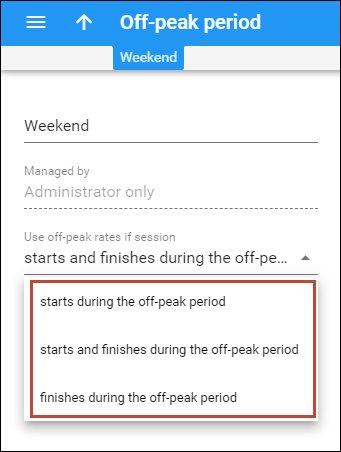
- On the Edit Off-peak periods panel that opens, select one of the three options in the Use off-peak rates if session field depending on when you want the call to start and/or finish.
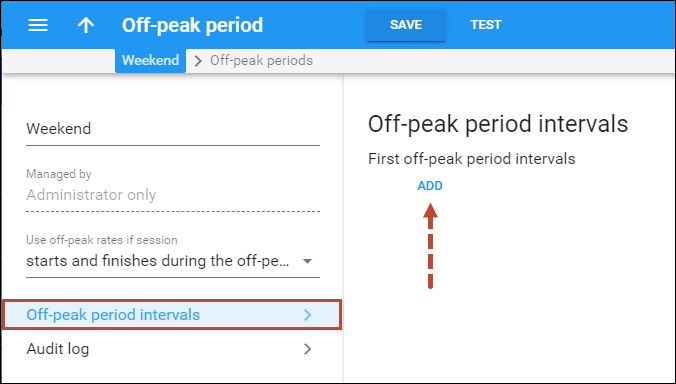
- Go to the Off-peak period intervals panel and click Add.
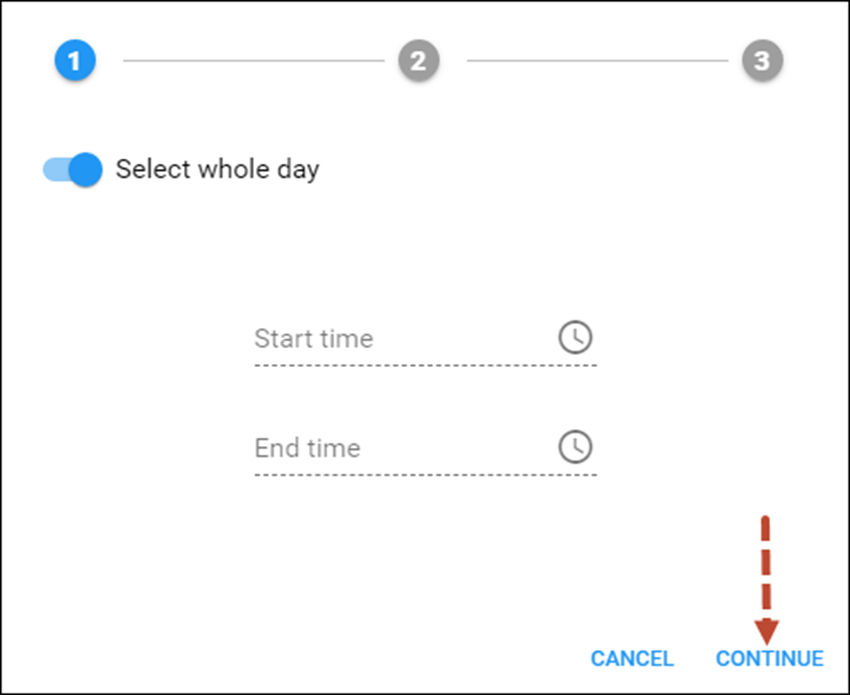
- On the first page of the dialog window, enable the Select whole day option as we are setting weekends as the first off-peak period. Click the Continue button.
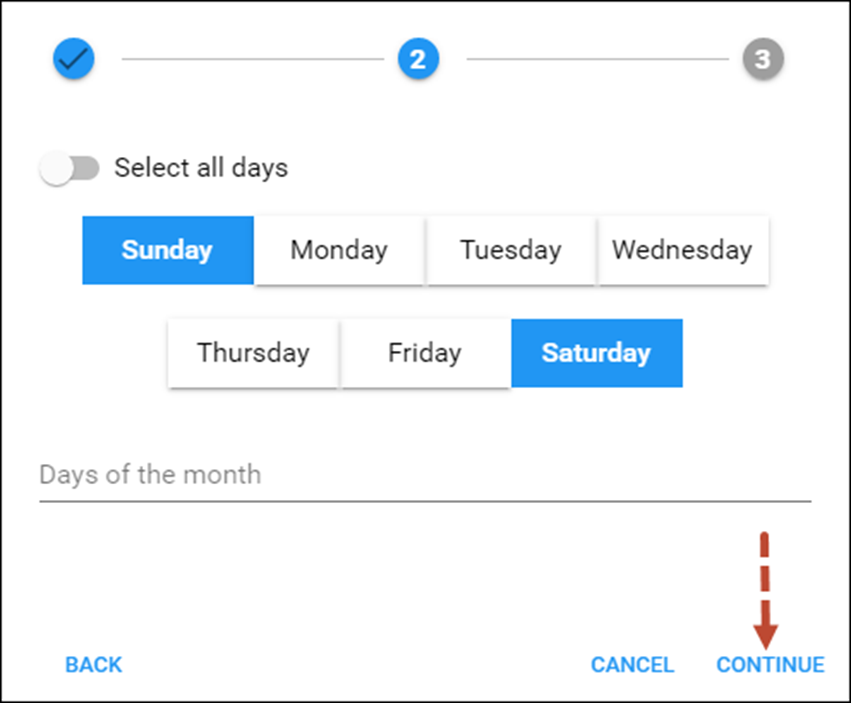
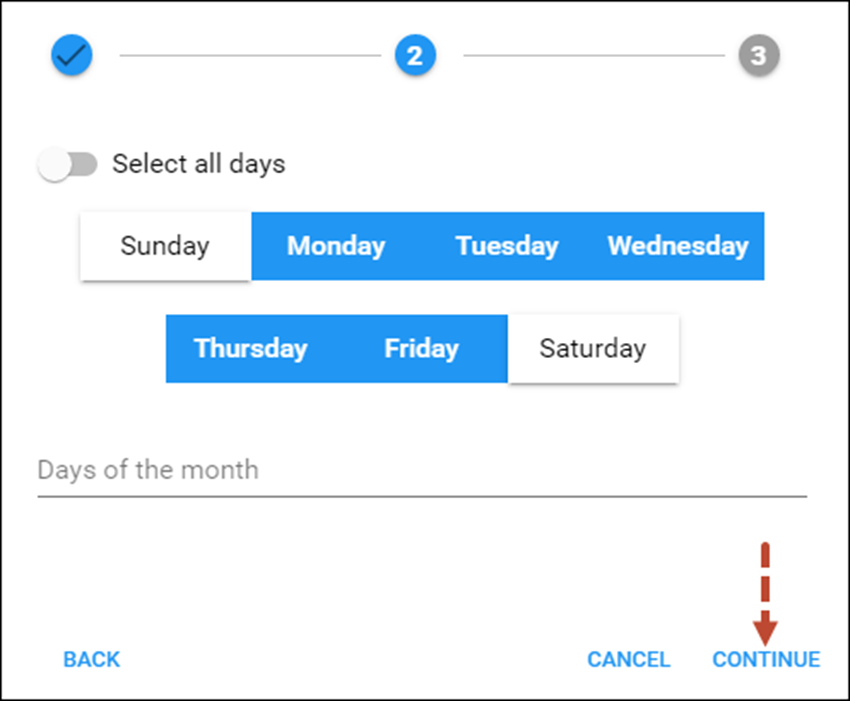
- On the second page disable the Select all days option and choose Sunday and Saturday from the list. Click the Continue button.
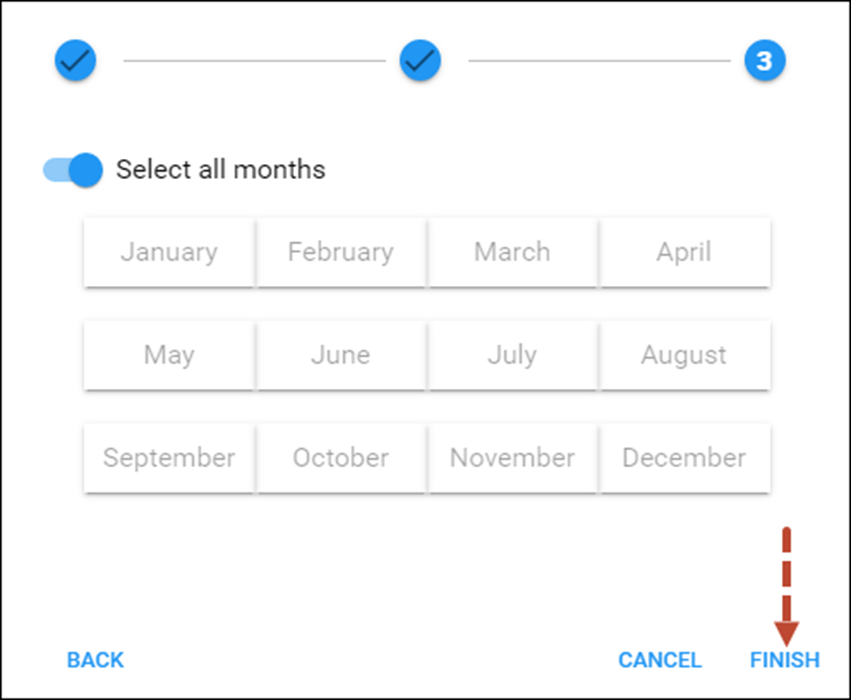
- On the third page, enable the Select all months option and click the Finish button.
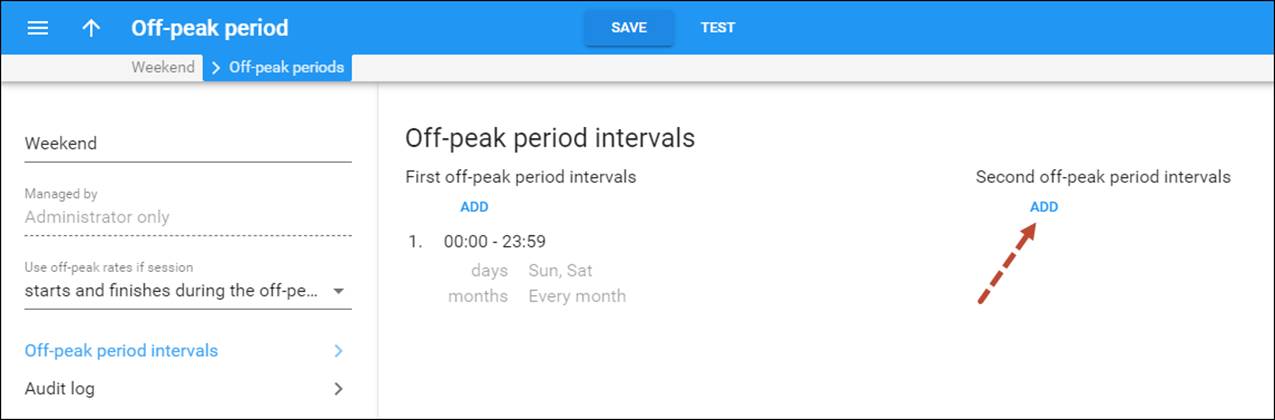
- Now you need to define the second off-peak period (from 9 PM until 8 AM during working days). Click the Add button.
- On the first page disable the Select whole day option and specify 21:00 in the Start time field and 08:00 in the End time field. Click the Continue button.
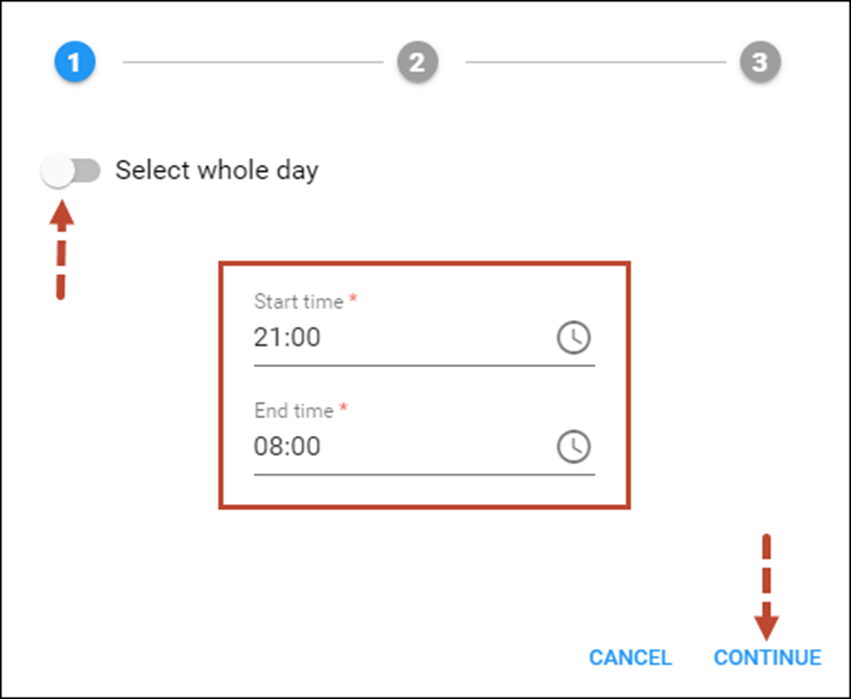
- On the second page disable the Select all days option and choose all the days except Sunday and Saturday from the list. Click the Continue button.
- On the third page, enable the Select all months option and click the Finish button.

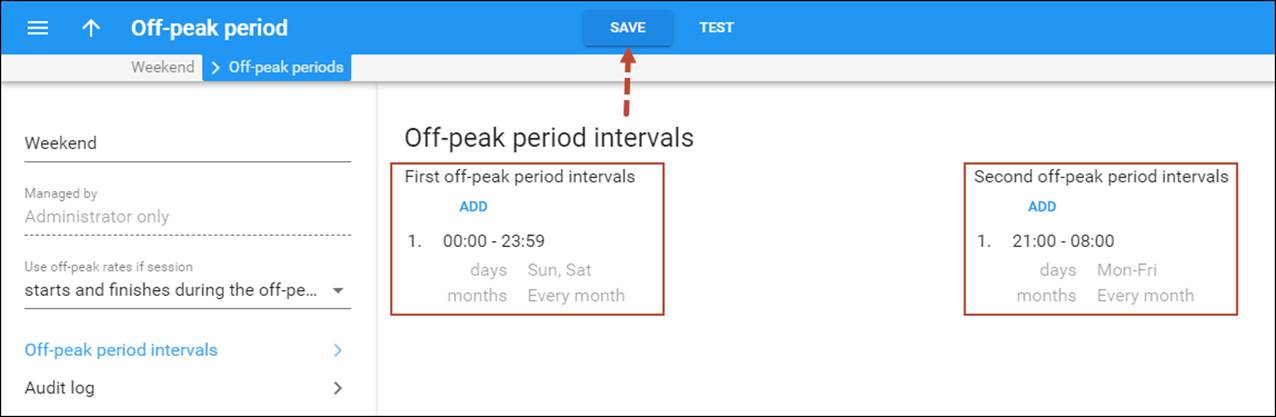
- Click Save.
- On the Tariff list panel, choose the tariff (SIP Subscribers) for which you want to set up the off-peak period created.
- On the tariff panel, click General info and select the previously created off-peak period in the Default off-peak period field.

- Click Save.
3.Define rates for off-peak periods
You can define different rates for the first and second off-peak periods on the Rates page. Select the Separate peak/off-peak rate option and select the off-peak period from the list. Insert prices for the first and second off-peak intervals into the two pairs of adjacent fields (0.2 and 0.08 on the screenshot) located below the fields where you define per-minute prices for the first and next intervals:

PortaBilling will then check whether the call fits into the first off-peak period; if it does, the price for the first off-peak period will be used. If the call does not fit into the first off-peak period, then the second off-peak period will be checked and that corresponding price will be used if the call fits into this period. Otherwise, peak rates are applied.
4.Define service volumes for off-peak periods
Now we will add different service volumes for the off-peak and second off-peak periods to the bundle created previously.
- Navigate to Service catalog > Bundles and open the created Renewable by calendar bundle, e.g., EasyCall offers.
You can edit bundles only when they are not in use (not assigned to any product, account or customer).
- Go to Bundle items, click Add, and fill in the bundle item details:
- Service – select Voice calls.
- Code group – select Germany code group.
- Measured as – select Service used.
- Service volume – select Unlimited.
- Click Save (you will be redirected to the Bundle item panel).
- Go to Bundle item > Service volume panel, and define the values for the Peak and two Off-peak periods according to the given example:

- Click Save.


