Let's set up account 12065558966 as a shared line on two IP phones (phone A and B), e.g., used by a boss and a secretary. This configuration can be achieved as follows:
Phone A (boss):
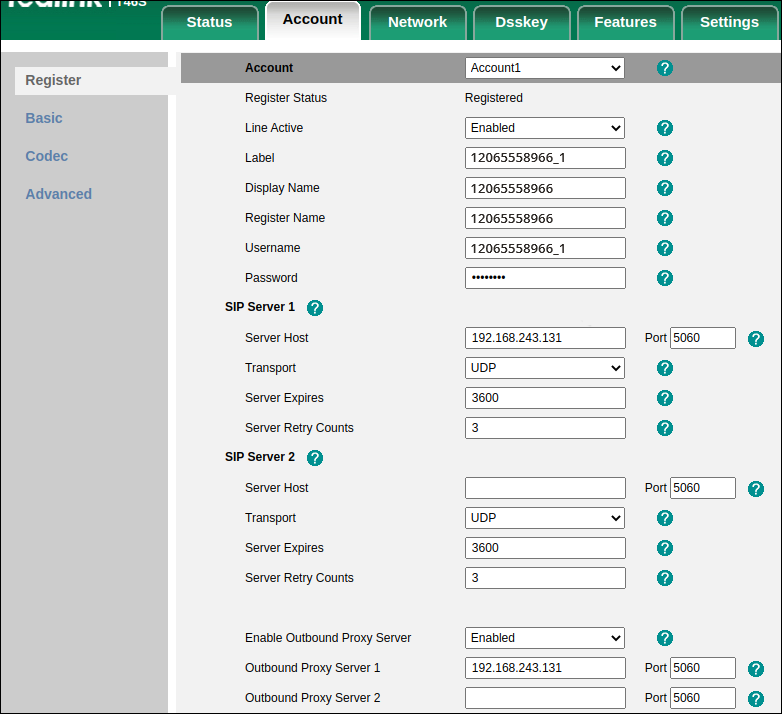
- Registers account 12065558966 with register name 12065558966 and username 12065558966_1.
- Assigns line keys 1 and 2 for the account 12065558966.
Phone B (secretary):
- Registers account 12065558966 with register name 12065558966 and username 12065558966_2.
- Assigns line keys 1 and 2 for the account 12065558966.
This setup allows either the boss or the secretary to answer incoming calls to the boss's extension. Calls on the shared line can be placed on hold, barged in on, or retrieved from another shared phone.
Configuration for Yealink T46S
Phone A
Log in to the user web interface and perform the following steps:
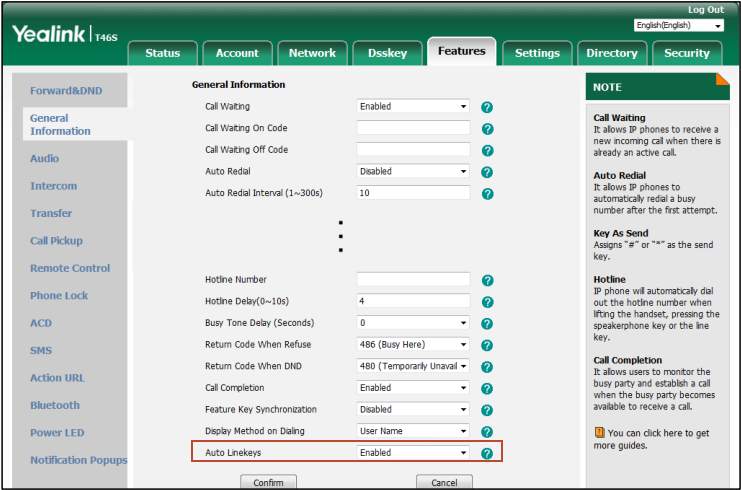
- Enable the “auto linekeys” feature to automatically assign multiple DSS keys with “Line” type for a shared line registered on the IP phone:
- Register the account:
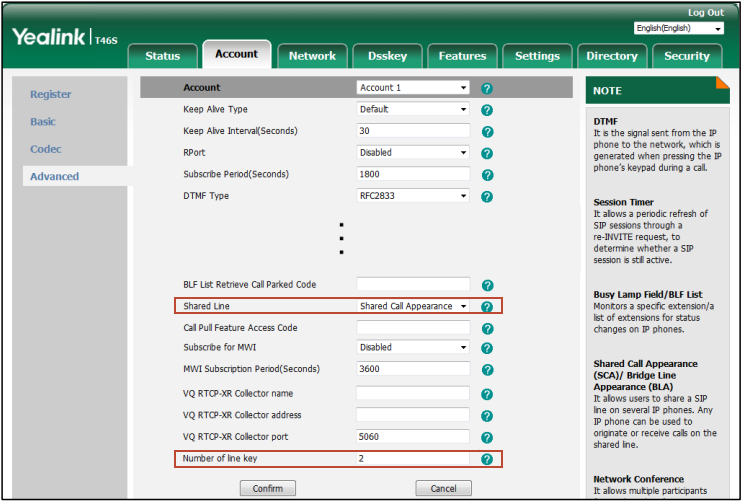
- Enable the shared line appearance feature and specify the number of line keys used for the shared line on the IP phone:
Phone A will automatically configure the line keys from the first unused DSS (“Direct Station Selection”) key, according to the configured number in the Number of line key field.
Phone B
Log in to the user web interface and perform the same steps as for phone A.
But when configuring step 2 (“Register the account”), specify the phone B username “12065558966_2.”
Configure a "Private Hold" soft key for IP phones (optional)
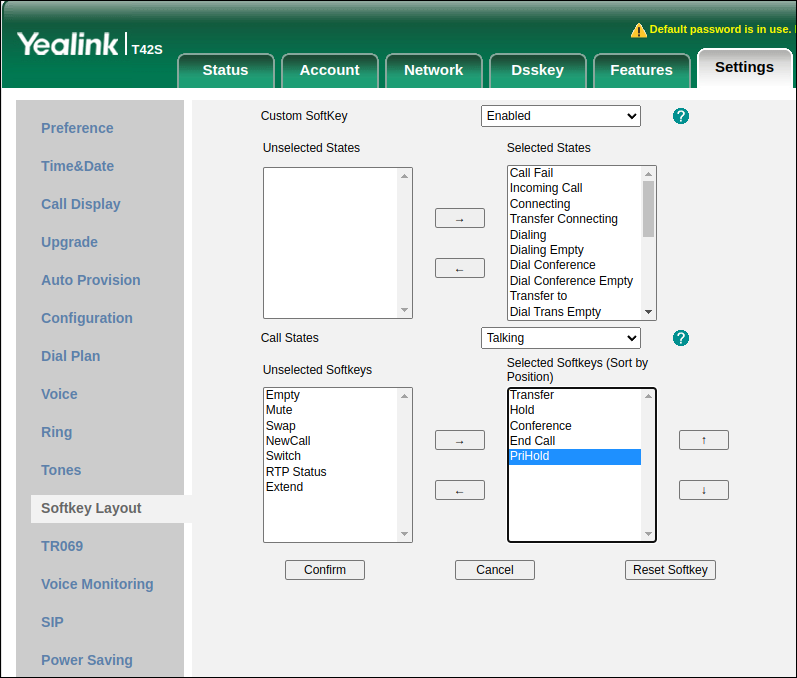
By default, the ”Private hold” soft key isn’t displayed in the phone menu. To configure the “Private hold” soft key:
- Go to Settings > Softkey Layout.
- In the Custom Softkey field, select Enabled.
- In the Call States field, select Talking.
- In the Unselected Softkeys field, select PriHold and click "→".
- Click Confirm.
Configuration for Polycom VVX 150
Phone A
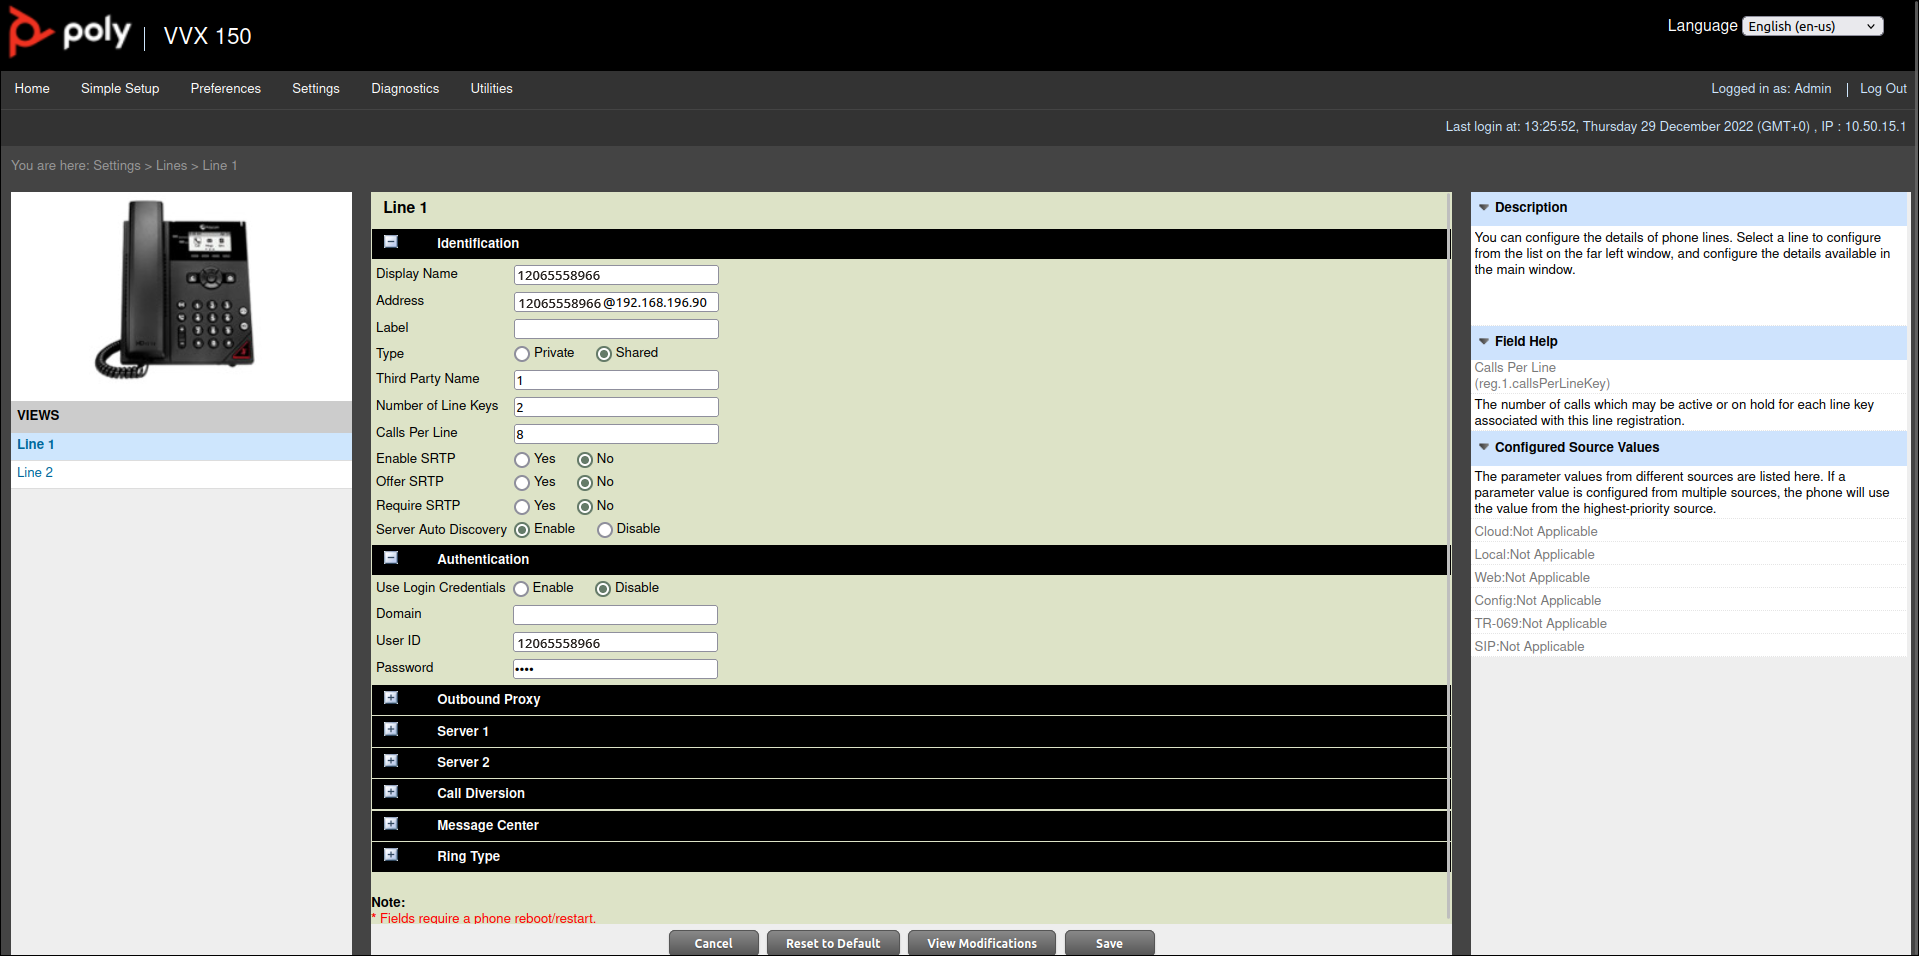
Log in to the user web interface as "admin" and register an account as a shared line in the following way:
- Go to Settings > Lines > Line 1
- Fill in the details:
- Display name
- Address
- Change Type to Shared
- Third party name set to "1" (will be used as shared line identifier)
- Set Number of Line Keys to "2"
- In Authentication section specify:
- User ID – the the account ID (phone number), e.g., 12065558966
- Password – specify the password used to authenticate all calls made using this account
Phone B
Log in to the user web interface and perform the same steps as for phone A. Third party name set to "2" (will be used as the shared line identifier).


