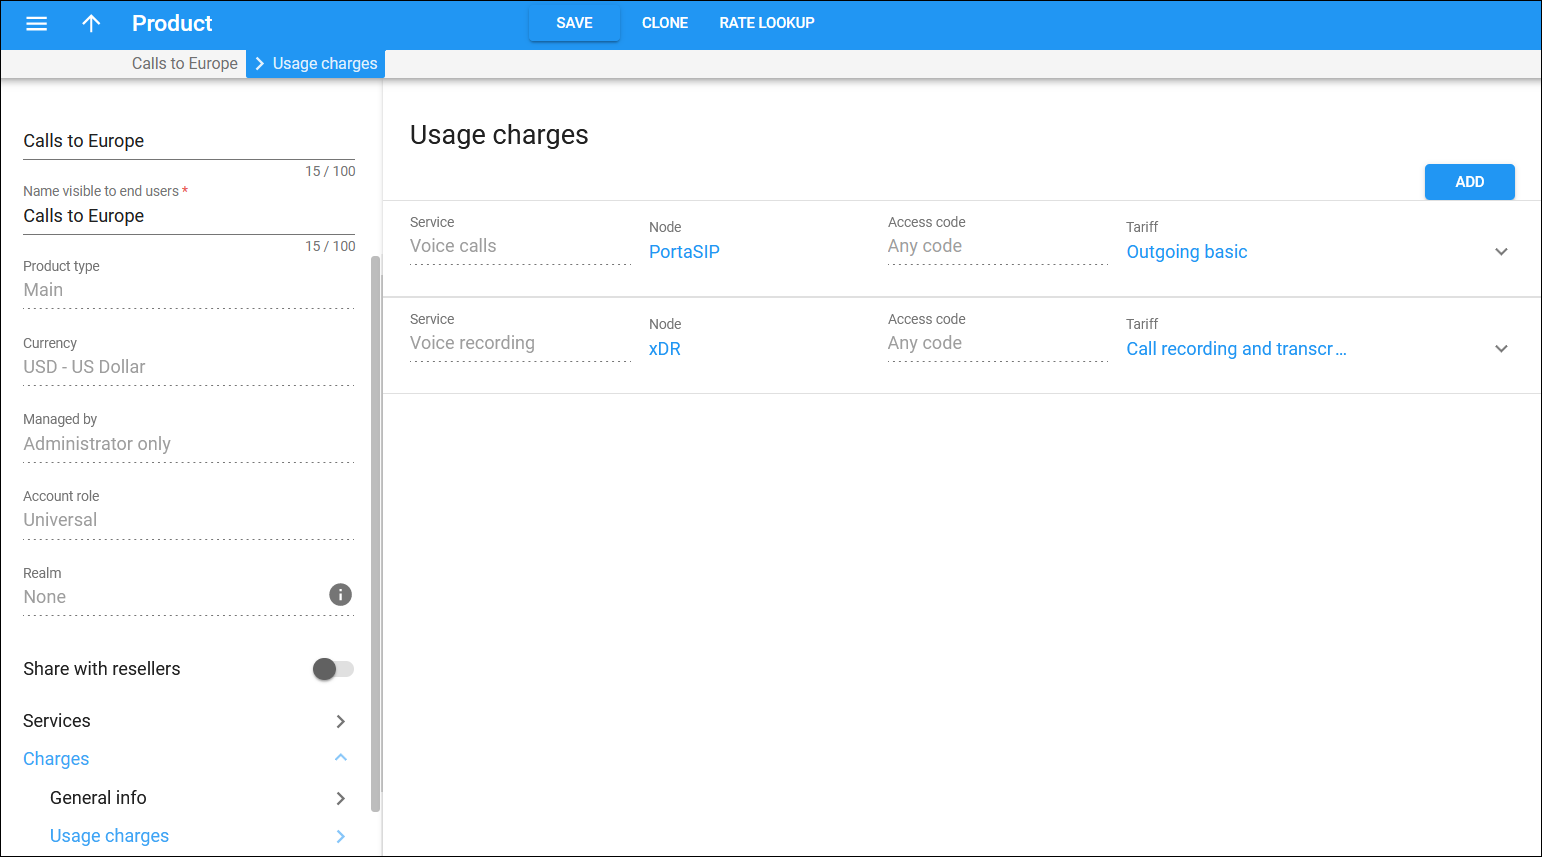
This handbook demonstrates how to set up charges for call recording and transcription services based on the total duration of recorded and transcribed calls. You can offer your customers a bundle with the allocated service volume, such as “10+10h Call Recording & Transcription” for $10 per month. When the customers use up the allocated volume, you can charge them at a pay-as-you-go rate.
Charges are applied once a day using the xDR Mediator utility.
- 10 hours of call recording
- 10 hours of call transcription
Recording one hour deducts one hour from both quotas, since all recorded calls are automatically transcribed.
Once the allocated volume is used up, the customers are charged according to the pay-as-you-go rates:
- $0.03/minute for recording
- $0.05/minute for transcription
Configuration overview
The configuration consists of deploying a new CDR Mediation instance which is typically performed by the PortaOne support team, and configuration steps on the PortaBilling web UI, such as creating tariffs, bundle, and setting up the product.
1. CDR Mediation setup
Billing call recordings and transcriptions require CDR Mediation to be configured for your billing environment. Since the CDR Mediation setup is a complex procedure that should be performed by an experienced engineer with advanced knowledge of PortaBilling, we recommend contacting our Support team for assistance.
2. Create rate codes
To proceed with the bundle and pay-as-you-go rates configuration, add the CallRecording and SpeechToText special rate codes to your system. You can find the instructions on how to add new rate codes in the Initial configuration: Create rate codes handbook.

3. Set up a vendor to calculate costs
PortaBilling requires that every service is accounted for both on the revenue side (customers) and the cost side (vendors). You need to create a vendor in the system to calculate service costs. To assign a vendor tariff created at step 3.1, you need to create a vendor connection. This connection will be used to keep records of all recorded/transcribed calls and track the costs, for example, charges from your speech-to-text provider like Whisper.
3.1 Create a vendor
- On the navigation menu on the left, select Infrastructure, then Vendors.
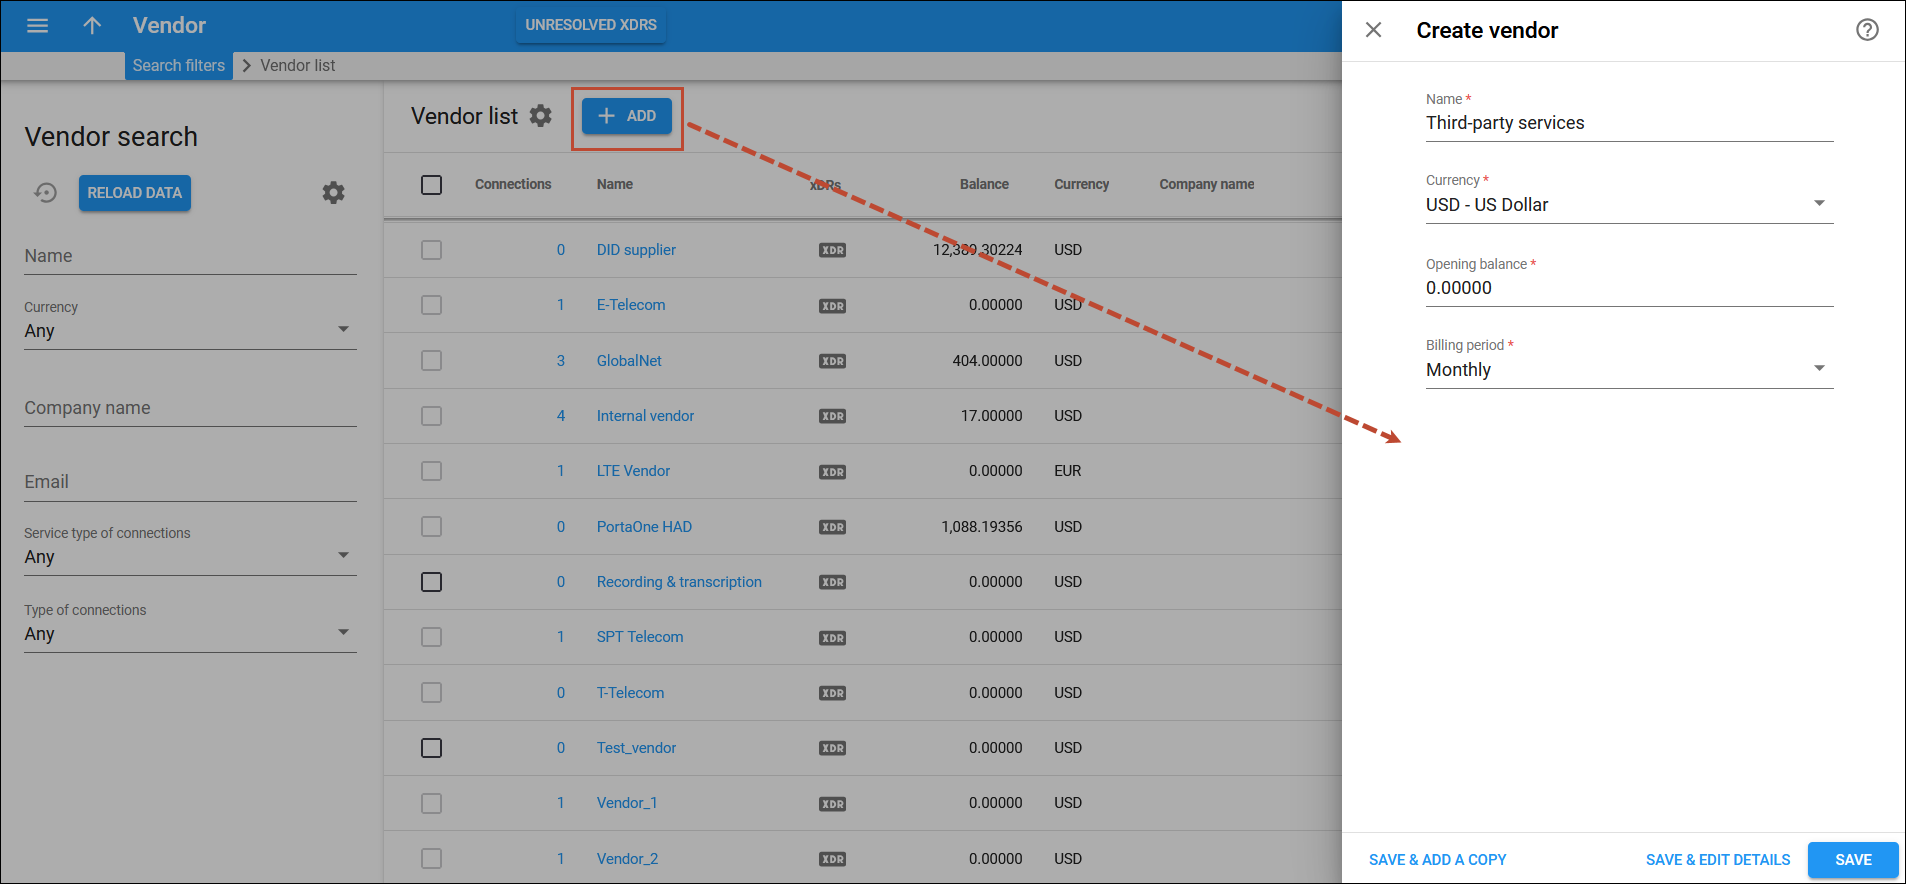
- Click Create and fill in the Create vendor form:
- Name – type a short name for the vendor, for example, “Third-party services”.
- Currency – choose the currency in which the costs are calculated.
- Opening balance – this option is usually used when you migrate a vendor from a legacy system to PortaSwitch. Leave “0” here.
- Billing period – choose a billing period for the vendor. A billing period defines how often the vendor will bill you, e.g., monthly.
- Click Save.
3.2 Create a vendor tariff
The vendor tariff should include rates for rate codes CallRecording and SpeechToText created in step 2. The system uses these rate codes to distinguish between call recording and transcription services while matching them with the rate within a tariff.
- Navigate to Service catalog > Tariff.
- Click + Tariff and fill in the tariff details:
- Name – specify a name for the tariff, such as “Vendor call recording & transcription”.
- Currency – choose the currency in which the cost of call recording and transcription services will be calculated.
- Service – select Voice recording.
- Applied to – select Vendor.
- Define prices – select per individual rate code.
- Code group set – select None.

- Open the Rates tab.
To add a rate for call recording, click + Rate and fill in the rate details:
- Rate code – type in “CallRecording” or select it from the list.
- Rating mode – select Flat rate.
- Effective from – specify when the rate becomes effective. By default, this parameter is set to “immediately”. If you want this rate to take effect sometime in the future, select “Specific time” and type in the date manually, or select in the calendar.
- First interval, seconds – specify the first rounding interval in seconds (default is 1 second). This interval defines the minimum duration of the recorded call that is going to be billed to the customer. For instance, if the first interval is set to 30 seconds, a recording lasting between 1 and 30 seconds will be billed as a 30-second call.
- First price – specify the per-minute price for the first interval.
- Next interval, seconds – specify the next rounding interval in seconds (default is 1 second). This determines how the call recording duration beyond the initial interval is billed. For example, if the next interval is set to 1 second, any duration beyond the initial interval will be billed in 1-second increments. If you set the first interval to 30 seconds and the next interval to 1 second, and the call recording lasts for 36 seconds, the customer will be charged for 36 seconds.
- Next price – specify the per-minute price for the next interval.

Add a rate for the transcription service in the same way. Select the “SpeechToText” rate code for this rate and set the corresponding price set by the transcription service provider.
3.3 Create a vendor connection
- On your vendor’s panel, click Connections.
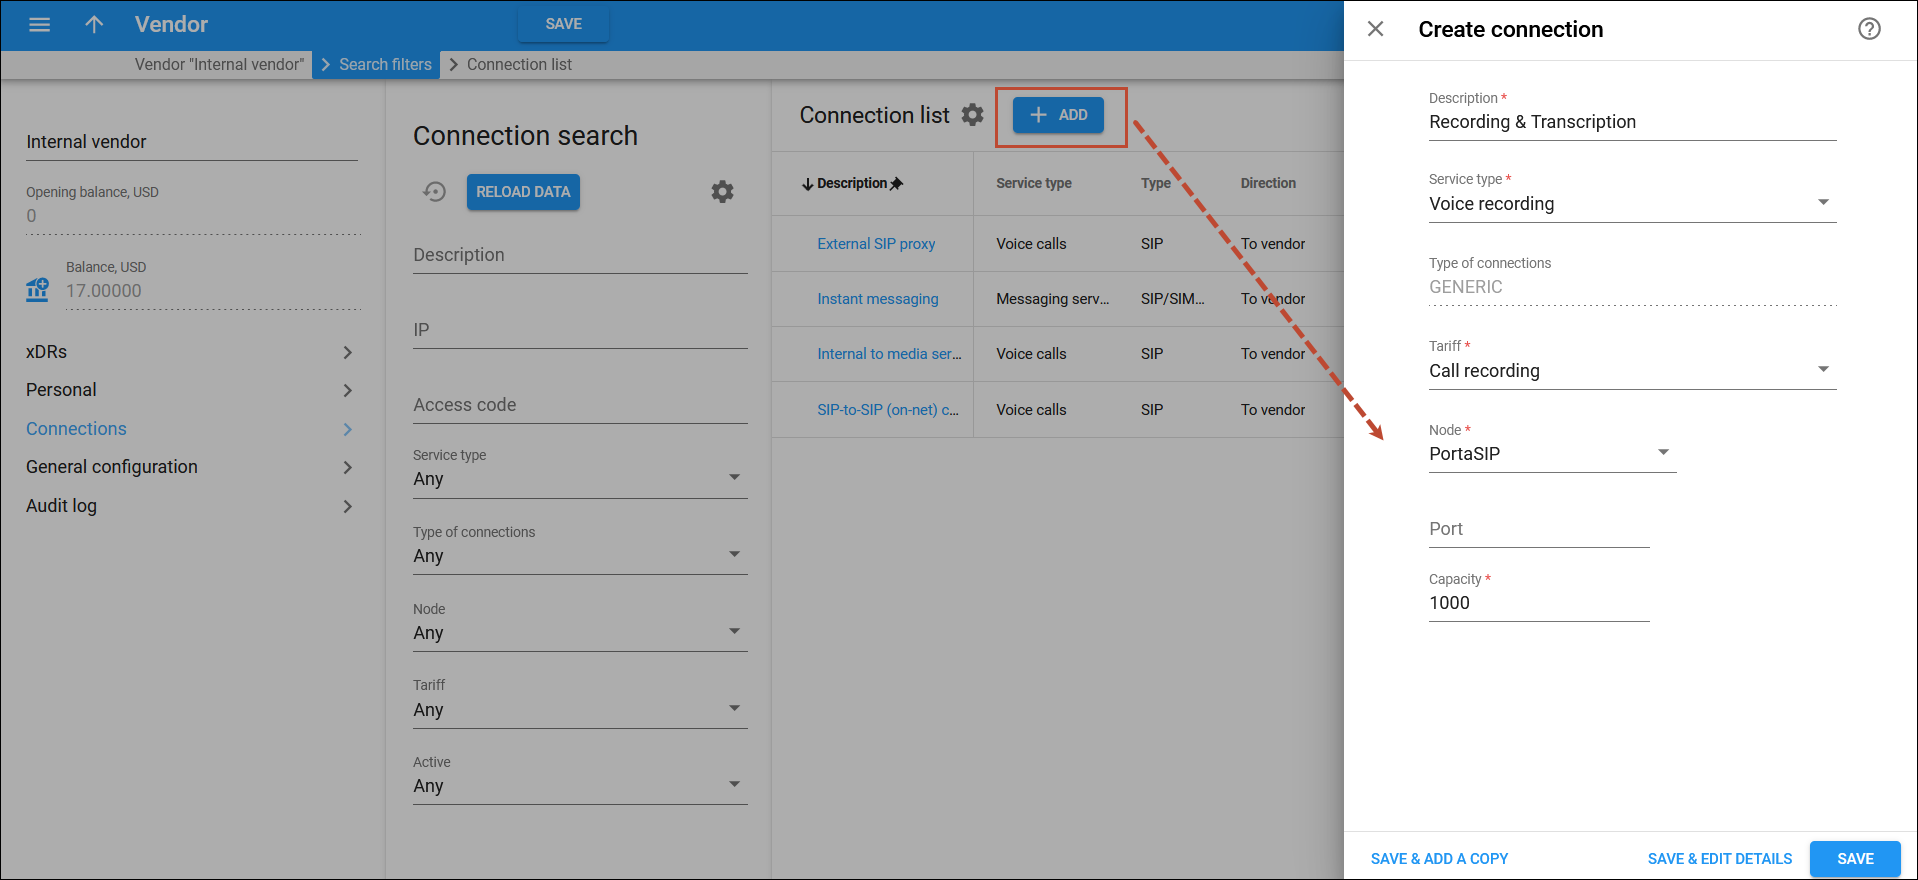
- Click Add and fill in the connection details:
- Click Save.
4. Set up the product
Charging at a pay-as-you-go rate can be enabled only on the Main product. You can create a new product or update an existing one.
4.1 Create a customer tariff
You need to create a Customer tariff that will be used to charge your customers at pay-as-you-go rates, e.g., $0.03/minute for recording and $0.05/minute for transcription. Therefore, it should include rates for rate codes CallRecording and SpeechToText created in step 2.
The system uses these rate codes to distinguish between call recording and transcription services while matching them with the rate within a tariff.
To create a customer tariff:
- Navigate to Service catalog > Tariffs.
- Click + Tariff and fill in the tariff details:
- Name – set a descriptive name for the customer tariff, e.g., “Call recording & transcription”.
- Currency – select the currency in which you will charge your customers.
- Service – select Voice recording.
- Applied to – select Customer.
- Managed by – select Administrator only.
- Define prices – select per individual rate code.
- Code group set – select None.

- Open the Rates tab.
To add a rate for call recording, click Add and fill in the rate details:
- Rate code – type in “CallRecording” or select it from the list.
- Rating mode – select Flat rate.
- Effective from – specify when the rate becomes effective. By default, this parameter is set to “immediately”. If you want this rate to take effect sometime in the future, select “Specific time” and type in the date manually, or select in the calendar.
- First interval, seconds – specify the first rounding interval in seconds (default is 1 second). This interval defines the minimum duration of the recorded call that is going to be billed to the customer. For instance, if the first interval is set to 30 seconds, a call lasting between 1 and 30 seconds will be billed as a 30-second call.
- First price – specify the per-minute price for the first interval ($0.03 in our example).
- Next interval, seconds – specify the next rounding interval in seconds (default is 1 second). This determines how the call recording duration beyond the initial interval is billed. For example, if the next interval is set to 1 second, any duration beyond the initial interval will be billed in 1-second increments. If you set the first interval to 30 seconds and the next interval to 1 second, and the call lasts for 36 seconds, the customer will be charged for 36 seconds.
- Next price – specify the per-minute price for the next interval (for our example, it is the same – $0.03).

Add a rate for the transcription service in the same way. Select the “SpeechToText” rate code for this rate and set the corresponding price ($0.05 in our example).

4.2 Create a code group set and a code group
To proceed with the bundle configuration, you need to create a code group set that will be associated with the bundle. The code group set, e.g., “Call recording and transcription,” should include two code groups, e.g., “Call recording” and “Recording transcription.” These code groups should include the CallRecording and SpeechToText rate codes correspondingly.
To create a code group set and a code group:
- Navigate to Service catalog > Code group sets
- Click Add and fill in the required information:
- Name – type in a descriptive name for the code group set (e.g., “Call recording and transcription”).
- Type – leave the default type Regular.

- Open the created Code group set.
To add the “Call recording” code group:
- click Add and specify the code group name, and optionally, add a description.

- Click Save.
- click Add and specify the code group name, and optionally, add a description.
- To add the rate code to the “Call recording” code group:
- On the Code group page, click All rate codes.

- In the Rate code search panel, select Custom in the Format field, specify CallRecording in the Prefix field to find the required rate code in the list, and click Apply filters.

- On the Rate code list panel, select the CallRecording prefix and click Assign to group.
- Select the code group “Call recording” and click Assign.

- On the Code group page, click All rate codes.
Repeat steps d-e to add the “Call transcription” code group with the corresponding rate code.

4.3 Create a bundle
The quotas (10 hours of call recording and 10 hours of call transcription) can be provided within a bundle.
To create a bundle:
- Navigate to Bundles and click Add.
- Fill in the required fields:
- Name – give the bundle a descriptive name. In this example, the bundle name is “10+10h Call Recording & Transcription”.
- Currency – select the currency in which you charge your customers.
- Code group set – select the code group set created at step 4.2
- Bundle type – select Renewable by calendar (new quota).
- Managed by – select Administrator only.
- Apply bundle if a rate code is found that – leave the default option Matches the rate exactly.
- Description – optionally, you can add a short description for this bundle.

- Create a bundle item with the service volume for call recording. Navigate to Bundle items, click Add, and fill in the details:
- Service – select Voice recording.
- Code group – select the “Call recording” code group created in step 4.2.
- Measured as – select Service used.
- Service volume – specify the service volume in minutes.

- Add a bundle item with the service volume for call transcription:
- Service – select Voice recording.
- Code group – select the “Call transcription” code group created at step 4.2.
- Measured as – select Service used.
- Service volume – specify the service volume in minutes.

Every time a call is recorded and transcribed, the system will deduct the same number of minutes from both bundle items.

4.4 Create a subscription
To define the recurring charges (e.g., $10 per month) for the allocated call recording and transcription service volumes, create a subscription:
- Navigate to Subscriptions and click + Subscription plan.
- Fill in the subscription details:
- On the General tab:
- Name – type the name of the subscription plan; in this example, “10$ Call recording & transcription”.
- Currency – specify the currency in which you charge your customers.
- Managed by – select Administrator only.
- Activation mode – leave the default option At the given start date. This means that the subscription will be activated when it’s assigned to an account with a product.
- Subscription charges applied – select At the end of the billing period.
- Can be applied more than once – leave this checkbox unchecked.

- On the Fees tab:
- Activation fee – leave the default value of $0.
- Monthly fee – specify the monthly periodic fee, e.g., $10.

- On the General tab:
- Click Save.
4.5 Configure the product
Before proceeding with this step, ensure that both call recording and transcription services are configured on your product.
To edit the existing product:
- Open the product’s Services tab and add the Voice recording service.
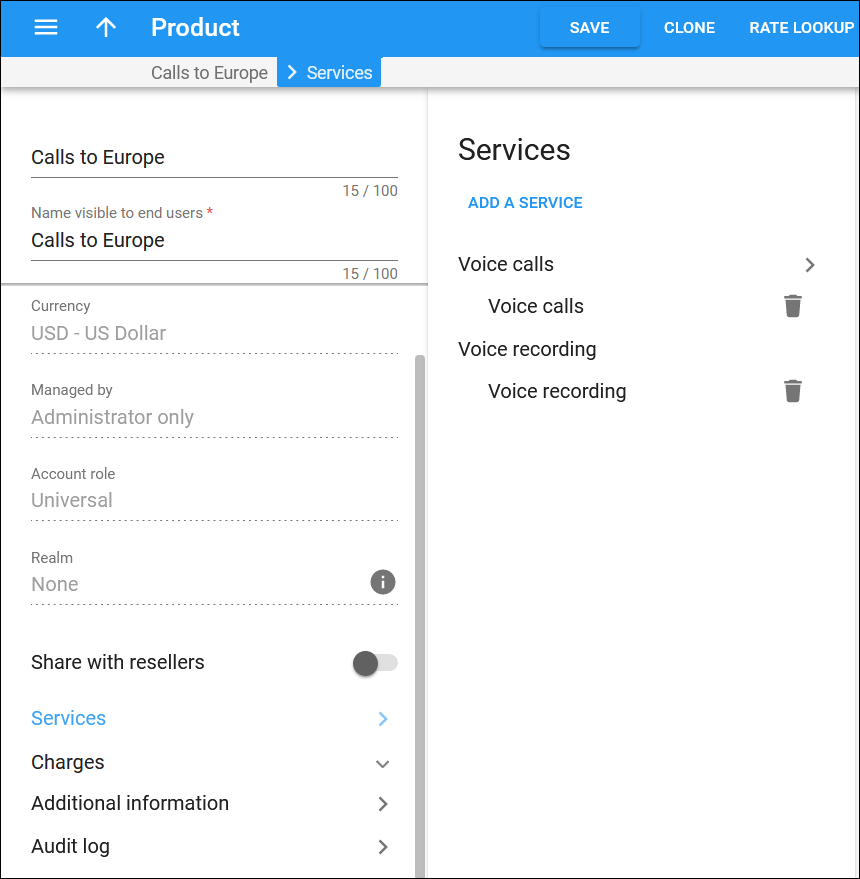
- Open Charges > Usage charges, and click Add. Fill in the details:
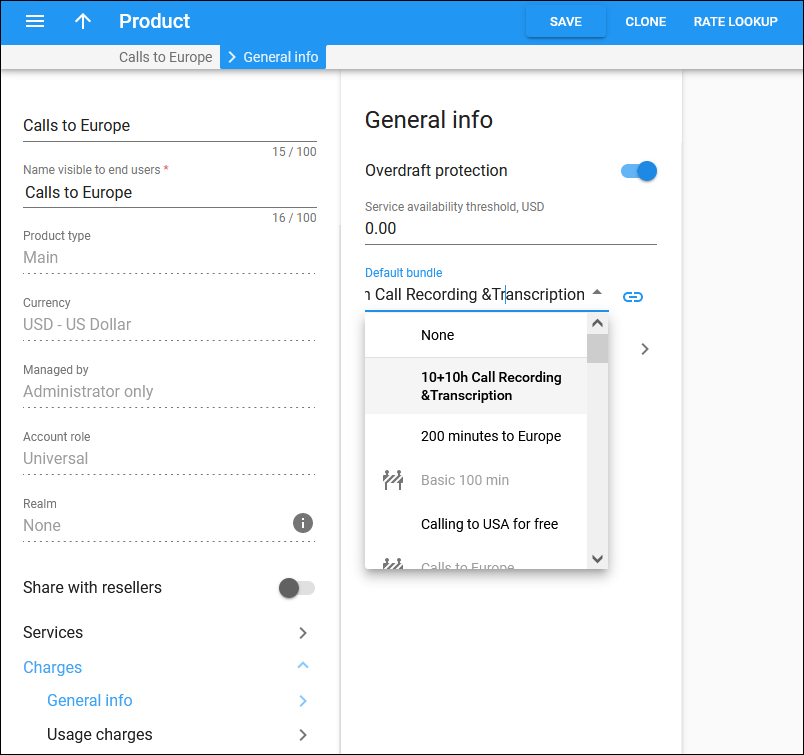
- On the Charges > General info panel, select the bundle created at step 4.3 from the Default bundle dropdown list.
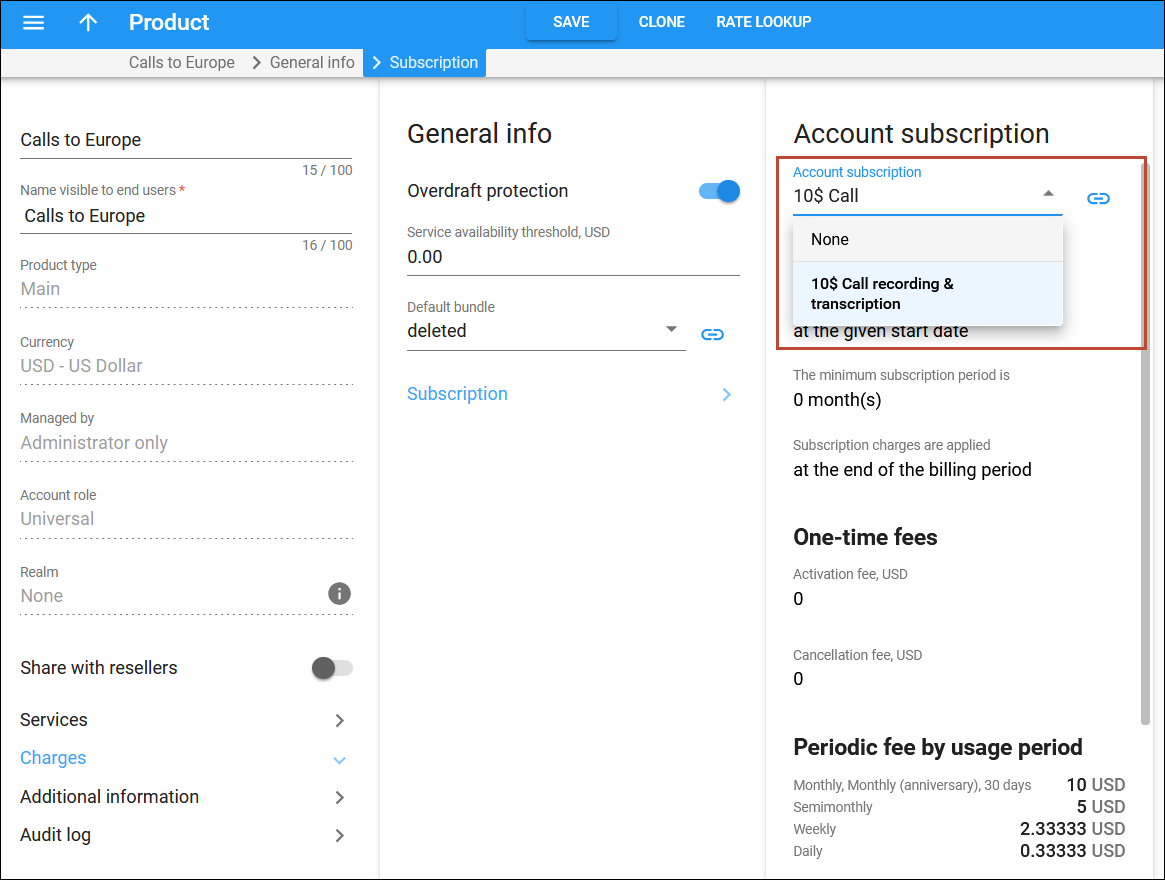
- On the Charges > General info > Account subscription panel, select the subscription plan created at step 4.4 from the Account subscription dropdown list.
- Click Save on the toolbar.