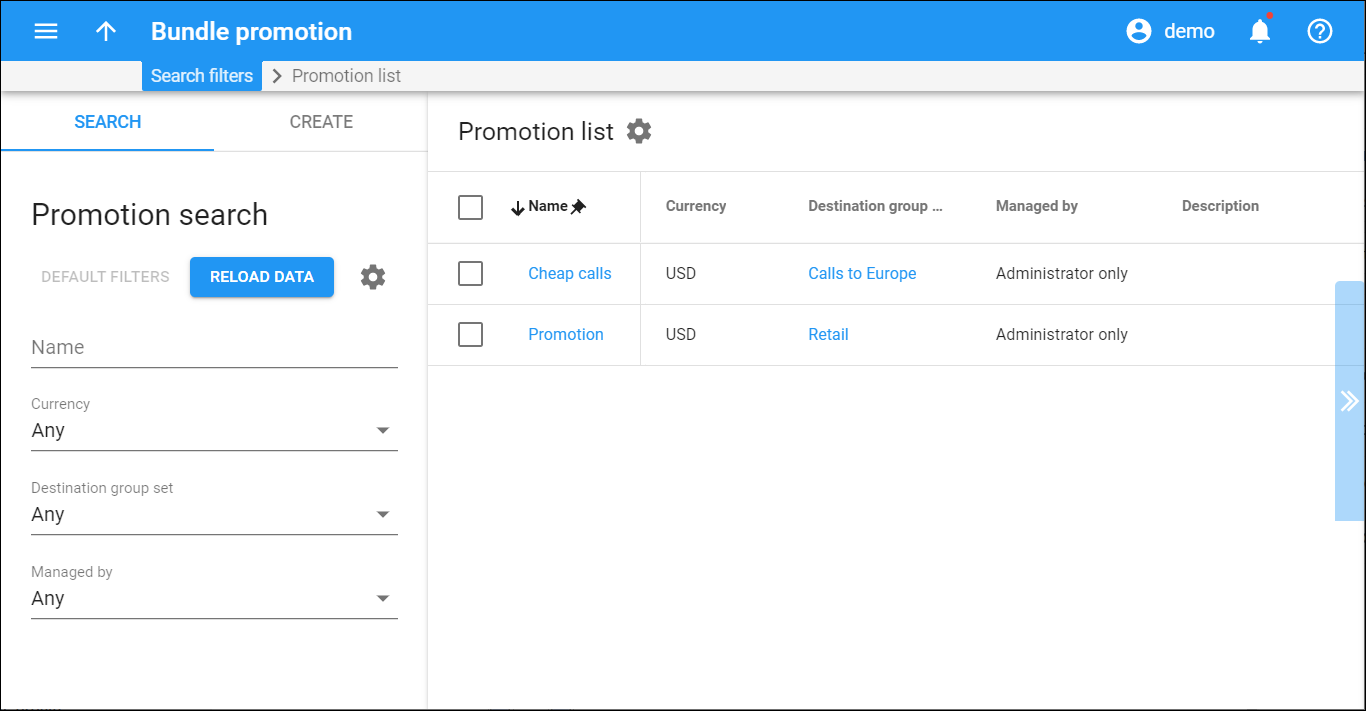
The promotions functionality enables you to build a powerful marketing plan for attracting new clients and encouraging existing ones to spend more money on your services. Use it to provide promotional discounts based on the monthly amounts of funds spent/volume of service used. Or streamline your revenue by applying the minimum service usage commitments to your customers.
To edit a bundle promotion, click the bundle promotion name in the list.
To delete a bundle promotion, check the box next to the bundle promotion name and click Delete.
To delete several bundle promotions, check the box next to the Name column header. You can delete only unassigned bundle promotions.
Each entry in the result list consists of:
- Name – The bundle promotion name, which is also a link that redirects you to the edit bundle promotion panel.
- Currency – The currency the bundle promotion is priced in.
- Destination group set – The destination group set the bundle promotion applies to.
- Managed by – This shows who can make changes to the bundle promotion, whether it is an administrator or a particular reseller.
- Description – The bundle promotion description.
Customize the panel
Change table settings – click Settings in the title bar to customize columns and change row style.
Re-order the columns – drag-and-drop the column headers right or left to place the columns in the order you want.
Re-order the rows – click Arrow (or
) next to the column header to re-sort the rows. For example, the Promotion list panel displays promotions in alphabetic order. You can re-sort them in the reverse order.
Change the default number of results globally – use the Number of results drop-down list in the upper right corner to adjust the maximum number of rows that appear on the panel. By default, the panel displays 25 rows. Once the number is changed, it's automatically saved, so the same number of rows is shown for PortaBilling entities, e.g., customer, account, reseller, etc.


