Before the Microsoft Teams (Teams) integration setup starts, we would like to confirm that the steps from the following checklist are completed:
1. Please log in to the Microsoft Office 365 Admin Center and do the following:
1.1 Make sure you have purchased the Microsoft Office licenses with a phone system option in a quantity that matches the number of planned Teams users plus one.
1.2 Assign a license to each user that you plan to add to Teams.
1.3 Make sure you still have an extra license that will be later assigned to a “virtual” user for Direct Routing setup.
1.4 Remove canceled, suspended, or expired licenses if any.
1.5 Remove any existing Direct Routing configurations if any.
1.6 Remove a Microsoft Calling Plan or Domestic Calling Plan if any was previously used, as you will be using your service provider’s calling plan instead.
2. To prepare for the Direct Routing setup, navigate to Admin Settings >> Domains. Make sure that your company domain, which you plan to use for Direct Routing, has the Skype service enabled and that the domain status is Healthy.
See how to fix possible Microsoft Domain issues here.
3. Send the following information to your service provider:
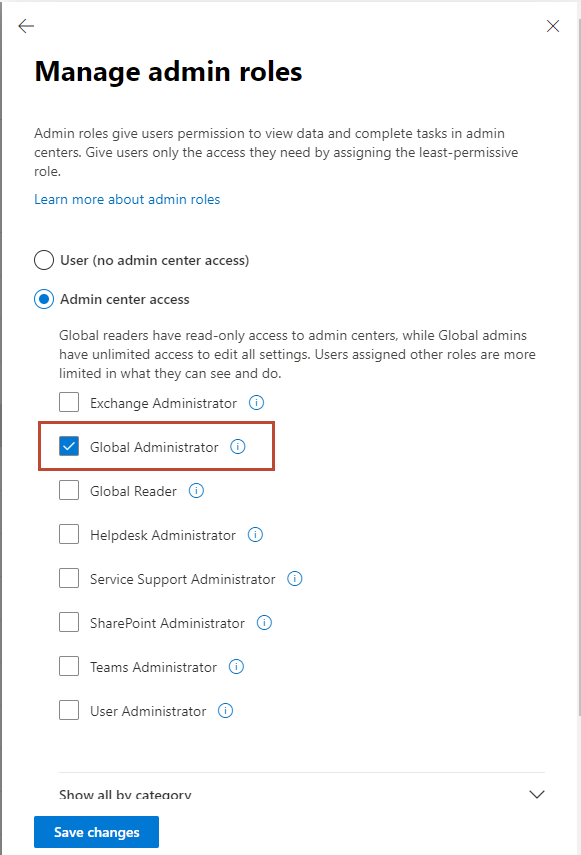
3.1 The email of your Microsoft Global Administrator, who has full access to your Microsoft Office 365 account. This email will be needed to register you on the Teams Enterprise portal where you will be able to set up the direct routing and manage Teams users once the registration is complete.
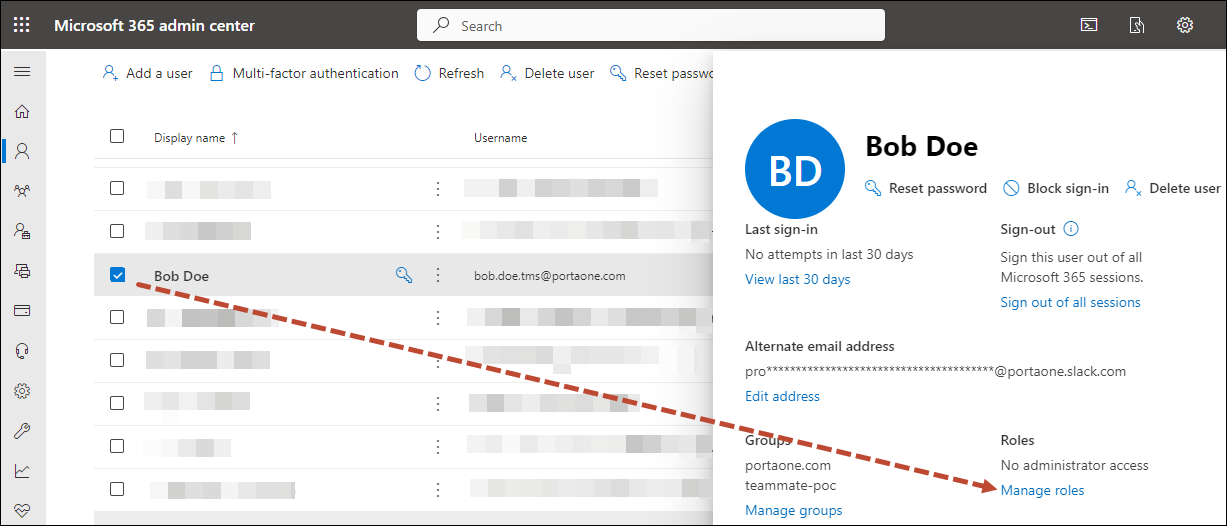
To assign a Global Admin role in the Microsoft Admin Center, open Active Users >> select a user name >> and then select Manage Roles.


3.2 The list of the Microsoft email address of all planned Teams users (optional). This will allow your service provider to prepare the user bulk upload file and confirm the match between the Teams Users and the PBX system users.


