



Once your free trial/paid subscription is activated, you can deploy your branded CloudPBX Self-Care Portal:
Preparation steps
Before proceeding with the module configuration and deployment, perform the following steps:
- Configure domains
- Obtain TLS certificates for these domains
- Add the portal domain to the list of trusted domains
- Make sure the configuration on the PortaBilling web interface is complete
- Prepare a logo and a favicon
Step 1: Configure domains
You need to configure two domains:
- A “portal” domain (e.g., cloudpbx.company.com) – will be used in the portal URL your customers open in their browsers.
- A domain for “middleware” (e.g., middleware.company.com) – will serve internally as a proxy to handle all API requests between the portal and PortaSwitch . It will not be visible to your customers. This proxy will protect your PortaSwitch from overload caused by a high number of concurrent API requests, e.g., in case of malicious activities on the portal.
The “middleware” is deployed if:
- Your PortaSwitch location is Europe, North America, South Africa, or Australia. In other locations, there will be a delay in processing API requests.
- Your PortaSwitch uses a unified API endpoint, where both the admin and customer self-care APIs run under the same hostname.
When configuring DNS for these domains, specify the IP address depending on the location (cluster) where you deploy the portal. Find the IP addresses here.
Step 2: Obtain TLS certificates
Choose one of the following ways to obtain TLS certificates for the domains configured at step 1:
Generate automatically (recommended)
TLS certificates can be generated for you automatically. All you need is to configure domains as described in step 1. The certificates will be generated by PortaOne using Let’s Encrypt certification authority (CA).
If you choose to generate certificates automatically, you can skip to step 3.
If you configured Certification Authority Authorization (CAA) DNS record for your main domain to permit issuing certificates only via a specific CA, and wish to use subdomains, then you need to additionally permit issuing certificates via Let’s Encrypt CA for your subdomains. Add the following CAA records to the DNS configuration for the “portal” and “middleware” subdomains:
- cloudpbx.company.com IN CAA 0 issue “letsencrypt.org”
- middleware.company.com IN CAA 0 issue “letsencrypt.org”
Order TLS certificates from a trusted CA
Optionally, you can contact your trusted certification authority (CA) such as Verisign to order TLS certificates for your domains (configured in step 1).
After you receive TLS certificates and private RSA key files from the CA, you will be able to upload them on the CloudPBX ConfigUI portal.
For subdomains, you can use:
- A wildcard certificate issued for the main domain and applicable to any subdomains. For example, if the main domain is company.com, the wildcard certificate covers any subdomains of the *.company.com format such as cloudpbx.company.com and middleware.company.com.
A wildcard certificate covers only subdomains, such as *.company.com. It is not suitable for nested subdomains, for example, cloupbx.voip.company.com.
- A certificate issued for both your subdomains configured at step 1 (e.g., cloudpbx.company.com and middleware.company.com).
Step 3: Add the portal domain to the list of trusted domains
Cross-Origin Resource Sharing policy (CORS) is a set of rules and permissions that web browsers use to allow web pages from one website to securely talk to APIs on another website (hosted on a different domain). By default, CORS policy blocks all requests from a different origin as potentially malicious. For example, a web page hosted on domain evilhacker.com is prohibited from making requests to an API hosted on myphone.com.
To allow cross-origin API requests from your portal to PortaSwitch, you need to explicitly grant permission by adding the portal to the list of domains trusted by the PortaSwitch API. This way your portal will be able to access it.
If your system version is MR97 or later
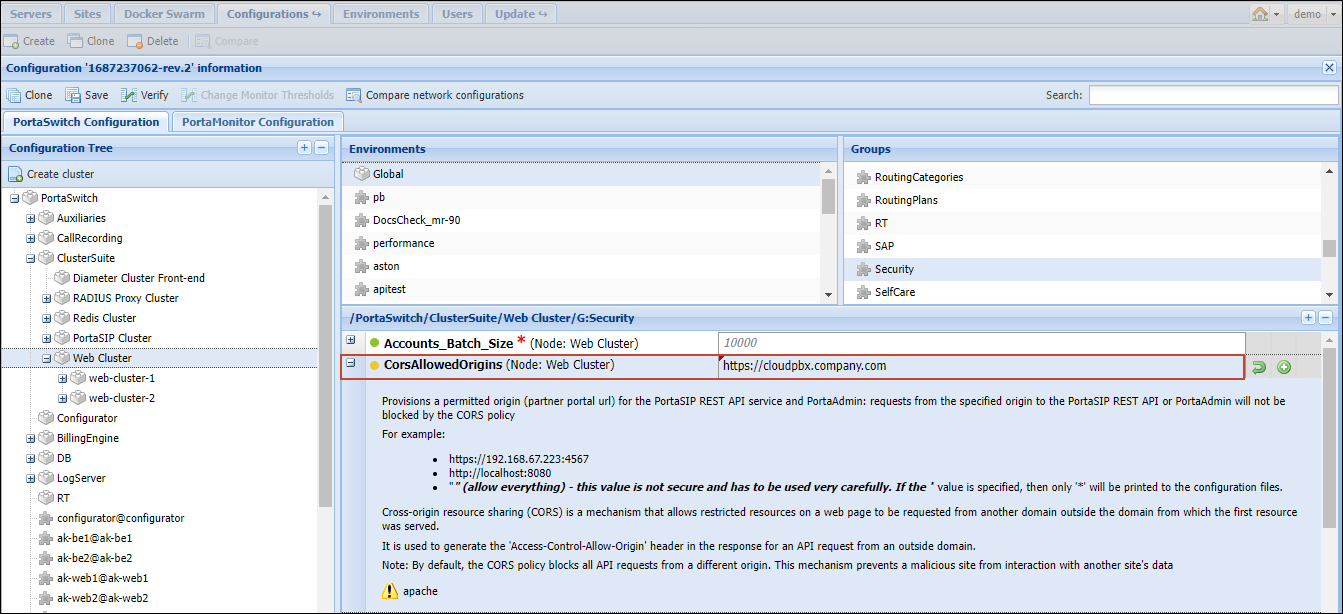
Go to the Configuration server web interface and specify the URL of the portal, e.g., cloudpbx.company.com in the CorsAllowedOrigins option.
If your system version is MR95-96
Go to the Configuration server web interface and specify the URL of the portal, e.g., cloudpbx.company.com in two options:
- CorsAllowedOrigins
- Media_server_cors_allowed_origins
If your system version is MR94 or earlier
Contact the PortaOne support team for assistance.
Step 4: Make sure the configuration on the PortaBilling web interface is complete
If you do not have your cloud PBX products configured yet, follow the steps in the handbook.
For the rest of this guide, we assume you have already configured products, product groups, customers (you can create test customers to test access to the portal), and these customers’ agreements.
Step 5: Prepare a logo and a favicon
For your branded portal, prepare a logo and a favicon in the format specified below.
Logo
The format of the logo:
- .svg or .png
- width 130–200 pixels
- max file size: 3 MB
It is crucial that the logo has a transparent background.


A logo with non-transparent background is not suitable and may result in an incorrect appearance.
Favicon
The format of the favicon:
- square .ico image
- 32×32 pixels
Module configuration and deployment
Once the module is activated and the preparation steps are performed, you can customize and deploy your branded CloudPBX Self-Care Portal.
On the My modules page, click Configure.

On the CloudPBX ConfigUI page that opens, fill in the configuration details and click Save & deploy (or Save for later to deploy it later).
The form on the ConfigUI consists of the following blocks:
- General settings
- Your portal branding
- Domain configuration
- PortaSwitch connection configuration
- Other settings
General settings
Before proceeding with the module configuration, select the suitable portal version and the location that is closest to your PortaSwitch:
- Your PortaSwitch version – select a portal version that is compatible with your PortaSwitch MR version (you can check the minimum required MR version here).
- Instance location – select the cloud datacenter closest to your PortaSwitch for portal deployment (to minimize the latency).
If none of the locations are close enough, please contact the PortaOne sales team. Additional data centers in other locations can be activated upon request.
- CloudPBX Self-Care Portal version to deploy – set your CloudPBX Self-Care Portal deploy version. The following options are available:
- Deploy the latest – select if you want to deploy the latest CloudPBX Self-Care Portal version.
- Select from the full list – select if you want to deploy another CloudPBX Self-Care Portal version.

Your portal branding
Upload your logo and choose a sidebar color to brand your CloudPBX Self-Care Portal.
- Company logo (mandatory) – upload your logo that will be shown on the portal web interface.
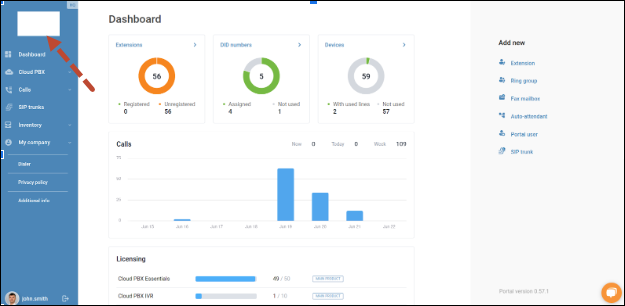
This is where the logo will be displayed on the portal.

- Favicon – click to upload an .ico image that will be used as a favicon for the portal web page.
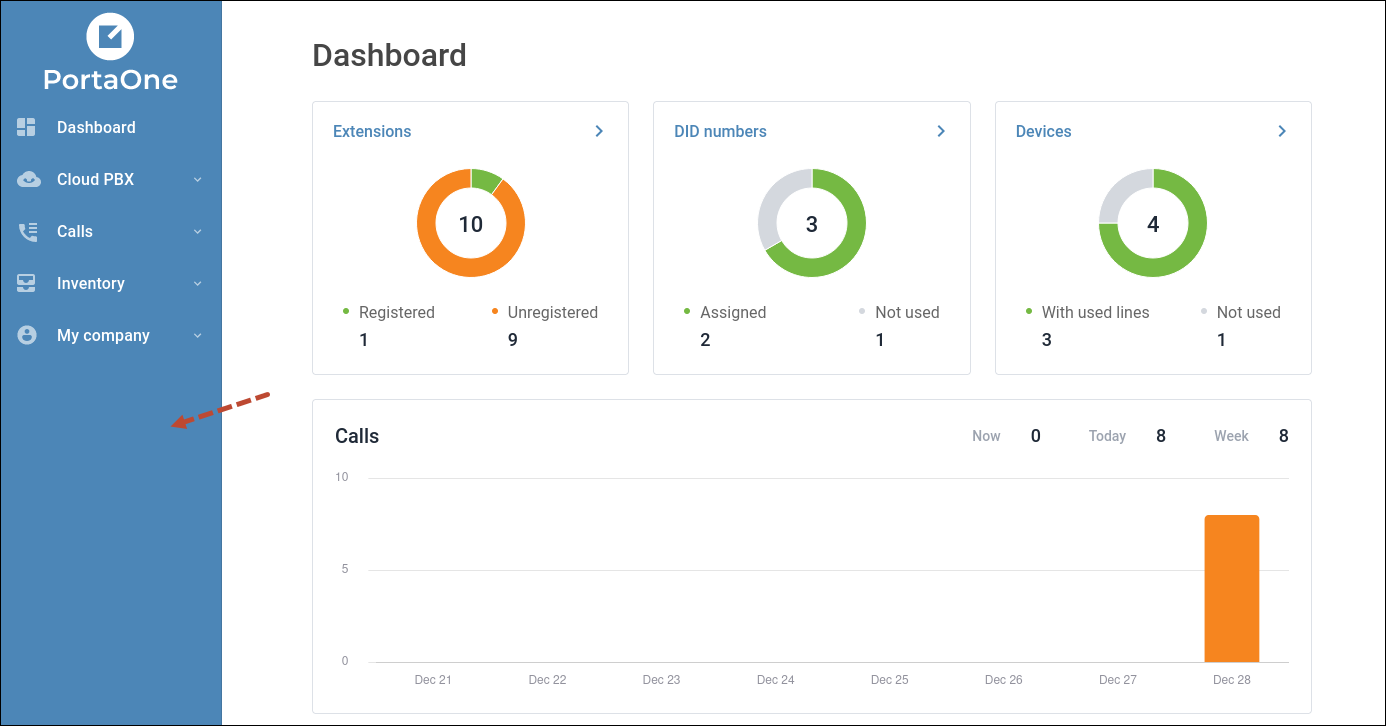
- Sidebar color – you can change the default color of the portal’s navigation panel. Specify the needed color code or select a color in the dropdown menu.
This is the default sidebar color on the portal.

Choose domain configuration
Specify the domains configured at preparation step 1 and upload TLS certificates for these domains (or choose to generate the certificates automatically).
- Portal domain – specify the domain name for the portal’s web page, e.g., cloudpbx.company.com.
- Would you like to deploy the middleware? – if you configured the middleware, select “Yes” to deploy it to the portal. Then specify the domain name for the API “middleware” in the Middleware domain option.
Choose whether you want us to generate certificates for you or if you want to upload your custom certificates. If you choose the Custom certificates option, upload your TLS certificate for your domain and the private RSA key (see preparation step 2).

PortaSwitch connection configuration
Fill in the parameters that are needed to connect the portal to PortaSwitch.
- Customer API URL (mandatory) – specify the URL of the PortaSwitch customer self-care interface: https://:/rest. By default, the customer realm port is 8444 (you can check the actual port on the Configuration server web interface in the VirtualHostsCustomer.server_port option). For example, the URL can be https://telecom.com:8444/rest.
- PortaSIP API URL (mandatory) – specify the URL to which the portal must send all PortaSIP API requests: https://:/rest. By default, the PortaSIP API port is 8443 (you can check the actual port on the Configuration server web interface in the VirtualHostsAdmin.server_name_and_port option). For example, the URL can be https://telecom.com:8443/rest.
- Websocket server URL – specify the URL where the portal will establish a Websocket connection to receive real-time updates on call state changes and session closures.

Specific for CloudPBX Self-Care Portal
Fill in the parameters that control product visibility and access permissions in the CloudPBX Self-Care Portal.
- Product group ID (comma separated) – you can organize products in groups, so that only relevant products will be shown to a customer on the portal, and it will be easier for them to select the product they are looking for. For example, when a customer adds a new extension, they will see only the products intended for extensions, and will not mistakenly choose a product for an auto-attendant or a fax mailbox. After you create the product groups in PortaBilling, specify the IDs of the groups that are meant for:
- extensions
- auto-attendants
- fax mailboxes
- SIP trunks
To get the product group IDs, you can use the Product/get_group_list API method or contact the PortaOne support team for assistance.To make any product available for customer self-sign-up, it must be added to the customer agreement, regardless of whether the product is included in any product group.
If you don’t specify product group IDs, the customer will be able to choose only the products from the customer agreement that do not belong to any product group. - Default action (if permissions are undefined) – in PortaBilling, you can define portal access levels per customer role via portal view configuration (e.g., a PBX administrator should have access to the PBX configuration but not to invoices). Here, you can additionally control access for customers whose roles are not set for the portal view configuration.
To allow full access to the portal even if a customer’s role does not include portal view configuration, select Show the menu here. This is useful if you don’t want to configure different access levels in PortaBilling and instead want to provide full access to all customers.
By default, the Hide the menu option is selected, so that a customer will not have access to the portal if their role does not include portal view configuration.

Other settings
Configure other settings to customize your portal.
- Zendesk key – to embed the Zendesk widget into the portal, you can specify the widget snippet key, e.g., e8681381-8d63-45f3-a16a-eeaaaaec65f1.
- Custom links to external apps (semicolon-separated) – you can provide your customers with useful links to your other resources on the portal sidebar. For example, you can add links to a ticketing system or to an e-commerce platform like Shopify, where customers can order IP phones. To do this, specify the corresponding menu item names and URLs here, e.g., Contact support;https://support/abc.com;Store;https://store/abc.com.
These custom links will be displayed on the portal sidebar.

- Trusted websites (semicolon separated) – your customers will be able to create widgets on the portal’s wallboard – you can either allow them to use content from any website of their choice (which is the default option) or limit this possibility to the websites listed as trusted sources in this field (for example, https://www.hubspot.com/; google.com; youtube.com). PBX admins can also add widgets with the content from external systems (even if not integrated with PortaSwitch) to consolidate all the necessary information in one place.
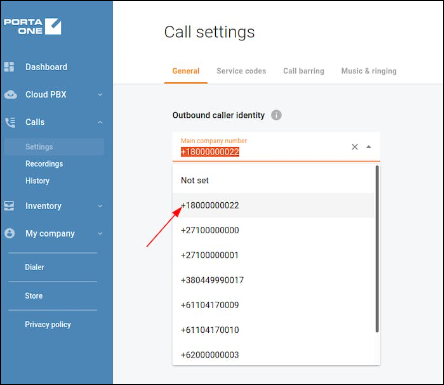
- Add a leading ‘+’ to outbound caller ID – by default, this option is set to “No”. Change to “Yes” if you need all DID numbers that are set as caller identity to be automatically prefixed with “+” so that you don’t need to set translation rules for CLI (Calling Line Identity) in PortaBilling.
This is how the outbound caller identity is shown on the portal when the option is set to “Yes”.
- Embed custom JavaScript (React) – to add a custom widget, e.g., a “live chat” connected to your CRM, insert the corresponding JavaScript code here.
- Status of new SIP trunks – this option defines the status for newly created SIP trunks: an active SIP trunk is ready for immediate use, enabling seamless call delivery to and from a customer’s PBX. Conversely, an inactive SIP trunk requires manual activation by the service provider before it can be utilized.
- Custom Translation File – upload a custom .json file to override the default labels shown in the app.
- Custom Plugins Archive – upload a ZIP archive of your custom plugins’ files.

Deployment
To deploy your CloudPBX Self-Care Portal right away, click Save & deploy. To save the configuration and deploy it later, click Save for later.

Test the portal
Once the CloudPBX Self-Care Portal is successfully deployed, open the link to the portal web page and test the basic functionality.


