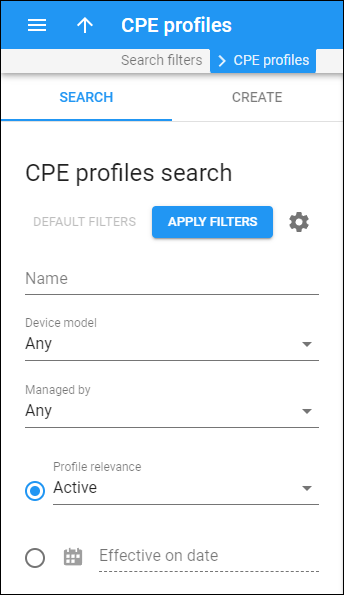
Use this panel to find a specific Customer Premises Equipment (CPE) profile.
Specify one or more search criteria listed below and click Apply filters. To reset the search criteria, click Default filters. To refresh the search results, click Reload data.
PortaBilling loads the list of CPE profiles automatically, once you open the page. You can turn off data autoload if you don’t want all the CPE profiles to load each time you open the page. To disable data autoload, click Settings and clear the check mark for the Automatically start searching upon opening the page option. When the check mark is absent, the CPE profiles won’t load until you click Apply filters.
Name
Filter CPE profiles by their name. Type the profile name fully or partially.
Device model
Filter CPE profiles by the device model these profiles are used for. Select the needed device model from the dropdown list.
Managed by
Filter CPE profiles by the entity they are managed by. Select the needed option from the dropdown list:
- Any – all available CPE profiles.
- Administrator only – CPE profiles managed by the administrator.
- Reseller name – CPE profiles managed by a specific reseller.
Profile relevance
Select one of these options:
- Filter CPE profiles by their relevance:
- All – all available CPE profiles.
- Inactive/Discontinued – these are administratively discontinued and/or inactive CPE profiles (making changes to a CPE profile creates a new copy of it, so the previous profile version is shown as inactive). You can’t assign these CPE profiles to devices.
- Active – these are currently effective CPE profiles that you can assign to devices.
- Upcoming – the CPE profiles that you can assign to devices and that will be effective in the future.
- Filter CPE profiles by the date when they are effective.
Click Calendar
and set the date and time, or type it in the “yyyy-mm-dd hh:mm” format (2022-03-19 00:00).


