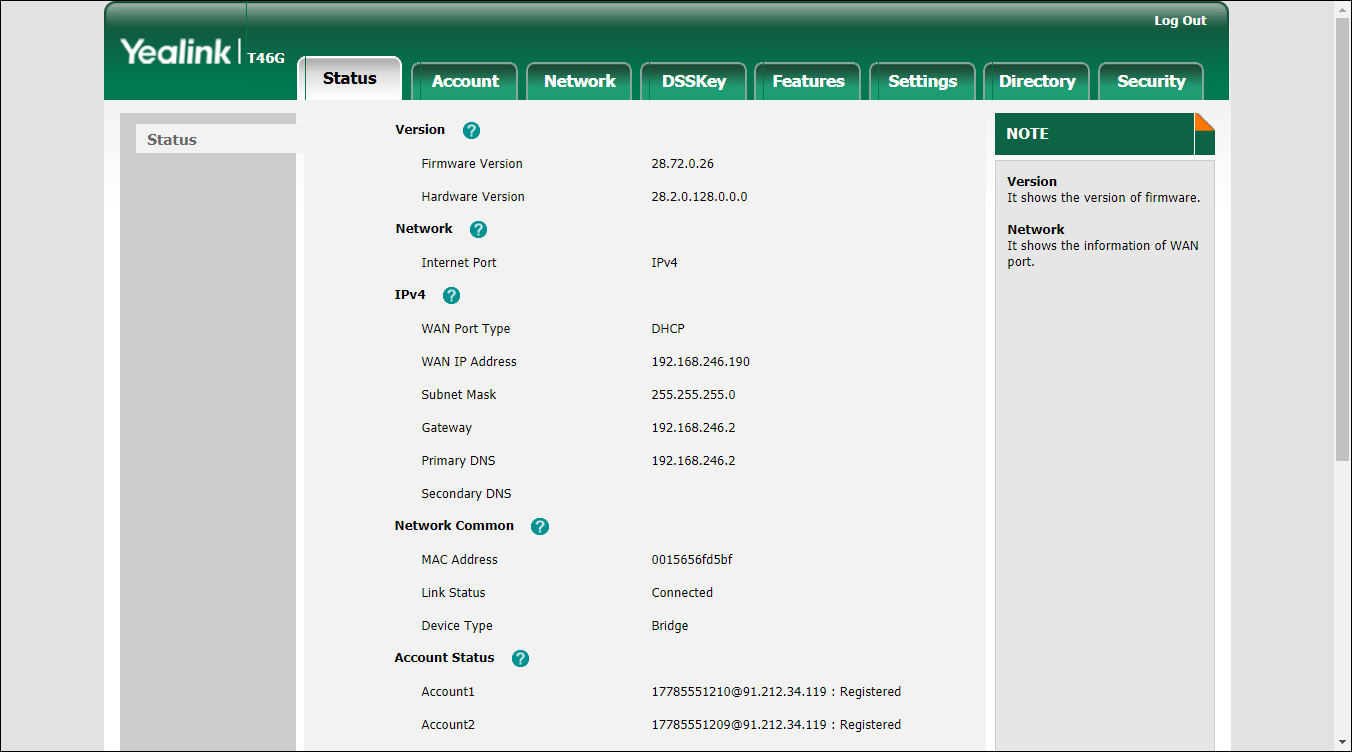
- First, you need to know the SIP phone IP address. There are two ways to check this via the phone user interface:
- Press the OK button in the idle screen.
- Press Menu and select the Status tab.
- Specify the Yealink device’s IP address in your web browser’s address bar (e.g., http://1.2.3.4/).
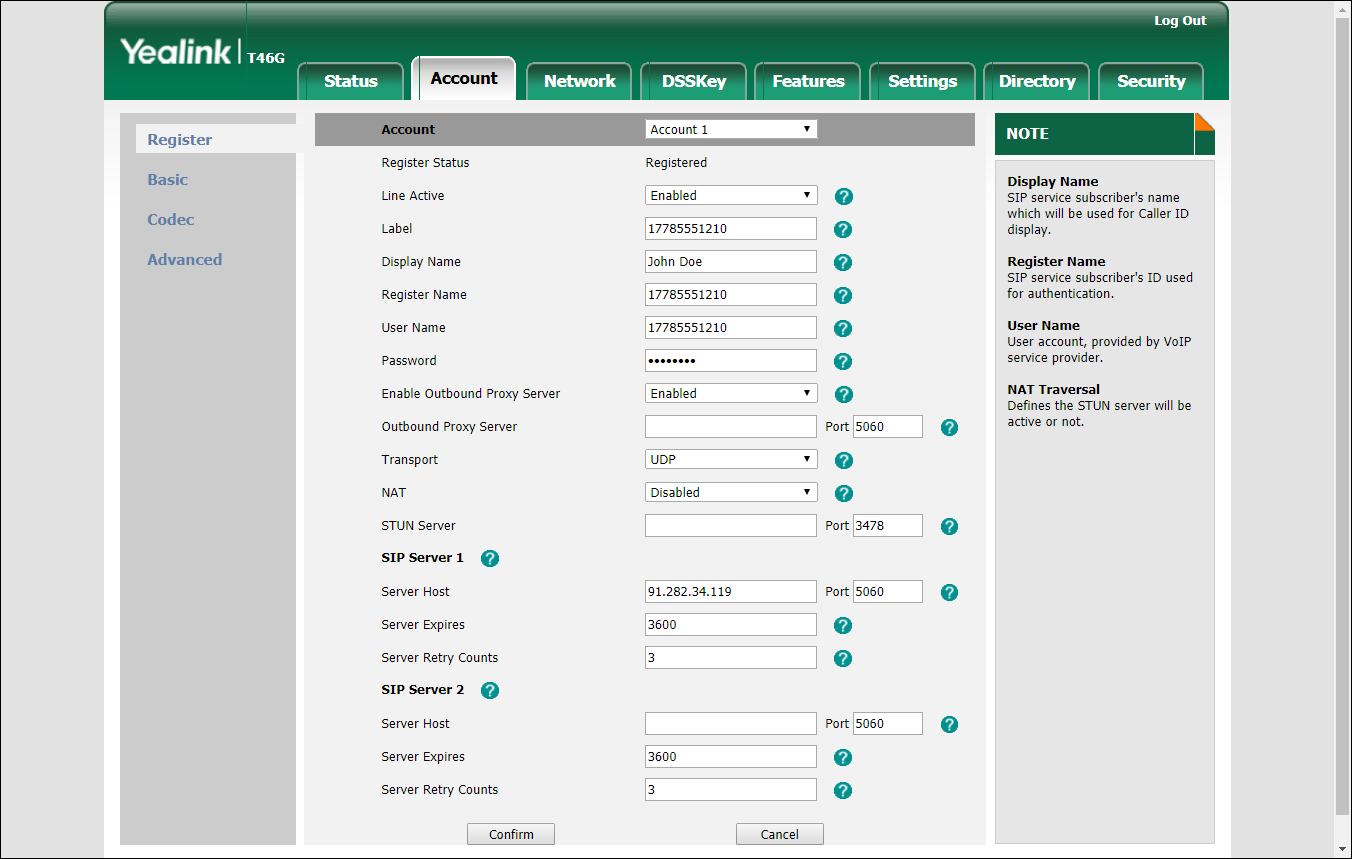
- On the Account tab, go to the Register section. Select the phone line you wish to configure (named as Account) from the pull-down list in the Account field.
- Configure the registration parameters for the selected account in the corresponding fields:
- Line Active – select Enabled here.
- Label – the name of the account displayed on the LCD screen of your SIP phone (e.g., 17785551210).
- Display Name – your identification (e.g., John Doe); this will be seen by the called party.
- Register Name – ID that is used to authenticate your SIP account. This field is mandatory.
- User Name – ID of your SIP account registered in PortaBilling.
- Password – service password for your SIP account.
- SIP server 1 section:
- Server Host – PortaSIP IP address or hostname (e.g., 91.212.34.119).
In the SIP server 2 section you can define the IP address of PortaSIP on the secondary site. If the main site becomes unavailable, the phone re-registers using this IP address.
- Click the Confirm button to update the SIP phone configuration.


