



Preparation steps
Before proceeding with the Auto Dialer module configuration and deployment, perform the following steps:
Step 1. Configure a domain
Configure a domain for the Auto Dialer web application, e.g., autodialer.your-company-domain.com.
Configure DNS for the above mentioned domain so that it points to the Add-on Mart cluster closest to your PortaSwitch. Use one of the following options:
- A CNAME record pointing to the cluster hostname.
- An A record pointing to the cluster IP address.
For cluster hostnames and IP addresses by region, see Add-on Mart service addresses by region.
Step 2. Obtain TLS certificates for the domain (optional)
TLS certificates can be generated automatically by PortaOne using Let’s Encrypt certification authority (CA). If you choose this option, you can skip this step.
Optionally, you can contact your trusted CA to order a TLS certificate for your domain. After you receive TLS certificates and private RSA key files from the CA, you will be able to upload them via the Auto Dialer Configuration UI.
Configuration in Add-on Mart
Log in to the Add-on Mart management portal, locate your Auto Dialer subscription, and click Configure.

The Configuration UI consists of the following blocks:
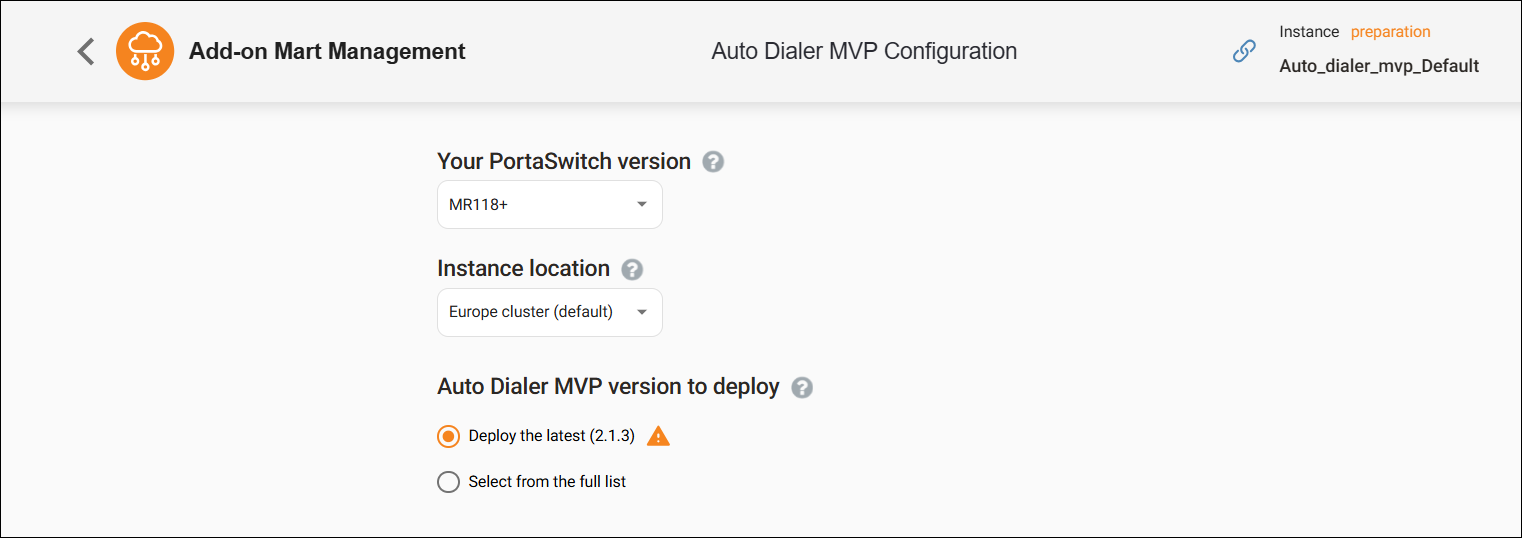
General settings
Your PortaSwitch version – select your PortaSwitch release version.
Instance location – to minimize the latency select the cloud datacenter closest to your PortaSwitch for the module deployment.
Auto Dialer MVP version to deploy – choose a module version. The following options are available:
- Deploy the latest – select if you want to deploy the latest version.
- Select from the full list – select if you want to choose a specific Auto Dialer version.
For best compatibility, match the version to your PortaSwitch:
- For PortaSwitch MR108–MR117: use Auto Dialer version 1.x.x.
- For PortaSwitch MR118 and later: use Auto Dialer version 2.x.x.
Choose domain configuration
Portal domain – specify the domain name from preparation step 1.
Generate certificates – select the checkbox if you want PortaOne to generate a TLS certificate for you. Alternatively, upload your custom certificate and the private RSA key for your domain (see preparation step 2).

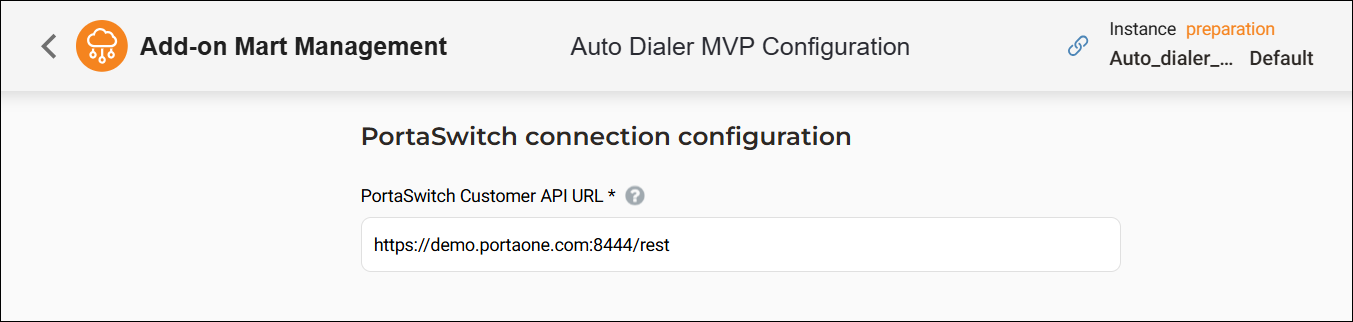
PortaSwitch connection configuration
PortaSwitch Customer API URL – specify the URL of the PortaSwitch customer self-care interface, e.g., https://demo.portaone.com:8444/rest. By default, the customer realm port is 8444 (you can check the actual port on the Configuration server web interface in the VirtualHostsCustomer.server_port option).
Scheduler configuration
Upcoming Interval (sec) – specify the time interval in seconds that defines how far ahead the Auto Dialer checks scheduled campaigns. The default value is 36,000,000 (416 days).
Expire Interval (sec) – specify the time interval in seconds that determines how late a scheduled campaign can start before it becomes Overdue. If the scheduler picks up a campaign within this interval following its planned start time, the campaign starts. If the delay exceeds this interval, the campaign is marked as Overdue, and no calls are made. The default value is 3,600 (1 hour).
Period not answered contact (sec) – specify the time interval in seconds after which a contact is considered as not answered. The default value is 60.
Logger level – the level of detail recorded in the Auto Dialer application logs. The default value is Info. Other available values: Fatal, Error, Warning, Debug.

Deployment
To deploy your Auto Dialer MVP module right away, click Deploy. To save the configuration and deploy it later, click Save for later.
Configuration in PortaBilling
For calls made by the Auto Dialer, the customer’s existing product and tariffs can be used. Ensure the tariffs include INCOMINGNRX, VOICEONNETRX, and UM rates.
If Auto Dialer calls are charged differently from regular calls, create a dedicated product with new tariffs that include the required rate codes.
To allow the Auto Dialer to initiate calls on behalf of the customer, complete the following steps:
Create a role for a customer
This permission is required for the Auto Dialer to make calls from the application via the Call Control API.
- Navigate to My company > Roles.
- Open an existing customer role or create a new one. To create a new role, click + Add, fill in the role details, and click Save & Edit details.

- On the role page, go to Permissions and set Self-care access to Modify.
- Set Call control to Modify and save the changes.
- Assign this role to a customer with access to the Auto Dialer.

Enable API token access for a customer
The customer uses an API token to log in to the Auto Dialer web interface.
- Open the customer record in PortaBilling.
- Go to General info > Web interface tab and enable the API token access toggle.

- Copy the generated API token and share it with the customer along with their login credentials.
Create a call campaign and test it
Once all steps are complete, create a call campaign and make a test call:
- Open the Auto Dialer web interface at the domain configured in preparation step 1.
- Log in using the customer’s web interface login and API token.
- Create a test call campaign. For detailed instructions on creating and managing call campaigns, see the Auto Dialer User Guide.
When creating a campaign, specify the number where answered calls are connected. This can be a ring group number or a dedicated DID number with forwarding configured to a ring group.
- Run the call campaign to confirm that calls are placed and routed to agents correctly.


