



Once your free trial/paid subscription is activated, you can deploy the REST API for Charging module.
- Preparation steps
- Module configuration and deployment
- Trusted node creation in the PortaBilling web interface
Preparation steps
Before proceeding with the REST API for Charging module configuration and deployment, perform the following steps:
Step 1: Configure a domain
Prepare a domain (e.g., https://charging-api.example.com) that will be used to access the REST API for the Charging module.
This module functions as a Web Charging Gateway (GW) – an API endpoint that receives REST API requests from external applications and translates them into RADIUS requests understood by the PortaBilling backend. The configured domain will serve as the base URL for all API requests sent to the gateway.
Step 2: Obtain TLS certificates for the domain (optional)
TLS certificates can be generated automatically by PortaOne using Let’s Encrypt certification authority (CA). If you choose this option, you can skip this step.
Optionally, you can contact your trusted CA to order a TLS certificate for your domain. After you receive TLS certificates and private RSA key files from the CA, you will be able to upload them to the REST API for Charging Configuration UI.
Module configuration and deployment
Once the free trial or paid subscription is activated and the preparation steps are performed, you can configure and deploy the module.
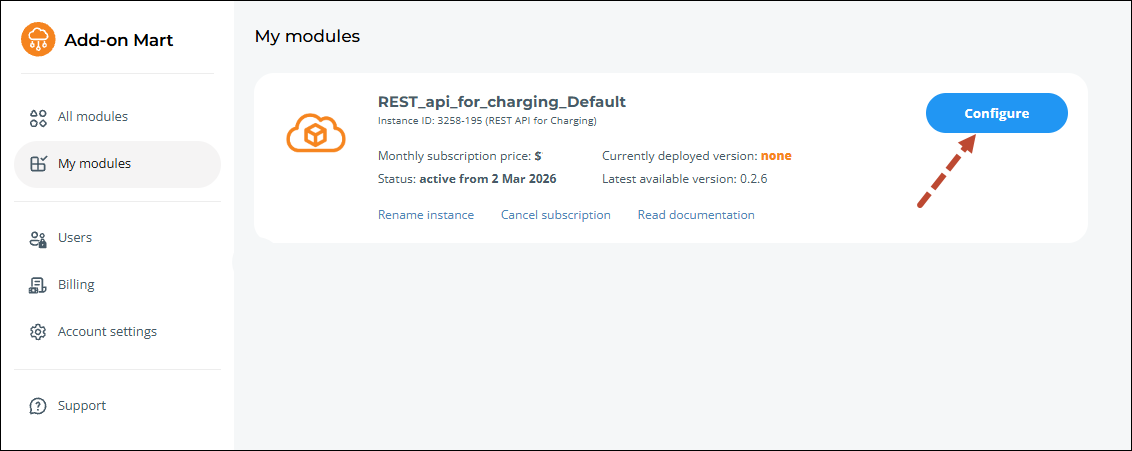
Log in to the Add-on Mart management portal, locate your REST API for Charging subscription and click Configure.
On the REST API for Charging Configuration UI page that opens, fill in the configuration details and click Deploy (or Save for later to deploy it later).
The form in the ConfigUI consists of the following blocks:
General settings
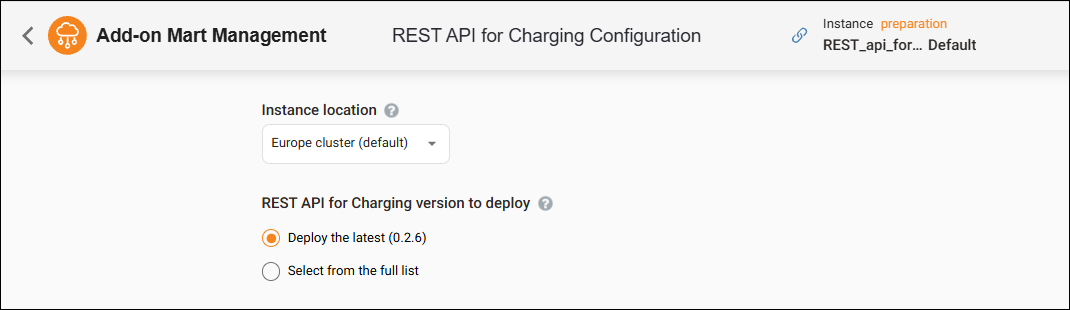
Instance location – select the closest cloud datacenter where the module will be deployed (to minimize the latency).
REST API for Charging version to deploy – choose a module version. The following options are available:
- Deploy the latest (recommended) – select if you want to deploy the latest version.
- Select from the full list – select if you want to deploy another version.
Choose domain configuration
Portal domain – specify the domain name from preparation step 1.
Generate certificates – select the checkbox if you want us to generate a TLS certificate for you. Alternatively, upload your custom certificate and the private RSA key for your domain (see preparation step 2).

CORS configuration
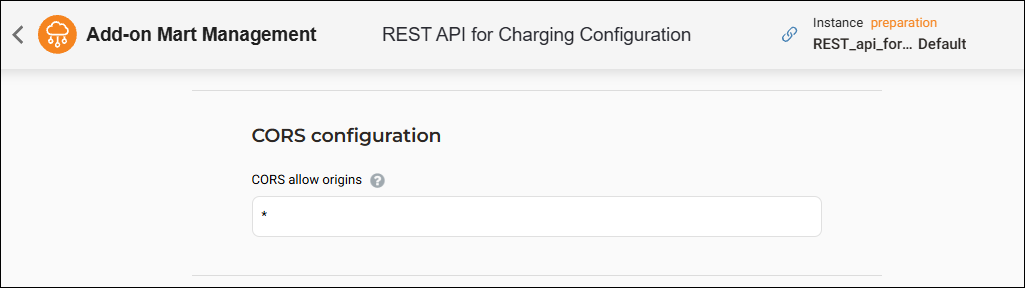
Cross-Origin Resource Sharing policy (CORS) is a set of rules and permissions that web browsers use to allow web pages from one website to securely talk to APIs on another website (hosted on a different domain). By default, CORS policy blocks all requests from a different origin as potentially malicious. For example, a web page hosted on domain evilhacker.com is prohibited from making requests to an API hosted on billing.example.com.
CORS allowed origins – enter a comma-separated list of trusted frontend origins that are allowed to send browser-based requests to the Web Charging GW. Use this setting when your web application and the REST API endpoint are hosted on different origins. Specify each origin in the format https://<domain>[:<port>] (the port is optional). Use * to allow requests from any origin.
Authentication
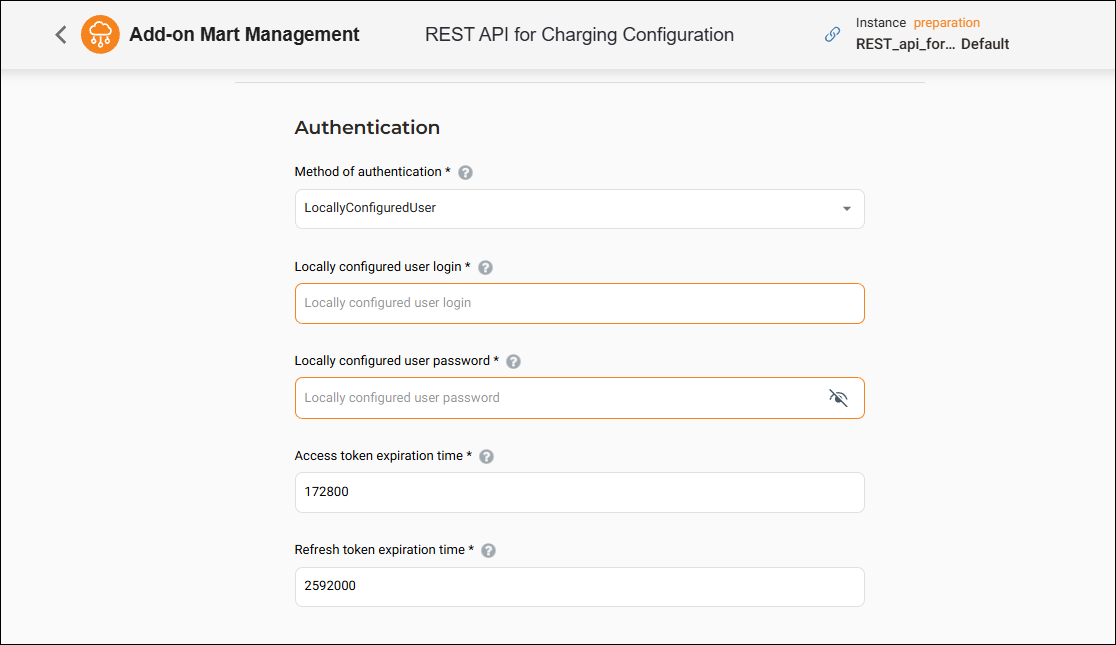
Select how the REST API for Charging (Web Charging GW) authenticates API clients:
- LocallyConfiguredUser – select this option to authenticate using a username and password stored in the Web Charging GW configuration. Once selected, fill in the fields below:
- Locally configured user login – specify the username that will be stored in the Web Charging GW and used to obtain access/refresh tokens.
- Locally configured user password – specify the password associated with the locally configured user.
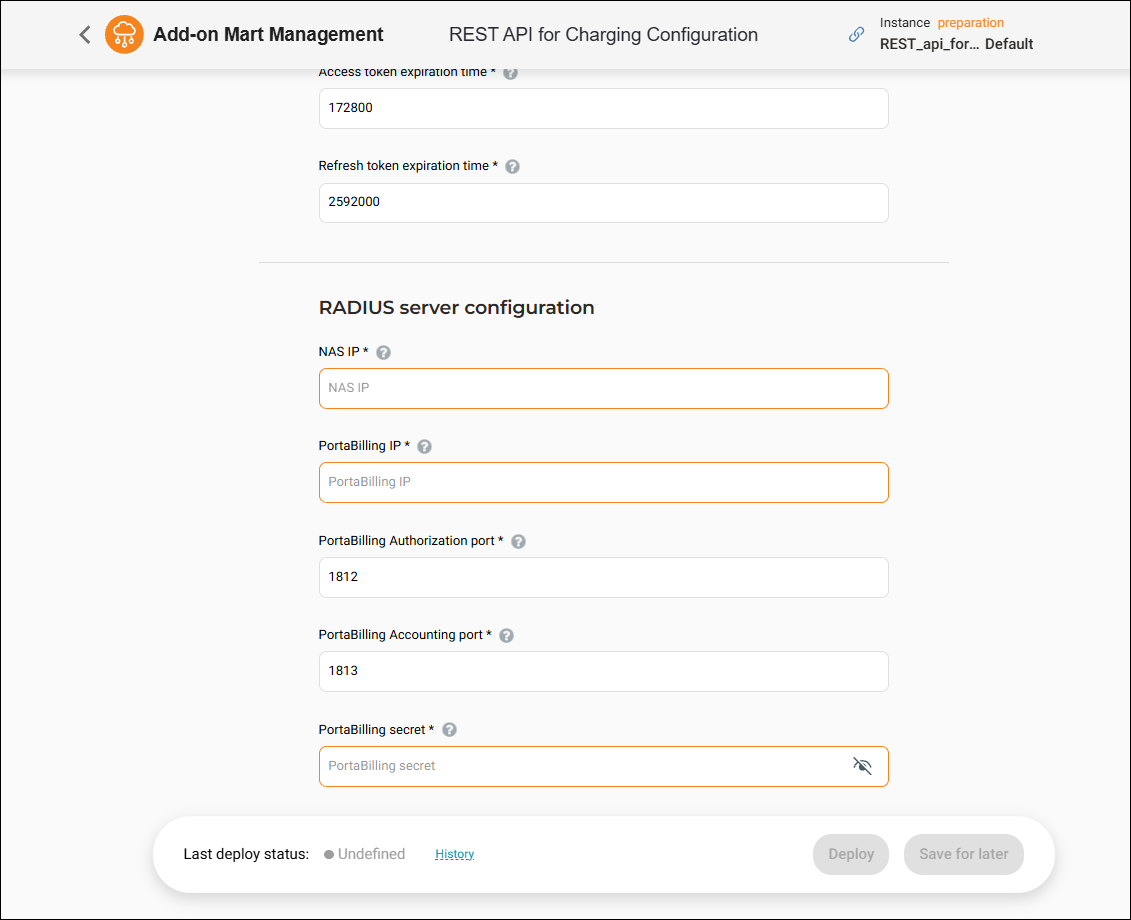
- Access token expiration time – specify the lifetime of the access token, in seconds, starting from token creation.
- Refresh token expiration time – specify the lifetime of the refresh token, in seconds, starting from token creation.
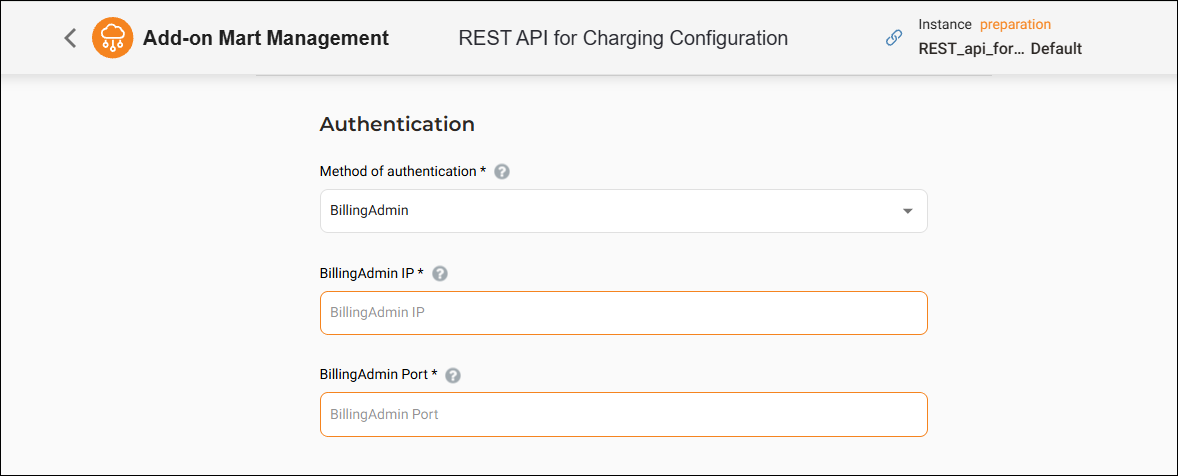
- BillingAdmin (supported for PortaBilling/PortaSwitch MR100 or later) – select this option to authenticate using the PortaBilling backend (BillingAdmin service). In this mode, Web Charging GW will send an authentication request to the PortaBilling administration backend, instead of checking credentials stored locally in the gateway. Once selected, fill in the fields below:
- BillingAdmin IP – the IP address (or hostname) of the BillingAdmin service that Web Charging GW connects to for credential validation. This is typically the same host that provides access to the PortaBilling admin interface (e.g., example.company.com).
- BillingAdmin port – the port of the BillingAdmin service used by Web Charging GW for authentication requests.
Do not enable CAPTCHA protection on the PortaBilling login page when using the BillingAdmin authentication method (Web Charging GW authenticates using the PortaBilling backend automatically and cannot complete the CAPTCHA challenge, so all authentication attempts will fail).
RADIUS server configuration
NAS IP – enter the IP address from which PortaBilling will receive RADIUS requests. This must be the NAT gateway IP address of the selected cloud datacenter where the Web Charging GW will be deployed. You can find the IP address here. The same IP should be specified as the RADIUS source IP in the Node settings in the PortaBilling web interface.
PortaBilling IP – the IP address (or hostname) of the PortaBilling server that will receive RADIUS requests from the Web Charging GW.
PortaBilling Authorization port – the port used to send authorization requests (Access-Request) to PortaBilling. Default: 1812.
PortaBilling Accounting port – the port used to send charging/accounting requests (Accounting-Request) to PortaBilling. Default: 1813.
PortaBilling secret – the shared secret used between the Web Charging GW (RADIUS client) and PortaBilling (RADIUS server). If the secrets do not match, PortaBilling will reject or ignore incoming requests. The same value should be configured in the RADIUS key field in the corresponding Node settings in the PortaBilling web interface.
The secret can be between 1 and 32 characters, with longer and more complex secrets providing higher security. The secret should:
- Be as long as possible within the allowed range
- Include a mix of uppercase and lowercase letters
- Include numbers
Click Deploy.
Trusted node creation in the PortaBilling web interface
PortaBilling accepts RADIUS authentication and accounting requests only from trusted nodes. To allow the Web Charging GW to communicate with PortaBilling, you must create a Node representing the gateway application. If the node is not defined, all incoming requests from the gateway will be rejected or ignored.
To create a Node, log in to the PortaBilling web interface and perform the following steps:
- Navigate to Infrastructure > Nodes
- Click +Add and fill in the node details:
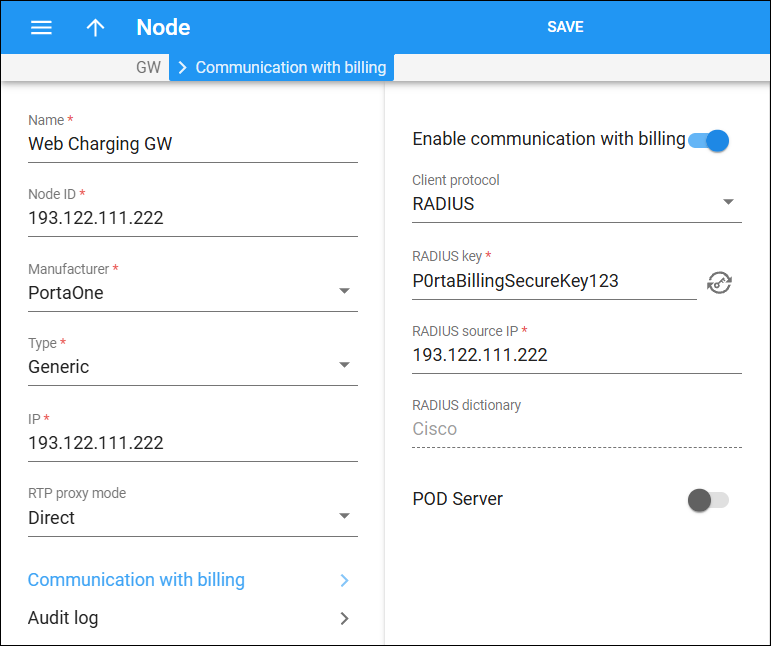
- Name – specify a descriptive name, e.g., WebChargingGW.
- Node ID – enter the IP address from which PortaBilling will receive RADIUS requests. This must be the NAT gateway IP address of the cloud datacenter where the Web Charging GW is deployed.
- IP – enter the same NAT gateway IP address.
- Manufacturer – select PortaOne.
- Type – select Generic.
- Open the created Node > Communication with billing and configure the following settings:
- Enable communication with billing – turn on the toggle.
- Client protocol – select RADIUS.
- RADIUS key – specify a shared secret used for communication between PortaBilling and the Web Charging GW. The value must match the PortaBilling secret specified during the REST API for Charging module configuration.
- RADIUS source IP – enter the NAT gateway IP address of the cloud datacenter from which PortaBilling will receive RADIUS requests.
Ensure that all other required entities (such as products, bundles, and customers) are already configured in PortaBilling.


