



Prerequisites
Link copied to clipboard
- Activate subscription to the NSPS module in the Add-on Mart and deploy NSPS
- Activate subscription to the WTL connector in the Add-on Mart
- Obtain credentials (URL and token) for accessing the WTL HSS/HLR via the API
- Obtain the names of the subscriber profiles preconfigured in the WTL HLR/HSS: CS (Circuit-Switched) profiles for voice calls/SMS, and EPS (Evolved Packet System) profiles for data service
- Ensure that all the required entities (SIM cards, products, bundles, etc.) are configured in PortaBilling
Module configuration and deployment
Link copied to clipboard
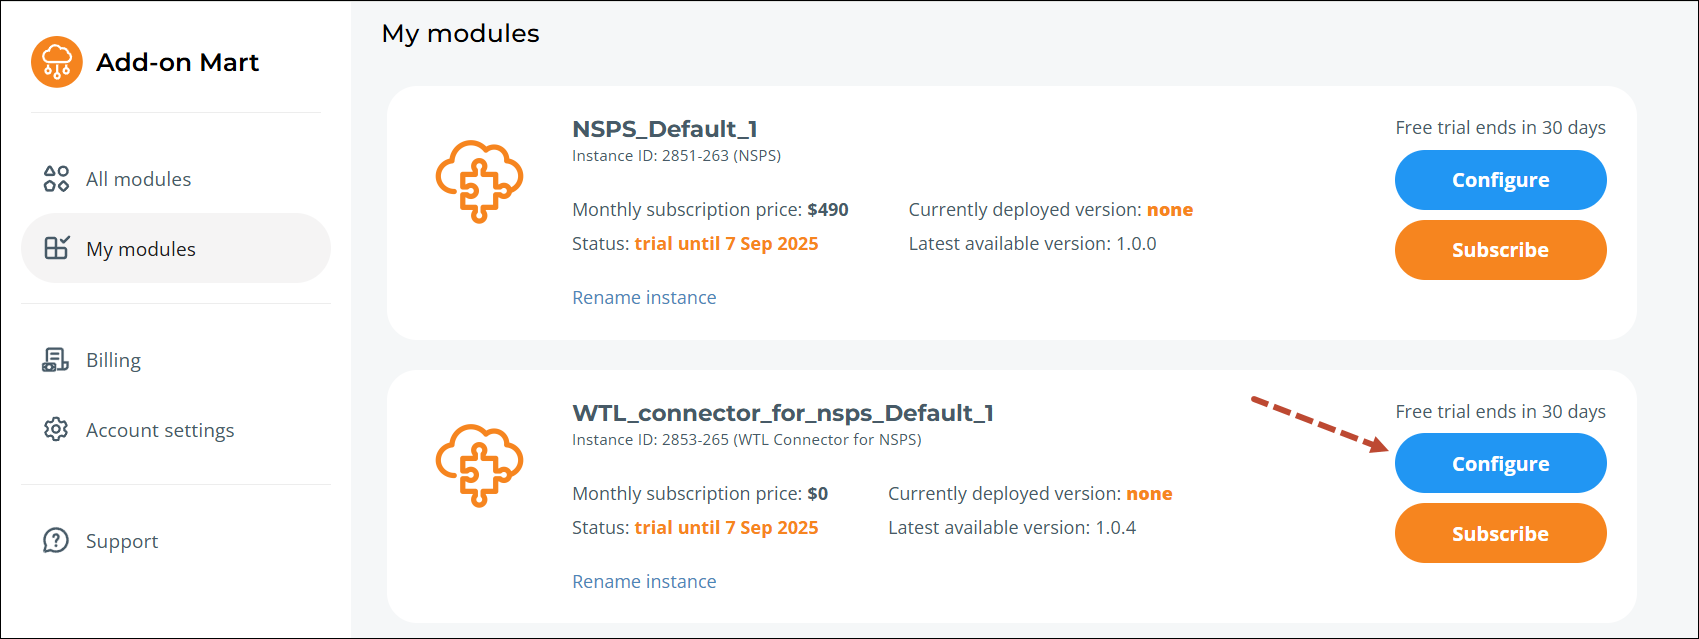
Log in to the Add-on Mart management portal, locate your WTL Connector subscription, and click Configure.
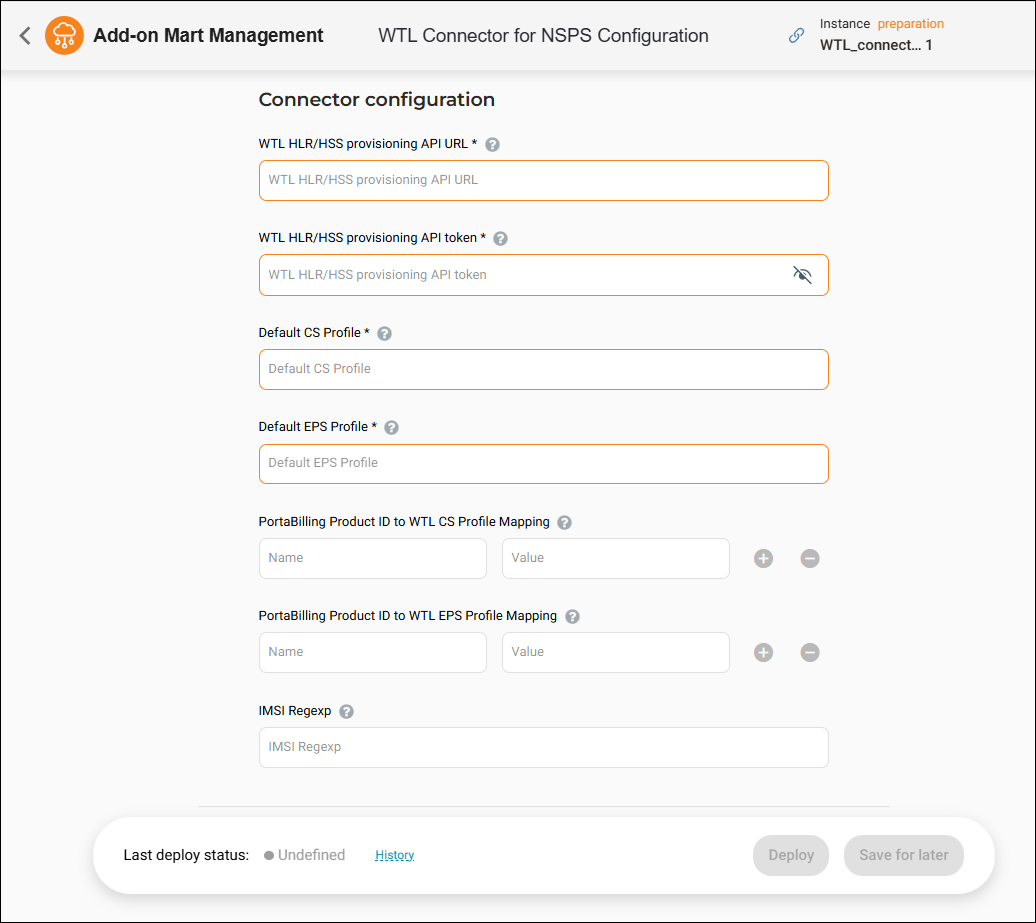
On the Configuration UI page that opens, fill in the details:
- WTL HLR/HSS provisioning API URL – the URL used to communicate with the WTL HLR/HSS API.
- WTL HLR/HSS provisioning API token – the token used to authorize API requests to the WTL HLR/HSS.
- Default CS profile – the name of the CS (voice/SMS) profile, e.g., “cs-barred”, that should be applied to any subscriber by default.
- Default EPS profile – the name of the default EPS (data) profile, e.g., “ps-barred”, that should be applied to any subscriber by default.
- PortaBilling Product ID to WTL CS Profile Mapping – use this mapping to assign a specific CS (voice/SMS) profile to a subscriber when they activate a PortaBilling product:
- Name – the ID of a PortaBilling product that provides voice or SMS services
- Value – the name of the corresponding CS profile configured in the WTL HLR/HSS
- PortaBilling Product ID to WTL EPS Profile Mapping – use this mapping to assign a specific EPS (data) profile to a subscriber when they activate a PortaBilling product:
- Name – the ID of a PortaBilling product that provides internet access services
- Value – the name of the corresponding EPS profile configured in the WTL HLR/HSS
- IMSI Regexp – you can specify a Python-compatible regular expression (regex) to validate IMSIs – unique subscriber identifiers stored on SIM cards. When the connector receives a provisioning event (for example, to activate or update a SIM), it checks whether the IMSI in that request matches this pattern. This ensures that only intended IMSIs are provisioned in the WTL HLR/HSS and is useful for acceptance and interoperability testing.
The pattern follows Python’s re module syntax. For example: ^(90170000005017[0-9]|90170000005018[0-9]|00101000002034[1-9])$
Click Deploy or Save for later.
After the module is deployed, contact PortaOne support to obtain the WTL Connector URL and the Bearer token (they will be required to create a WTL handler in the NSPS web interface).
WTL handler setup in the NSPS web interface
Link copied to clipboard
Log in to the NSPS web interface (using the URL provided by PortaOne support and the credentials defined during the NSPS deployment) and create a WTL handler.
For this, navigate to the Handlers tab, click + Handler, and fill in the details:
- Handler ID – specify the handler ID, e.g., “wtl.” This value will be used as an internal handler name.
- Handler name – specify a descriptive name for the handler.
- Event types – select the events that should be processed by the WTL handler.
- Required data – select the entities for which additional data should be included in the JSON payload received from NSPS (available options: Account, SIM card, Access policy, Main product, Bundle item counters)
- Service URL – specify the URL of the WTL connector received from the PortaOne support. NSPS will send HTTP REST requests to this URL.
- Bearer token – specify the token obtained from PortaOne support.
- Description – optionally, add a description for the handler.
- State – select the handler state (Active or Inactive). Choose Active to enable event processing.
- Rate limit – specify the maximum number of API requests that can be sent per second to the WTL connector.
Click Save.
Open the created handler. You can check the event queue on the Events tab.



