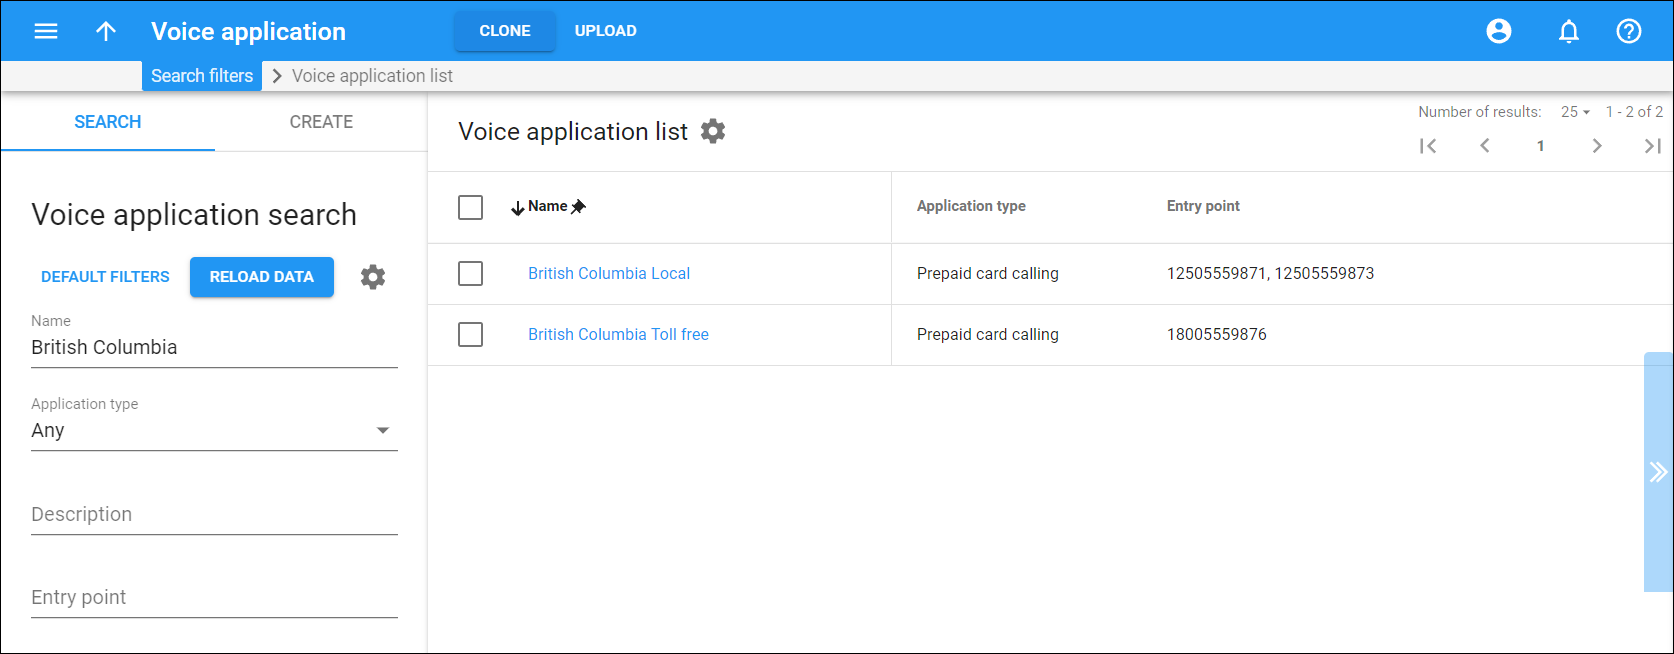
This panel displays the list of voice applications that match your search query.
Each entry in the voice application list consists of:
Name – the name of the voice application. This is also a link that redirects you to the voice application settings.
Description – this is a short description of the voice application. To add/remove this column, click Settings , click Customize columns, and select/clear the Description checkbox.
Application type – the type of application used to process calls.
Entry point – one or more numbers that end users can dial to access this voice application. It can be a prefix, e.g., *98, or a phone number, e.g., 12065558975.
Clone voice application
You can create a new voice application by cloning one of the current ones:
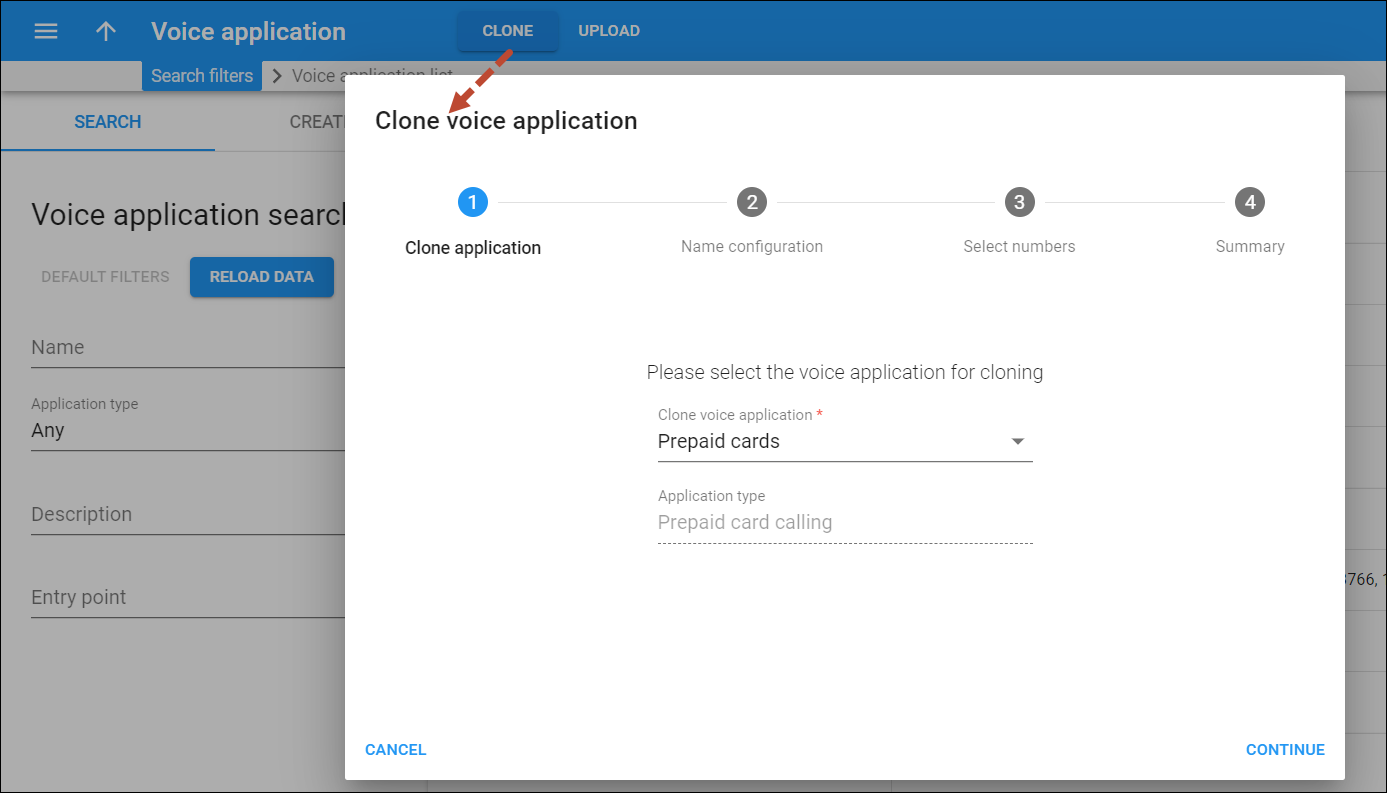
- Click Clone on the toolbar. The dialog box opens.
- In the dropdown list, select the application you want to clone. The Application type field is read-only. Click Continue.
- Specify the new voice application name and description (optionally). Click Continue.
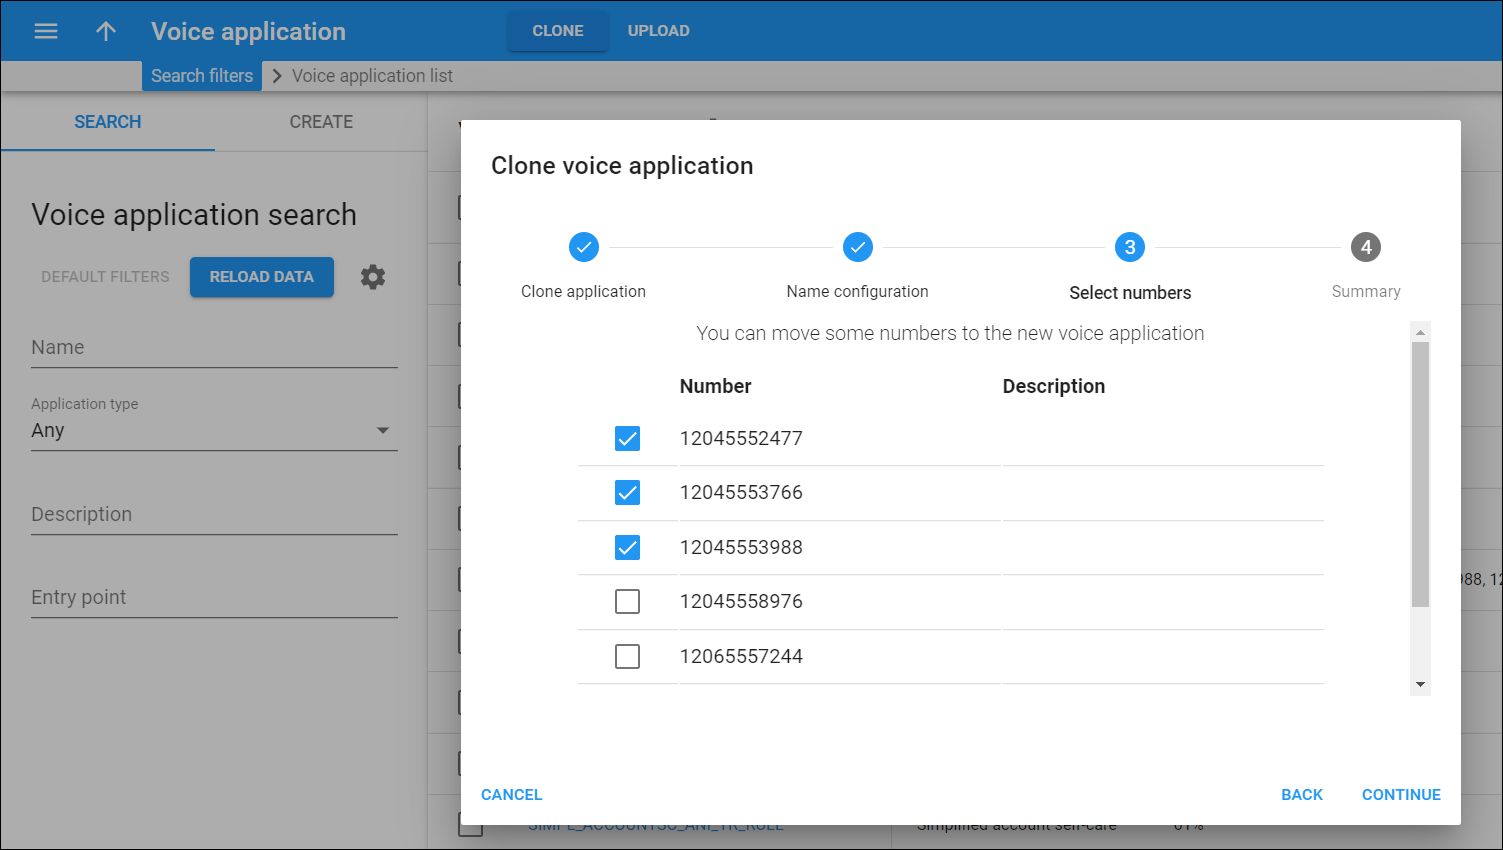
- Optionally, select checkboxes for numbers that you want to move from the original application to the new one. Skip this step if no numbers are specified for the original application. Click Continue.
- Click Finish to confirm.
The cloned voice application inherits the parameters of the original application and can be customized later.
Quickly upload numbers
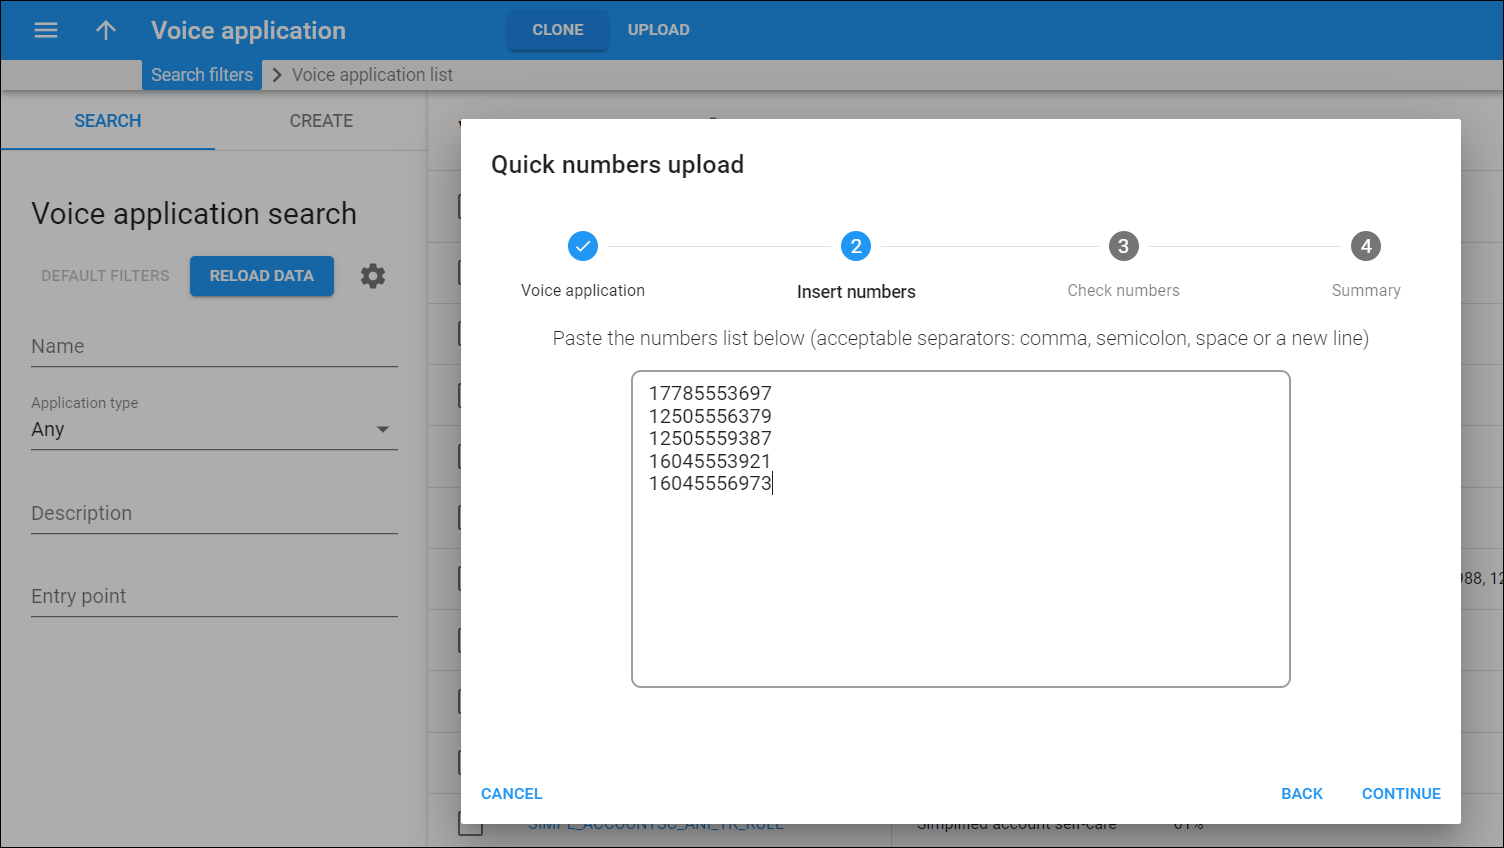
If you provide service with multiple numbers (e.g., prepaid card calling with toll-free number and local numbers in every state), type in or paste the list of numbers with Quick numbers upload:
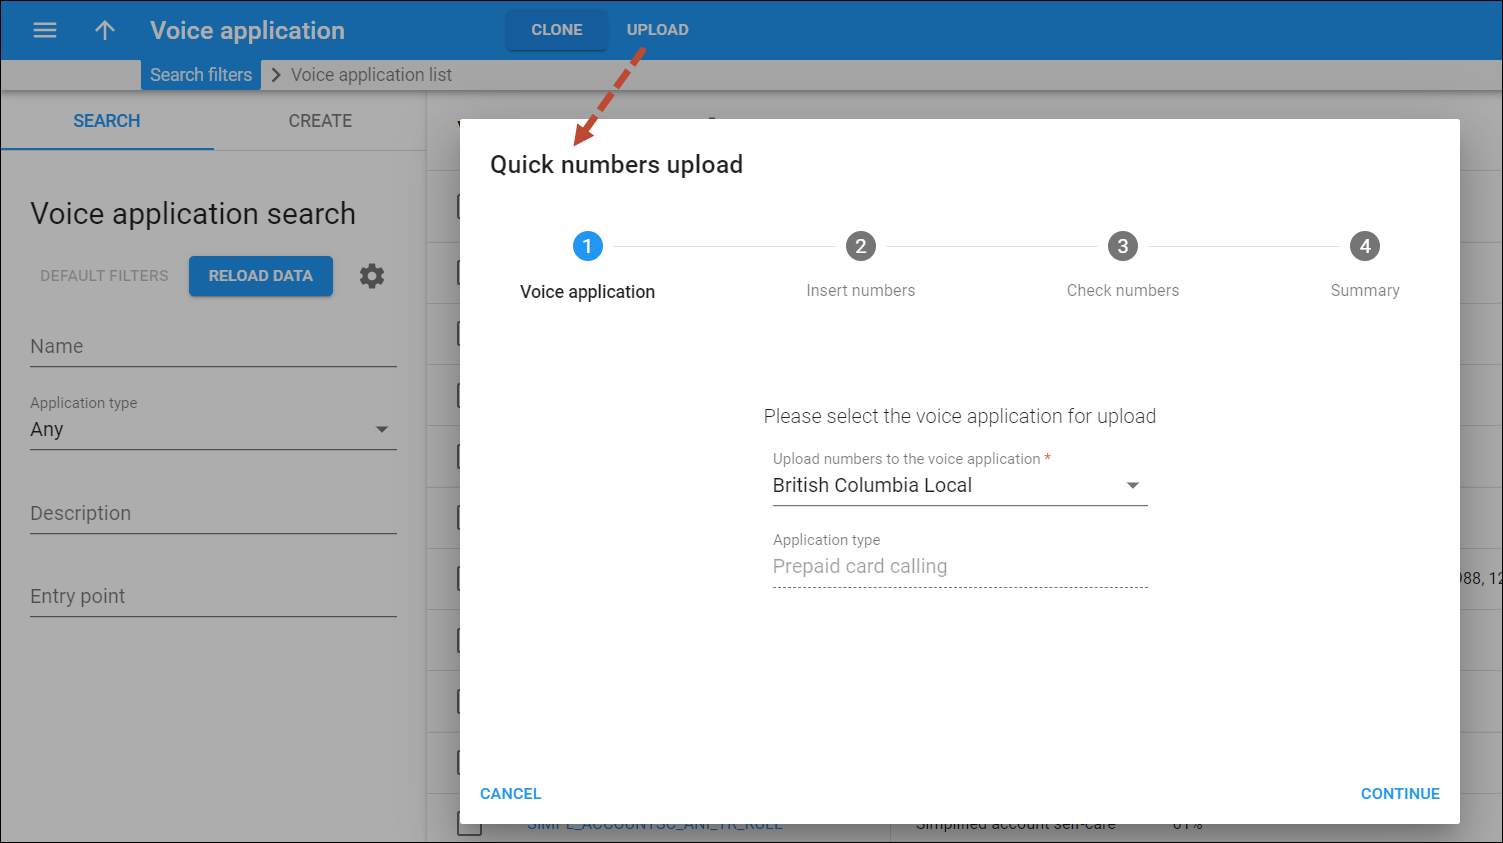
- Click Upload on the toolbar. The dialog box opens.
- In the dropdown list, select the application you want to upload numbers to. The Application type field is read-only. Click Continue.
- Paste the numbers list using either comma, semicolon, space, or a new line.
If you want to upload DID numbers they must be Frozen / Not in use and not assigned to any customer.
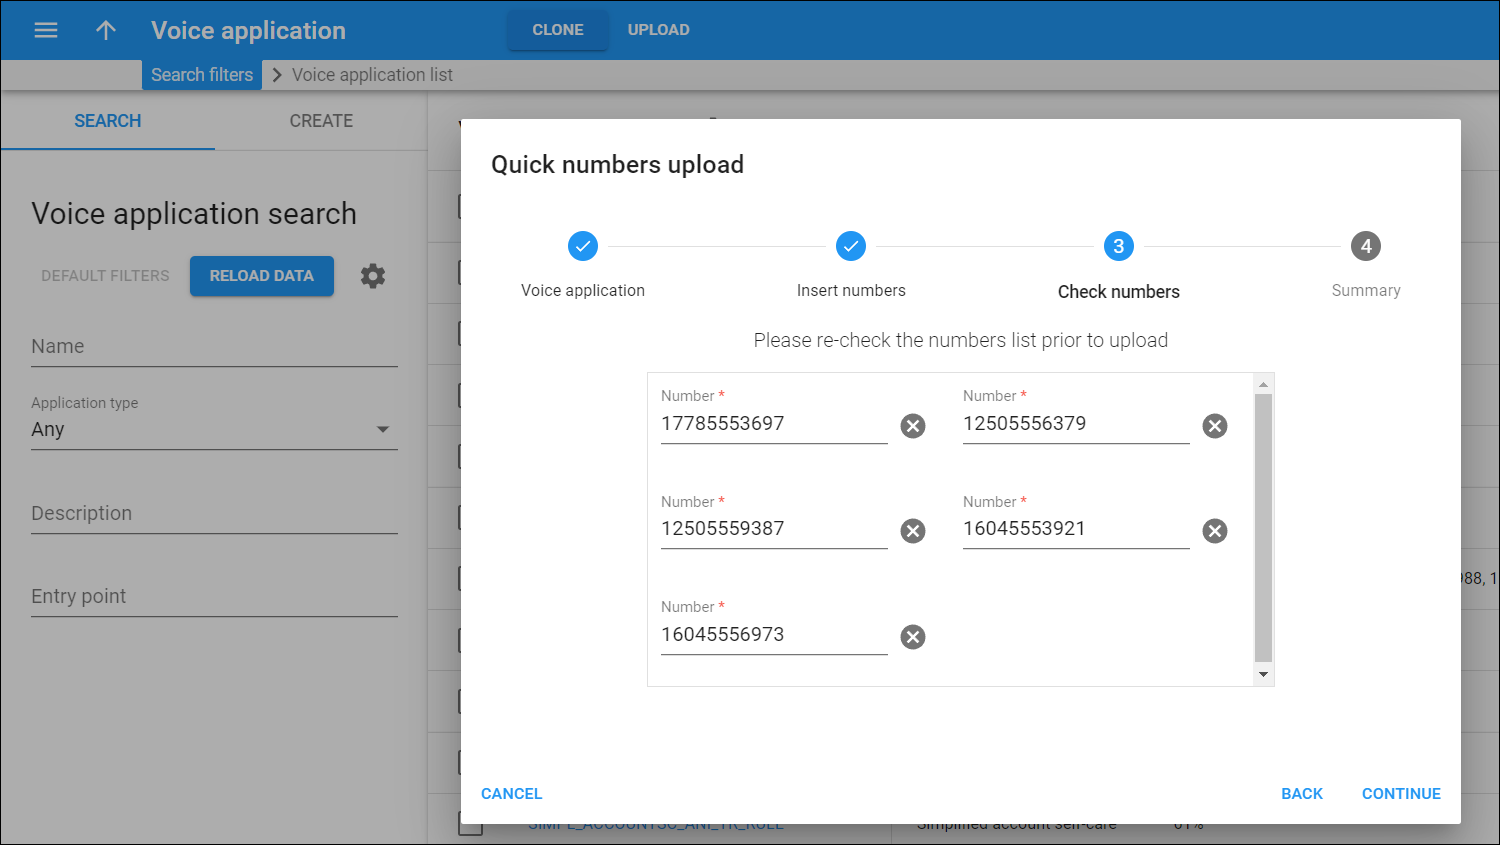
- Re-check the number list and click Continue. You can change numbers manually and remove a number by clicking Remove
.
- Click Finish to confirm.
To see the list of numbers that users will dial to access the voice application, open the Entry point panel.
Customize the panel
Change table settings – click Settings in the title bar to customize columns and change row style.
Re-order the columns – drag-and-drop the column headers right or left to place the columns in the order you want.
Re-order the rows – click the arrow (or
) next to the column header to re-sort the rows. For example, this panel displays voice applications in alphabetical order. You can re-sort them in the reverse order.
Change the default number of results globally – use the Number of results dropdown list in the upper right corner to adjust the maximum number of rows that appear on the panel. By default, the panel displays 25 rows. Once the number is changed, it’s automatically saved, so the same number of rows is shown for PortaBilling entities, e.g., customer, account, reseller, etc.


