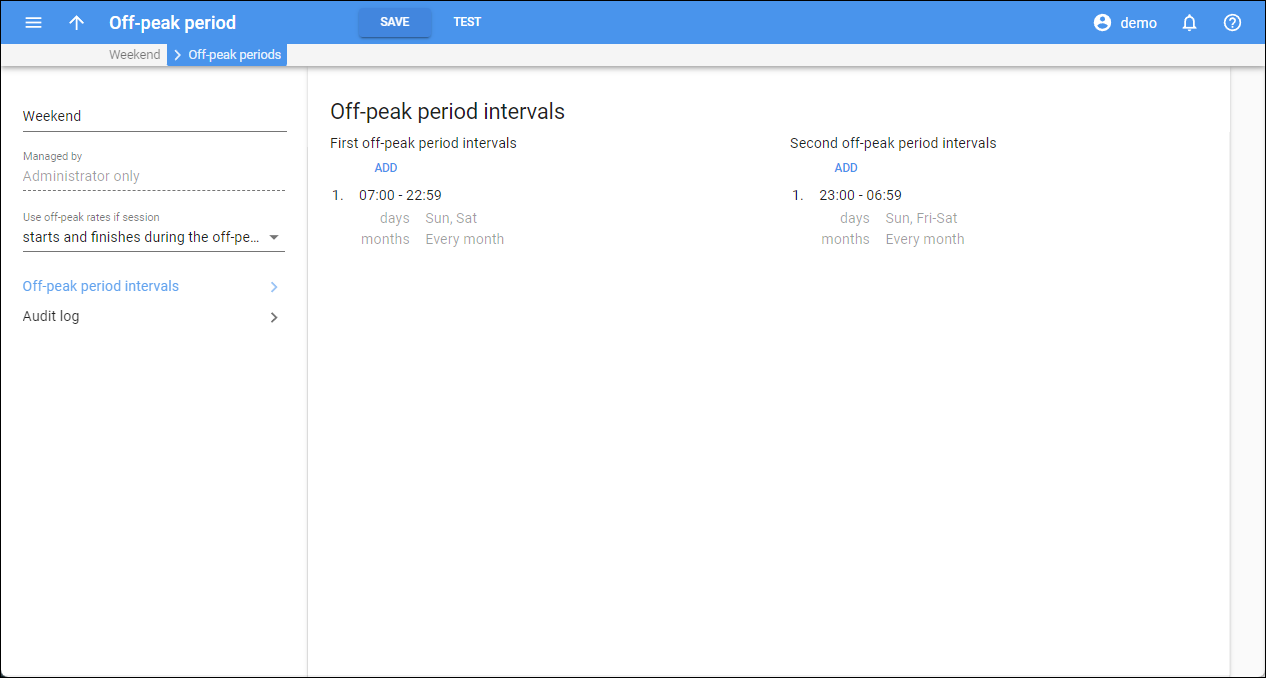
First off-peak period intervals
Here you can add, edit, or delete intervals for the first off-peak period.
Add off-peak period interval
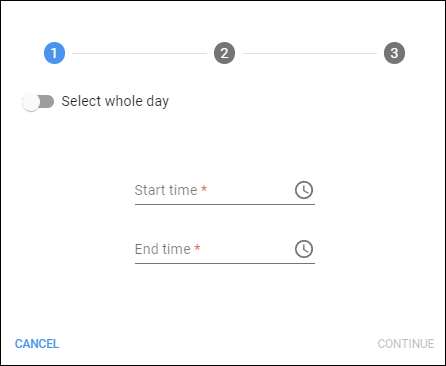
To add an interval for the off-peak period, click Add and specify the details in the dialog that opens:
- Time – define the time for the off-peak period interval:
- Start time – define the exact time when the interval starts.
- End time – define the exact time when the interval ends.
If you want the off-peak period interval to take the whole day, turn on the Select whole day toggle. Click Continue to proceed with the off-peak period configuration.
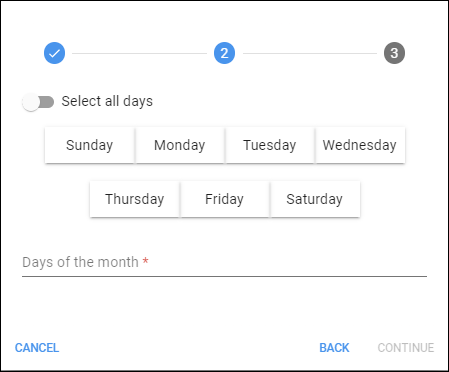
- Days – define the days of the week and/or of the month for the off-peak period interval:
- Days of the week – click on the specific days of the week to add them to the off-peak time interval.
- Days of the month – specify days of the month as comma-separated values, e.g., 1, 4, 5. To add a period, specify the values separated by dashes, e.g., 15-30.
If you want the off-peak interval to cover the whole month (all days), turn on the Select all days toggle.
- Months – click the names of the months you want to add to the off-peak interval. If you want the interval to cover all months of the year, turn on the Select all months toggle.
- Click Finish to save the off-peak period interval.
To delete an off-peak period interval, hover over the specific interval, and click Delete .
To change the off-peak period interval, hover over the specific interval, and click Edit
.
Second off-peak period intervals
You can add intervals for the second off-peak period, once at least one interval is added for the first off-peak period. To create a second off-peak period interval, click Add and perform the steps as described above.


