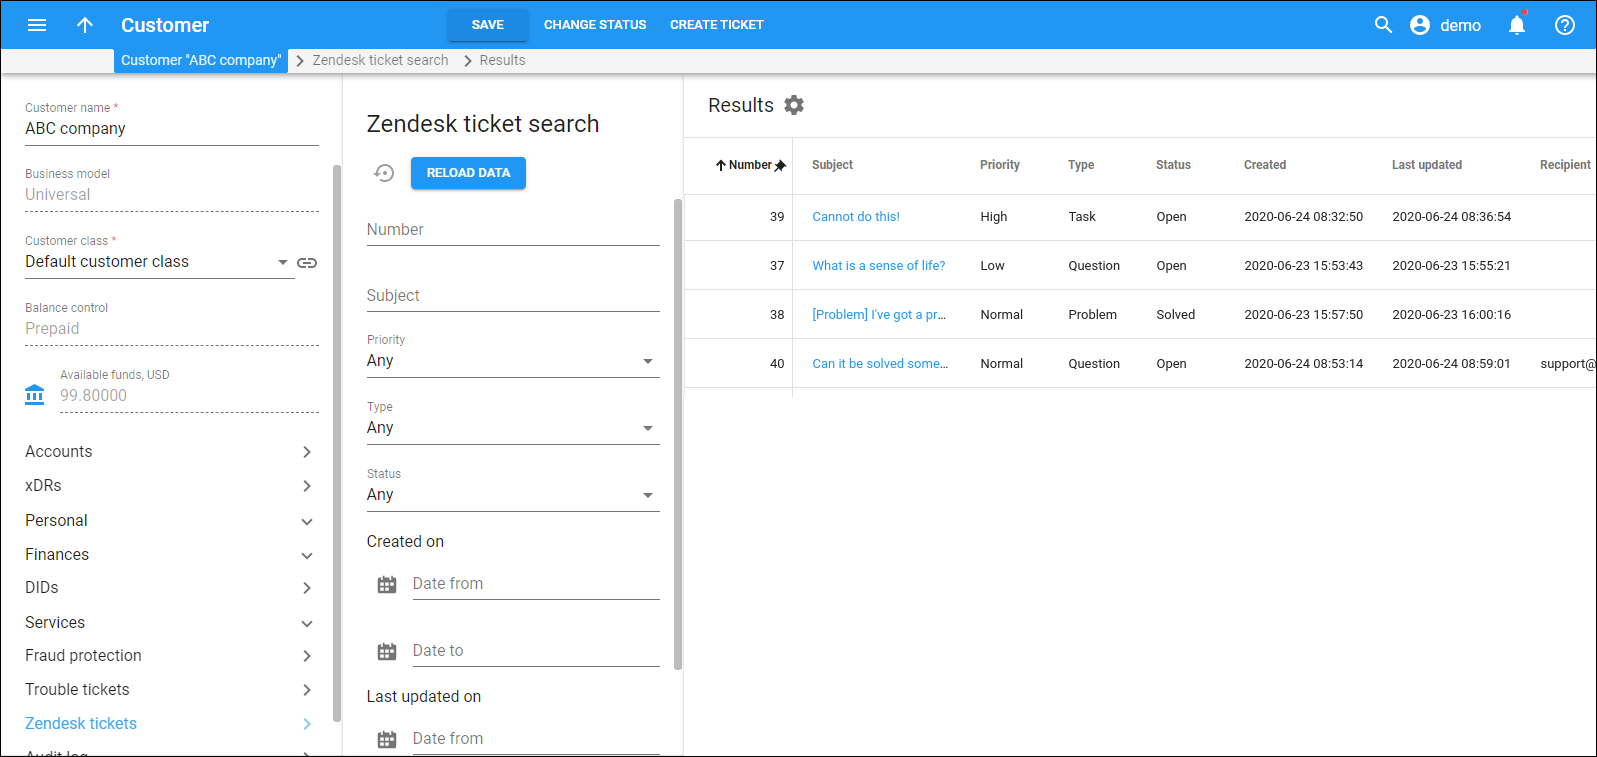
On this panel, you can monitor all the tickets that are submitted by the customer to the Zendesk ticketing system.
This panel is only available after the integration with Zendesk is configured.
Each Zendesk ticket in the list consists of:
Number
Link copied to clipboard
The ticket number.
Subject
Link copied to clipboard
The subject of the ticket.
Priority
Link copied to clipboard
The priority of the ticket, e.g., “Low”.
Type
Link copied to clipboard
The type of the ticket, e.g., “Question”.
Status
Link copied to clipboard
The status of the ticket, e.g., “New”.
Created on
Link copied to clipboard
The date when the ticket is created in Zendesk.
Last updated on
Link copied to clipboard
The date when the ticket was last updated in Zendesk.
Recipient
Link copied to clipboard
The original recipient's email address of the ticket.
Customize the panel
Link copied to clipboard
- Change table settings – click Settings
in the title bar to customize columns and change row style.
- Re-order the columns – drag-and-drop the column headers right or left to place the columns in the order you want.
- Re-order the rows – click Arrow
(or
) next to the column header to re-sort the rows. The list panel displays result in alphabetical order. You can re-sort them in the reverse order.
- Change the default number of results globally – use the Number of results dropdown list in the upper right corner to adjust the maximum number of rows that appear on the panel. By default, the panel displays 25 rows. Once the number is changed, it's automatically saved, so the same number of rows is shown for PortaBilling entities, e.g., customer, account, reseller, etc.


